
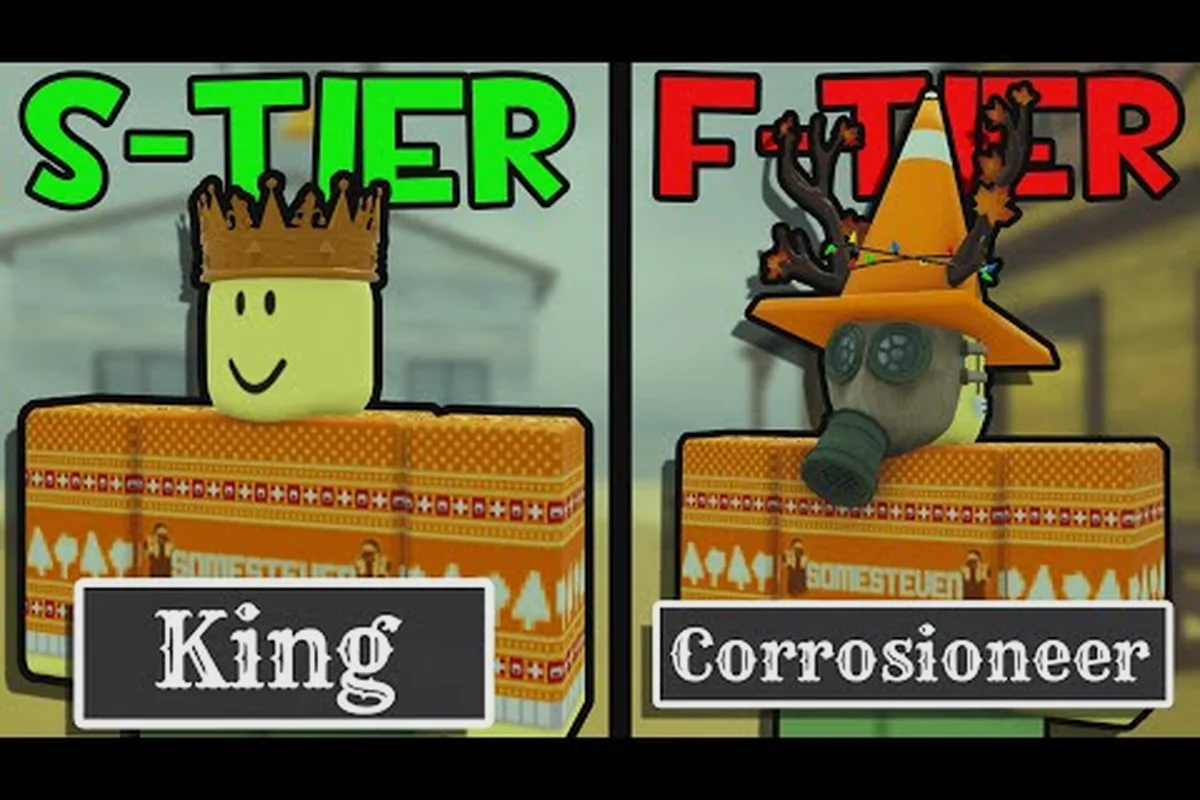
Choosing among the Dead Rails classes changes how a run handles combat, revives, resources, and boss damage. The right pick depends on your bond budget, team size, and whether you value solo control or flexible support: classes with strong weapon or task performance can carry a solo run, while Engineer, Medic, and other support-oriented roles become more valuable in larger crews, where revive uptime and resource sharing can make the difference between reaching a boss or being forced to restart.
Dead Rails Classes Overview: What Each Role Contributes
The Dead Rails classes are not simple damage labels. Each one alters a portion of the run, from the supplies you begin with to the abilities that can turn enemies into temporary allies. That makes a class comparison useful before you spend bonds or plan a difficult route.
Budget players can begin with Doctor, which starts with bandages and snake oil, or Miner, which supplies a mining helmet, coal, and a pickaxe. Community data reports both at 15 bonds, although prices can change after patches. Those inexpensive picks already solve early resource and recovery problems without requiring an event route.
| Play style | Strong starting class | Main benefit | Best fit |
|---|---|---|---|
| Low-cost recovery | Doctor | Bandages, snake oil, teammate revives | New players and cautious teams |
| Resource gathering | Miner | Coal, pickaxe, mining helmet | Runs focused on exploration and income |
| Fast melee pressure | Vampire | Greater speed and melee strength | Players who move aggressively |
| Enemy control | Necromancer | Converts defeated enemies into allies | Teams comfortable with risky positioning |
| Ranged reliability | Cowboy | Adaptable firearm-oriented role | General-purpose runs and mixed groups |
| Mounted utility | Horse | Rideable movement and traversal | Long routes and exploration-heavy teams |
This overview of Dead Rails classes is only a starting point. A class that looks weak during the opening route can become excellent after its ability tree develops, while an event unlock may be stronger than its bond price suggests.
Understanding Cost, Abilities, and Team Value
Class cost is only one layer of the decision. A cheap class has a faster payback if its tools prevent deaths or produce reliable income, while an expensive class can feel wasteful if its ability depends on a narrow fight type. The same class also changes value in a group: one player handling revives can free the others to focus entirely on output.
A practical Dead Rails class tier list should therefore measure four things: the price required to unlock or purchase a class, the practical reach of its active and passive abilities, and the value it adds to a team’s revive, combat, and income roles. A low-cost class earns a higher tier if its tools prevent frequent deaths and maintain a steady resource loop, while a costly class needs broad, reliable utility. In co-op, the same class can lose value when teammates already cover its support functions, making solo strength and group contribution separate ranking criteria.
-
Early usefulness: Can the class contribute before the route becomes dangerous?
-
Failure recovery: Does it restore a teammate, escape combat, or provide another way to continue?
-
Damage consistency: Can it defeat enemies without requiring a perfectly timed combo?
-
Scaling: Does its ability become stronger through class mastery or later upgrades?
The most important point is that rank depends on context. Doctor may be an S-tier solo choice because its healing tools compensate for having no second player, but it can be only a B-tier selection in a co-op group with another dedicated support class. Vampire may climb rapidly with a good mastery route, yet sunlight adds a risk that Doctor simply avoids.
Dead Rails Class Tier List: Budget and Unlock Picks
This Dead Rails class tier list groups classes by practical value rather than claiming that one option wins every situation. The ranking weighs solo survivability, crowd-control potential, resource gathering, route flexibility, and unlock difficulty: for example, Doctor is strong when repeated fights require healing, while Miner offers stronger gathering value if you can avoid close-range danger. Community-reported costs and mechanics can shift after updates, so verify them against the current game version before committing bonds.
| Tier | Classes | Why they rank here | Main drawback |
|---|---|---|---|
| S | Doctor, Vampire, Necromancer | Healing, strong melee, or scalable enemy control | Doctor favors cautious play; Vampire has a sunlight weakness; Necromancer needs positioning |
| A | Cowboy, Miner, Horse | Reliable combat, useful gathering, or strong traversal | Less dramatic ability ceiling than the top group |
| B | Werewolf | Durable close-range bruiser with high health | Heavy commitment to melee |
| Event tier | Alien, Krampus, Santa, Elf | Distinct event-driven tools and seasonal appeal | Availability or unlock conditions can limit them |
| Situational | Remaining class roster | Useful when a specific enemy, route, or objective dominates | May overlap with stronger universal choices |
These tiers describe the Dead Rails classes ranked by immediate usefulness and scaling potential, but each band also reflects a different role in a solo run. Doctor becomes especially valuable when repeated fights drain health, Miner gains value through resource gathering when you can keep distance from close-range enemies, and Horse improves route flexibility through faster traversal. A tier can move after a patch, so treat the ranking as a planning tool rather than a permanent rule, and re-check class costs, abilities, and unlock conditions before committing bonds.
The Best Budget Selections
Doctor is the safest recommendation for a player who wants survival value without committing to a difficult event. The class begins with bandages and snake oil, while its revival ability can restore a teammate by spending half of the donor’s own health. That sacrifice creates a meaningful emergency tool instead of an effortless full heal.
Miner is the better economic choice when a route includes enough mining opportunities. The starting mining helmet, coal, and pickaxe improve the early game without making every encounter dramatically harder. If your goal is to accumulate bonds steadily, the extra resources can repay the class cost before a boss encounter.
| Budget question | Doctor | Miner |
|---|---|---|
| Starting supplies | Bandages and snake oil | Mining helmet, coal, and pickaxe |
| Primary value | Recovery and revives | Resource production |
| Solo safety | Excellent | Good |
| Damage support | Limited | Limited |
| Best early goal | Keep the run alive | Increase income |
Both appear in community reports as 15-bond choices, but the exact price may vary by version. A good dead rails best class for solo decision therefore starts with the run’s biggest weakness: choose Doctor when deaths are likely, or Miner when income feels too slow.
Event Unlocks Worth Planning Around
Alien stands apart because its unlock involves a lever puzzle, and its identity includes ray weapons and a buff that community reports say received tuning in 2026. The puzzle itself can be more demanding than an ordinary purchase, so players should treat the unlock as a skill check rather than a guaranteed improvement.
Werewolf offers a contrasting package: high health and close-range power. It is a durable bruiser, but positioning matters because ranged enemies can exploit a player who cannot create distance. That makes it a stronger specialist for aggressive teams than for a cautious solo route.
Horse, Krampus, Santa, and Elf are also reported as event or unlock classes, with community footage of the Frost Bite holiday event listing Krampus, Santa, and Elf as that mode's seasonal picks. Their exact conditions can change between seasons and patches, so community guides should not be treated as a permanent codex. The Dead Rails classes gameplay video can help you review the presentation of these choices before making a run.
Dead Rails Best Class Picks by Play Style
The dead rails best class is not a single universal answer. Doctor wins when prevention and recovery matter most, while Vampire can dominate a route when its speed lets you strike first and avoid sunlight. Necromancer is especially appealing when defeated enemies can be redirected into productive combat.
Strongest Solo Generalist
Doctor remains the most forgiving dead rails best class for solo candidate because it compensates for the absence of a second crew member. Bandages help during ordinary encounters, and the revive ability can turn a disastrous fight into a survivable mistake. Its weakness is that a support role may feel slow when the goal is to race through enemies as quickly as possible.
For solo players, compare each class by how it handles the two pressures of a Dead Rails run: staying alive without crew support and converting limited resources into progress. A Miner can stock up on bonds when a route offers safe mining opportunities, while a Vampire can recover health through melee attacks if you can close distance safely. Necromancer can provide extra bodies with summoned enemies, but those summons also compete for space and attention. Check weapon range, reload speed, and melee damage before committing, since the best class for solo play is often the one that matches your route and equipment rather than a single class ranking.
-
Choose Doctor when enemies outnumber your available ammunition.
-
Choose Miner when the route permits repeated gathering and you need more bonds.
-
Choose Vampire when confident melee movement and aggressive target selection are strong skills.
-
Choose Necromancer when the group is willing to create space for summoned enemies.
Solo strength also depends on your equipment. The Dead Rails weapons comparison can show how a class’s damage profile changes when your gun or melee weapon does not fit its intended role. For example, a ranged build with weak reload speed can lose its advantage against fast enemies, while a melee-focused class needs enough damage and reach to secure a hit before its target closes the gap. Weapon handling, range, and reload timing therefore determine how effectively Doctor, Miner, Vampire, or Necromancer converts its class ability into a solo-safe run.
Best Co-op Support
In a larger crew, Doctor can still be excellent, especially if another player handles the fighting. The class’s value comes from extending the team’s effective lifespan rather than multiplying damage. If someone is knocked down during a difficult boss, even a costly revive can be worth more than another damage dealer.
Horse is another flexible team choice because movement helps the crew reach resources, flank enemies, and escape unfavorable fights. Its value rises when the route is long and the team can coordinate around a mount. Players searching through the dead rails all classes should look for a combination that complements the other roles rather than selecting four fighters with nearly identical skills.
| Team composition | Best-supported class | Reason |
|---|---|---|
| One fighter, three supports | Doctor | Keeps the damage dealer in the fight longer |
| Two melee specialists | Horse | Supplies mobility and a different approach |
| Boss-focused squad | Cowboy | Offers adaptable ranged pressure |
| Aggressive small crew | Vampire | Rewards quick melee engagement |
Melee, Ranged, and Control Specialists
Vampire moves faster and hits harder in melee, giving the class a strong identity in close fights. Direct sunlight is the important countercondition, so a Vampire should treat daylight as a travel constraint rather than a minor debuff. Routes that offer shade or let the class reach combat at the right time are much more valuable.
Necromancer revives defeated enemies to fight for the crew. This ability can provide control and additional damage, while mastery routes may transform raised enemies into repeatable bond-farming opportunities. The risk is that summons need attention and space, making positioning more important than raw damage.
Cowboy is the steadier ranged option. Its mastery replaces High Noon with Dead Eye, according to community field notes. That change shifts the class toward deliberate ranged execution rather than simply choosing the strongest gun. The dead rails class mastery guide can help you understand the broader upgrade structure before committing to a particular branch.
Comparing the Dead Rails Classes Ranked by Risk
A useful ranking accounts for both upside and failure states. Dead Rails classes ranked by pure power may overvalue a class with a restrictive condition, while a ranking based only on safety can overlook excellent farming potential. The table below separates classes by the type of risk they ask you to accept.
| Class | Main advantage | Risk accepted | Ideal route condition |
|---|---|---|---|
| Doctor | Healing and revives | Lower offensive pressure | Difficult fights and limited resources |
| Miner | Reliable early supplies | Less direct combat power | Resource-rich exploration |
| Vampire | Fast, strong melee | Sunlight vulnerability | Shaded or aggressive routes |
| Necromancer | Extra allies and farming loops | Positioning and upkeep | Open battle space |
| Cowboy | Adaptable ranged damage | Requires effective weapon timing | General or boss-heavy runs |
| Werewolf | High health and melee pressure | Vulnerable to ranged pressure | Close-range engagements |
| Horse | Fast traversal | Ability tied to mounted use | Long routes and exploration |
| Alien | Distinct weapon identity | Puzzle-based access | Players who enjoy the unlock challenge |
Risk does not mean weakness. A Vampire under a controlled route can outperform a safer class, and a Miner with enough resources can create a larger lead than any damage build. The key is matching the class to the challenge rather than selecting from reputation alone.
Budget, Power, and Ease Compared
Use three filters when narrowing your options: bond efficiency, ability strength, and ease of use. Doctor tends to lead in ease because its recovery tools and forgiving utility reduce downtime, Miner offers strong resource value through early-income supplies, while Vampire and Necromancer excel in raw ability power. For example, a solo route may favor Doctor’s survivability, whereas a player confident in exploiting enemy conversion can gain more value from Necromancer’s power rather than simply choosing the highest-ranked class.
| Filter | Leading pick | Why it leads | Alternative |
|---|---|---|---|
| Bond efficiency | Miner | Supplies can improve early income | Doctor |
| Ability power | Necromancer | Enemy conversion creates extra value | Vampire |
| Ease for beginners | Doctor | Clear recovery tools and forgiving utility | Cowboy |
| Exploration | Horse | Mobility supports long routes | Miner |
| Boss potential | Cowboy | Precise ranged damage remains valuable | Werewolf |
This comparison also explains why the dead rails class tier list should be treated as contextual. A class that ranks lower for beginners can become excellent when its mastery path is developed. Class mastery adds ability trees to classes including Cowboy, Doctor, Miner, Vampire, Horse, and Necromancer, giving long-term players more than one reason to keep a favorite.
Class Mastery, Builds, and Run Planning
Selecting a class is only the first layer of planning. The route, starting equipment, event objectives, and team composition can alter the final build. For the dead rails classes to reach their full potential, you need to think about what the class contributes at three stages: the opening route, the first major fight, and the late-run boss.
Match the Starting Kit to the Class
Doctor begins with bandages and snake oil, so a build that repeatedly wastes these healing resources is missing the class’s main advantage. Preserve them for emergency moments and avoid spending every bandage on a minor scrape. The revive ability also has a clear cost: it consumes half of the donor’s health, so use it when keeping the teammate in the fight outweighs your personal safety.
Miner’s starting kit serves a different purpose. Coal, the pickaxe, and the mining helmet support repeated resource gathering, so route planning should account for the number of mining opportunities available. If the journey offers few nodes, the opportunity cost of choosing Miner rises even when the initial purchase price is attractive.
| Class | Starting kit | First action | Common mistake |
|---|---|---|---|
| Doctor | Bandages and snake oil | Save healing for high-risk fights | Wasting supplies on weak enemies |
| Miner | Helmet, coal, and pickaxe | Gather before the route gets crowded | Forcing a mining build on a poor route |
| Vampire | Class ability and melee focus | Test safe combat zones | Ignoring sunlight exposure |
| Necromancer | Class ability and control tools | Test enemy conversion | Summoning without space |
| Horse | Rideable movement | Plan mounted routes | Ignoring how crew positioning changes |
This early kit matters because Dead Rails class mastery cannot repair a weak opening. A player who arrives at the first serious encounter with no healing, no income, and no useful ability has already paid for a class without receiving its payoff.
Build a Practical Progression Plan
A reliable progression plan follows four steps. First, choose the class for the route’s main risk. Second, collect enough bonds to cover the class cost and a basic weapon. Third, preserve the class’s signature resources rather than spending them immediately. Fourth, add mastery or equipment that strengthens the main ability.
For Vampire, that could mean improving survival until the melee advantage becomes reliable. For Necromancer, it could mean learning when to convert enemies instead of merely finishing them. For Doctor, it could mean finding a balance between personal health and revive value. A suitable weapon can dramatically change these priorities, which is why the Dead Rails weapons guide is useful when refining a final setup.
Account for Team Synergy
Team synergy can outweigh the class tier assigned in a general ranking. Two damage-heavy classes may struggle against a boss that needs sustained protection, while a balanced crew can handle threats that overwhelm specialists. In co-op, the most valuable ability is often the one that lets another player act without fear.
| Team need | Class to prioritize | Class to reconsider first |
|---|---|---|
| Healing and revival | Doctor | A second fragile support |
| Enemy pressure | Vampire or Werewolf | Redundant ranged dealers |
| Battle control | Necromancer | A class with no defensive utility |
| Long-distance travel | Horse | Slow low-mobility picks |
| Resource generation | Miner | Players without enough combat coverage |
Treat dead rails best class recommendations as conditional rather than fixed rankings, because every class assumes sensible spending and at least one developed weapon. A class can look weak when its rail car is poorly equipped, but an average pick can become excellent when its tool matches the encounter—for example, a Miner with a developed weapon can provide strong resource generation, while a Doctor becomes far more valuable when the team needs reliable healing and revival.
Choosing a Class for Your Next Dead Rails Run
Start with the largest problem in your recent runs. If you die because damage arrives too quickly, favor Doctor or a mobile melee class. If you lose because income stalls, Miner can address the underlying issue. If you enjoy manipulating enemies and have room to fight, Necromancer offers unusually high upside.
Before locking your selection, compare three things: the bond cost, the class’s starting resources, and the ability you can actually use. The dead rails all classes roster contains event and seasonal options, but their unlock costs may change, so confirm current availability before planning a run. Community reports should be treated as useful field notes rather than permanent patch-accurate documentation.
The most balanced conclusion is that Dead Rails classes succeed through context. Doctor is the safest solo foundation, Miner is the clearest economic specialist, Vampire rewards aggressive play, Necromancer rewards tactical spacing, and Cowboy remains a dependable ranged option. Choosing the role that solves your recurring problem will produce better results than copying a universal ranking.
Frequently Asked Questions
What is the best class in Dead Rails for a new player?
Doctor is generally the easiest recommendation because bandages, snake oil, and a teammate revival ability reduce the impact of mistakes. Its value is especially high for solo runs, where nobody else can restore you after a failed encounter. Confirm current bond costs and ability values before starting, since patches can alter class details.
Which class is strongest for solo runs?
Doctor is the most forgiving solo choice, while Miner can be stronger when the route offers many resources. Vampire may perform better in fast or shaded combat, and Necromancer can dominate when enemies are easy to convert. The best option depends on whether your main weakness is combat survival, income, positioning, or raw damage.
Is Doctor better than Necromancer in co-op?
Usually, yes when the team already has reliable damage dealers because Doctor extends the crew’s survival while Necromancer adds offensive control. A specialist team may prefer Necromancer if it can turn enemies into repeatable farming allies. The decisive factor is whether your crew lacks healing or lacks extra pressure.
How do class mastery choices affect rankings?
Mastery can raise a class above its starting-tier reputation by improving the central ability and adding a more effective build path. Community field notes identify the Vampire and Necromancer trees among the strongest investments, while Cowboy mastery can replace High Noon with Dead Eye. Current trees should be checked because balance changes can alter that ranking.
Are event classes stronger than bond classes?
Not necessarily. Alien, Werewolf, Horse, Krampus, Santa, and Elf may offer distinctive abilities, but their unlock requirements, availability, and opportunity costs can make them less convenient. A budget class with reliable early value can outperform a difficult unlock when its tools match the route. Compare practical contribution rather than rarity alone.