
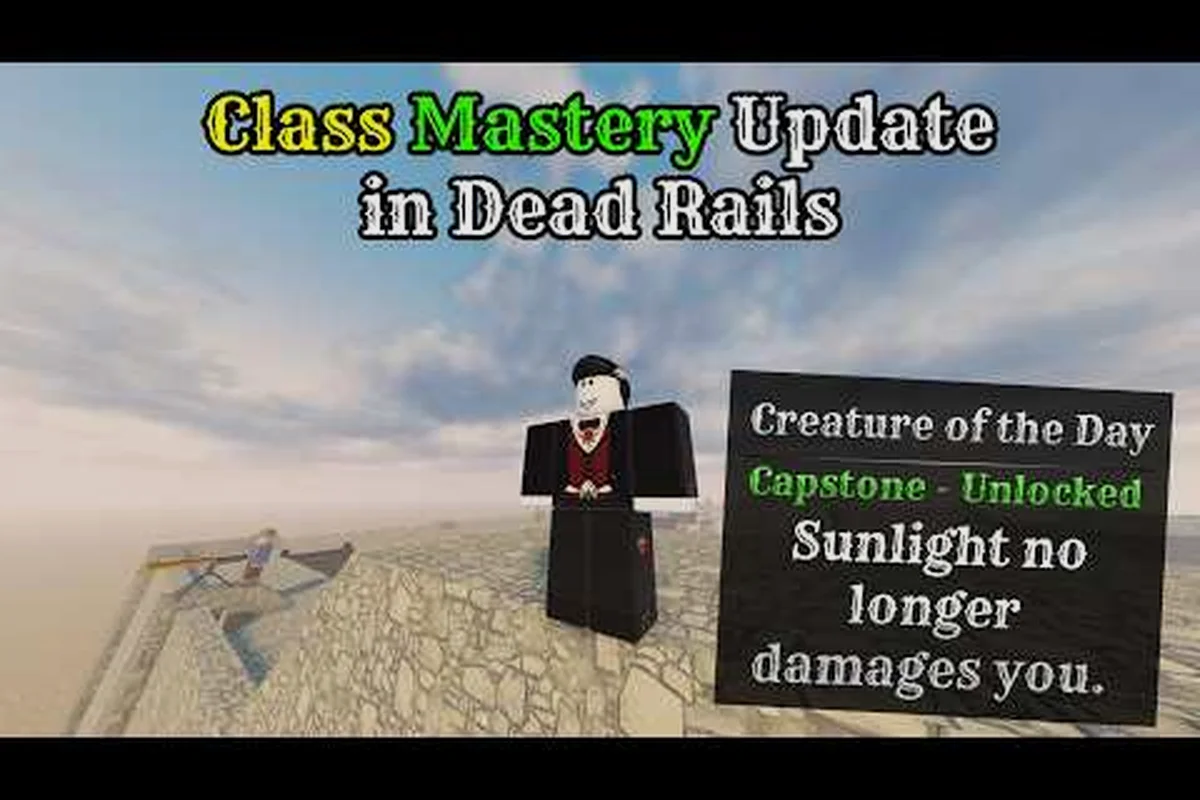
Dead rails class mastery matters because your starting role determines which tools, abilities, and team roles you can develop. This guide explains how to choose, unlock, and strengthen classes such as the Doctor, Cowboy, Miner, and other specialists without wasting bonds or overlooking survival.
Dead Rails Class Mastery Guide: Build Around a Clear Role
A strong class choice in Dead Rails is not simply the character with the highest damage. It is the role that solves a problem your crew will actually face: reviving a fallen teammate, gathering resources, surviving daylight, controlling space, or providing ranged pressure. The class mastery guide approach starts by identifying the job your team lacks, then chooses a class whose normal abilities reinforce that job.
The game includes a broad Dead Rails class list, with regular classes, event unlocks, and seasonal roles appearing over time. Community reports describe more than 30 classes, although availability and balance can change after patches. A useful reference for the roster is this Dead Rails class mastery guide gameplay video, which can help identify unfamiliar roles while you learn the underlying class structure.
| Class archetype | Main contribution | Best crew situation | Early mastery focus |
|---|---|---|---|
| Doctor | Recovery and team support | Co-op groups that lose players quickly | Revive timing and health management |
| Cowboy | Ranged combat and flexible damage | General-purpose crews | Ammo control and weapon timing |
| Miner | Resource gathering and equipment access | Teams that need bonds and materials | Tool efficiency and collection routes |
| Werewolf | Durable melee pressure | Front-line groups | Health management and close-range positioning |
| Vampire | Fast, hard-hitting melee with a daylight weakness | Night-oriented or mobile teams | Movement and exposure planning |
| Necromancer | Converts defeated enemies into temporary allies | Groups comfortable with controlled risk | Summon duration and crowd routing |
The key distinction is that starting equipment and permanent unlock status do not equal permanent run equipment. A class may remain unlocked in the lobby, while bonds spent on weapons and armor disappear when a run ends. Treat each new journey as a fresh build rather than assuming purchased gear carries over.
Unlocking Classes and Choosing the First Permanent Upgrade
Learning how classes become available prevents you from buying a role with little practical value or missing a limited-time opportunity. The general process is straightforward: enter the class selection interface, review the available roles, inspect their starting tools, and spend bonds on a permanent unlock when the right choice appears. Event and seasonal classes may require completing their own activity, so check the task panel before attempting to buy them normally.
| Unlock source | Examples reported by players | Verification before spending |
|---|---|---|
| Standard bond purchase | Doctor, Miner, Cowboy | Confirm the displayed cost and current ability |
| Class-specific activity | Alien through its lever puzzle | Finish the current objective, then inspect the reward |
| Event progression | Horse through Horsing Around | Check whether the event is active |
| Seasonal release | Krampus, Santa, Elf (Frost Bite holiday event) | Confirm that the current event permits the unlock |
| Special condition | Werewolf and other limited roles | Verify the current trigger before saving |
The Doctor and Miner are commonly cited as accessible early picks, with community data placing both around 15 bonds at the time of the reference. Because prices and descriptions can change, treat that figure as a comparison point rather than a guaranteed current cost. Always read the number displayed beside the class before confirming the purchase.
Your first unlock should solve a clear crew need. A Doctor is valuable because the character starts with bandages and snake oil and can revive a teammate by spending half of the teammate’s own health. A Miner provides a mining helmet, coal, and a pickaxe, making that role easier to build around resource gathering. A Cowboy fits more conventional ranged-combat compositions and can serve as a dependable early damage option.
When comparing the broader options, the Dead Rails class overview provides a useful second look at role combinations. Before buying anything, ask whether the role is already covered, whether the team can use its equipment effectively, and whether a more flexible class would make better use of future bonds.
A Reliable Unlock Checklist
Start by entering the class menu with enough bonds available for a deliberate purchase, rather than spending immediately on the first attractive portrait. Compare the displayed starting items, passive ability, and practical use of the class in your normal crew size.
-
Read the current class cost displayed in the interface.
-
Check the starting equipment for immediate combat or utility value.
-
Compare the passive ability with the roles already in your lobby.
-
Investigate event requirements for limited classes.
-
Unlock only when the role fills a gap that your team cannot cover.
-
Test the class in a short run before investing in mastery upgrades.
This process also prevents a common mistake: saving for a flashy event role while having no reliable way to recover from a failed encounter. Permanent class unlocks broaden your options, but a practical class often produces more successful runs before a rare unlock becomes available.
Doctor and Cowboy Mastery: Support and Damage Compared
The Doctor and Cowboy represent two dependable approaches to crew survival, but their value comes from different decisions. Doctor mastery is about preserving a run after someone falls; Cowboy mastery is about creating safe opportunities through ranged damage and positioning. In small co-op groups, a reliable combination of both can outperform two damage dealers.
| Mastery consideration | Doctor | Cowboy |
|---|---|---|
| Primary strength | Healing, revival, and sustain | Ranged damage and flexible positioning |
| Starting advantage | Bandages, snake oil, and teammate revival | A ranged weapon suited to distance |
| Best moment to shine | After a costly mistake or close encounter | Before pressure becomes overwhelming |
| Main risk | Spending too much health on recovery | Wasting ammunition or fighting at close range |
| Ideal teammate | Aggressive front-line fighter | Doctor or durable tank |
| Mastery test | Revive safely while managing personal health | Maintain output without exhausting resources |
Doctor mastery is less about repeatedly pressing the healing button and more about preserving the correct balance of health. A teammate can be revived by spending half of their own health, which makes the revive decision a meaningful calculation rather than a free reset. If the player has only a narrow margin above a dangerous threshold, spending too much can turn one emergency into a second emergency.
Build around that limitation by carrying supplies early, avoiding isolated encounters, and using the class when the team has a safe recovery window. Community field notes recommend a dedicated Doctor for co-op crews because a second experienced player can cover offense while the Doctor protects the run. Solo players should favor self-sustain and escape tools instead, since there is no teammate available to revive them.
Cowboy mastery takes a different route. The Cowboy class is attractive because ranged pressure can reduce the number of dangerous close-range engagements, but ammunition, reload timing, and weapon selection determine whether that advantage remains. A Cowboy who stays at maximum range may feel safe while missing short windows, whereas a Cowboy who understands the weapon’s effective distance can create valuable spacing for the whole crew.
A practical Cowboy routine is to identify the safest firing lane, watch the enemy’s approach pattern, and attack before it closes the gap. Do not spend every round on the first target if a different enemy is about to reach an ally. Preserve enough ammunition to deal with a second threat, and use cover to create separation without becoming trapped against the train or terrain.
| Build test | What to watch | Mastery result |
|---|---|---|
| Early encounter | Whether ranged damage prevents a teammate from taking a hit | More damage is converted into safety |
| Retreat scenario | Whether you can fire while moving toward cover | The Cowboy keeps useful damage during disengagement |
| Resource test | Whether ammunition remains after a difficult wave | The class avoids empty, low-value fights |
| Team test | Whether your fire pattern protects the Doctor or Miner | Ranged damage supports the crew’s specialty |
These two classes also pair well because their mastery curves solve different problems. A Cowboy creates space, while the Doctor converts a late mistake into a recoverable situation. A broader Dead Rails items reference can help evaluate which tools are worth buying, but the best item is the one that strengthens the role instead of turning it into a generic fighter.
Class Ability Priorities by Crew Size and Objective
The best mastery path depends on whether you play alone, in a small group, or with a full crew. Solo players need enough recovery and mobility to handle mistakes, while larger crews can afford more specialization as long as the class fills a missing role. The objective matters too, since gathering, boss fights, and long train runs create different demands.
| Player situation | Priority class qualities | Good choices | Avoid relying on |
|---|---|---|---|
| Solo run | Self-sustain, escape utility, reliable damage | Doctor, Cowboy, or a mobile specialist | A revive plan that requires another player |
| Two-person crew | One support role and one damage role | Doctor plus Cowboy | Two classes with nearly identical utility |
| Small co-op group | Specialized skills with clear communication | Doctor, Miner, Werewolf, or ranged class | Overlapping item roles |
| Full crew | Niche advantages and team coverage | Any role with a distinct contribution | A class selected only for appearance |
| Resource objective | Gathering efficiency and bond income | Miner or a flexible damage dealer | Carrying expensive gear you will not use |
| Boss or survival challenge | Burst damage, sustain, and crowd control | Cowboy, Doctor, Werewolf, or Necromancer | A role with no answer to close-range pressure |
These priorities turn the Dead Rails class list into a decision-making system. A class becomes strong when its weaknesses are covered by teammates. A Cowboy may lack the close-range pressure needed in a crowded fight, but that is less concerning when a Werewolf holds the front. A Miner may not be the fastest damage dealer, but excellent gathering can fund better equipment for the entire crew.
Environmental and event effects also alter the value of a class. The Alien combines a lever puzzle with ray weapons, according to community field notes, making it more than a conventional damage choice. The Werewolf functions as a high-health melee bruiser, whereas the Vampire moves faster and hits harder but has a direct weakness to sunlight. Necromancer turns defeated enemies into temporary fighters, which can be effective for repeatable crowd pressure.
Do not copy a community route blindly because the same class mastery can shift after a balance patch. A strategy that worked against an older enemy roster may be less effective now, especially for roles with movement or survival limitations. Test the strongest community recommendations in a controlled run, then adjust them for current encounters and your crew’s composition.
Using Classes Without Overspending
Mastery should improve decision-making, not merely increase the number of abilities owned. Start with the role’s core tool, buy only when a weakness becomes obvious, and preserve bonds for situations where the purchase changes the run’s outcome. The class unlock progression guide can help organize the next permanent purchase, including limited roles that are otherwise easy to miss.
-
Buy utility early if it prevents repeated damage.
-
Delay premium weapons until the class’s normal tool proves inadequate.
-
Choose team coverage over a small personal advantage.
-
Keep one emergency option available for solo play.
-
Reassess after updates because seasonal roles can expire.
These habits preserve resources without making every run overly cautious. Sometimes the correct move is to enter with a strong class, gather efficiently, and use one well-chosen upgrade rather than spending bonds across unrelated categories.
Cowboy Mastery Tactics for High-Damage, Low-Risk Runs
A reliable Cowboy build depends on repeatable positioning, not one spectacular shot. The core idea is to make each encounter begin at a distance your weapon can control. That gives you time to react, protects weaker teammates, and reduces the number of actions that can go wrong during a crowded encounter.
Start by identifying the practical range of the weapon instead of assuming every enemy can be handled safely from far away. Community descriptions call the Cowboy a flexible ranged option, but that does not mean every pistol or rifle performs identically. A player should test the weapon, note the practical trigger distance, and avoid using a close-range weapon as though it offers the same reaction window as a longer gun.
| Cowboy decision | Weak approach | Mastery approach |
|---|---|---|
| Opening a fight | Fire once and retreat randomly | Establish a lane before engaging |
| Managing ammunition | Empty the magazine on the first target | Choose high-value shots and preserve reserve rounds |
| Handling a flank | Turn toward every sound | Clear the immediate threat, then reposition |
| Supporting allies | Stand far away without covering them | Cover the Doctor, Miner, or downed teammate |
| Entering a room | Rush in after the group | Check the angle and create a firing position |
Cowboy mastery also depends on recognizing when not to fight. A retreat with a teammate is often better than spending the entire magazine on a target that would retreat anyway. Preserve health and ammunition together, because a low-health Cowboy with an empty weapon is much more vulnerable than a character who disengages early.
The Horse mastery guide is relevant if you are comparing the Cowboy with a mobile mount-focused build. The Horse is rideable and has been reported as an event unlock, while the Cowboy provides immediate ranged pressure. One route may excel at travel and repositioning; the other may win the direct combat test. The strongest choice depends on which part of the journey creates the most difficulty.
Do not overlook the Cowboy’s team value during events. A ranged teammate can cover a Miner during gathering, watch an approach while another player revives the Doctor, or pull enemy attention from a close-range teammate. This allows specialists to perform their intended jobs without abandoning them entirely. A class mastery build is strongest when it makes the crew more efficient, not simply when it records more damage.
Doctor Mastery Tactics for Safer Co-op Recovery
Doctor mastery succeeds when the team can take risks without allowing one mistake to end the journey. The class begins with bandages and snake oil, giving the player immediate recovery tools, while the teammate revival converts a fatal setback into a temporary setback. The key is preserving enough personal health to finish the rescue rather than reviving someone and immediately collapsing yourself.
Before using the revive, consider the downed player’s health cost and your own remaining margin. The reported revival cost is half of the teammate’s own health, so an injured teammate may require less health than someone at full strength. That makes it useful to revive quickly, but the safest time is when the team has secured a short window of protection.
| Doctor situation | Risk | Better mastery decision |
|---|---|---|
| Reviving during an active attack | The Doctor may be interrupted or finish at low health | Create distance first, then revive |
| Teammate near death | Revive may consume a larger share of health | Stabilize the area before committing |
| Doctor also injured | Both players may fail to continue | Use the safest available healing tool first |
| One enemy remains | A quick revive may be efficient | Kill or control the threat when necessary |
| Multiple enemies arrive | Revival creates a larger recovery window | Retreat or regroup before restoring the teammate |
The Doctor becomes less reliable in a solo journey because the ability to revive another player does not solve the player’s own death. Solo builds should use the class primarily for self-healing, supply efficiency, and safe repositioning. A co-op player with a reserved teammate can make the revive central to the class and create value that cannot be matched by a simple damage upgrade.
Community field notes also identify the Doctor as one of the practical crew choices alongside a dedicated damage class. The best pairing is usually a role that draws or holds enemy attention, such as a durable front-liner, while the Doctor stays behind cover. The Cowboy is a natural partner because its ranged pressure can create the space needed for a revive, although the exact partnership depends on enemy behavior and current balance.
The key mastery habit is to preserve the rescue window. Use range, terrain, and teammate positioning to keep enemies occupied, then revive before the situation deteriorates. A successful Doctor is not defined by the number of revives; it is defined by how rarely a rescue becomes a second loss.
Advanced Class Mastery: Event Roles and Team Synergies
Once the core classes are understood, event and seasonal roles can add more specialized answers. Their unlock conditions may be less obvious, and their value can change with the event schedule. The most reliable approach is to identify the problem they solve, confirm that the role is currently obtainable, and compare it with a permanent class before committing valuable resources.
| Advanced role | Reported or known feature | Mastery emphasis | Main caution |
|---|---|---|---|
| Alien | Lever puzzle, ray weapons, and event-related access | Combining puzzle progress with ranged pressure | Availability may be limited |
| Werewolf | High-health melee bruiser | Holding space and absorbing damage | Community health estimates can vary |
| Horse | Rideable event unlock | Travel speed and flexible positioning | Combat value depends on the build |
| Vampire | Faster, harder melee attacks | Moving between targets | Direct sunlight creates exposure |
| Necromancer | Raises defeated enemies as temporary allies | Managing a repeatable summon loop | Temporary units may not last long |
| Krampus | Frost Bite seasonal class | Adapting to a limited event window | Event availability may end |
| Elf | Frost Bite seasonal class | Coordinating with the holiday event rotation | Event availability may end |
Community footage of the Frost Bite holiday event identifies Krampus, Santa, and Elf as seasonal classes tied to that mode, so treat their availability as rotating rather than permanent. These classes are not simply automatic upgrades. A Vampire is compelling when the route offers shade or indoor fights, yet sunlight can invalidate an otherwise strong plan. A Necromancer can create valuable pressure after a wave is cleared, although the summons remain temporary and must be directed before they disappear. An Alien may combine puzzle solving with special weapons, giving it an unusual mix of utility and damage.
Unlocking order also matters. A permanent class offers more repeated value than a seasonal role that is available for a limited period, while an event role can be ideal when its associated mechanics align with a difficult encounter. Compare expected repeat opportunities, the cost of obtaining the class, and how its abilities interact with your current crew.
A Mastery Checklist for Any New Class
Test the class in a low-risk setting before taking it into a difficult route. Note the normal ability, the cooldown or resource cost if one appears, and the situations in which the class contributes beyond basic damage.
-
Verify the unlock method and current availability.
-
Record the class’s starting equipment and passive effect.
-
Test it in both close and long-range encounters.
-
Combine it with one teammate who covers its weakness.
-
Compare performance with a familiar permanent class.
-
Keep the strongest master’s strategy flexible for patch changes.
That process makes the class mastery guide more than a purchasing checklist. It turns each unlock into a practical experiment and gives you a clear reason to revisit the roster after an update. For broader comparisons, the Dead Rails class mastery overview can help distinguish permanent roles from event choices before the next run.
Frequently Asked Questions
Which class should a new player unlock first in Dead Rails?
Doctor, Miner, and Cowboy are often recommended because their utility is easy to understand and useful across different crews. A Doctor supports recovery, a Miner gathers resources, and a Cowboy provides ranged damage. The best first choice still depends on whether you play alone, what your teammates lack, and the current displayed bond cost.
Is the Cowboy class strong for solo players?
A Cowboy can be effective in solo play because ranged damage creates distance from dangerous enemies and reduces the need for close-range defense. The main weakness is resource management, especially when ammunition is limited. Choose a weapon with a comfortable range, avoid forcing uncertain fights, and preserve enough firepower for retreating from an enemy.
What makes Doctor mastery useful in a co-op crew?
Doctor mastery preserves a run after a teammate falls instead of ending the journey immediately. The class can revive a teammate by spending half of their own health, so its value depends on careful timing and sufficient personal health. Pair the Doctor with a ranged or durable front-liner, and revive only when the surrounding area is secure enough to finish the rescue.
Are event and seasonal classes worth unlocking?
They can be worth unlocking when their mechanics match your playstyle and the event is still active. Alien, Werewolf, Horse, Vampire, and Necromancer each offer distinct advantages, while seasonal roles may disappear after their event ends. Confirm current availability and compare the role with a permanent class before spending scarce bonds on a temporary opportunity.
How should I decide which Dead Rails class to master next?
Choose the class that fixes the most important weakness in your current crew, not simply the role with the highest reported damage. A support player needs recovery, a gathering-heavy team may value the Miner, and a dangerous boss route may benefit from ranged pressure or a melee bruiser. Test the candidate in a normal run, then invest further only if its performance remains useful.
A successful Dead Rails class mastery journey comes from matching abilities to real crew needs, preserving enough resources to use those abilities, and adapting when patches shift class value. Unlock deliberately, test one role at a time, and build a crew whose strengths cover each other instead of collecting overlapping classes.