
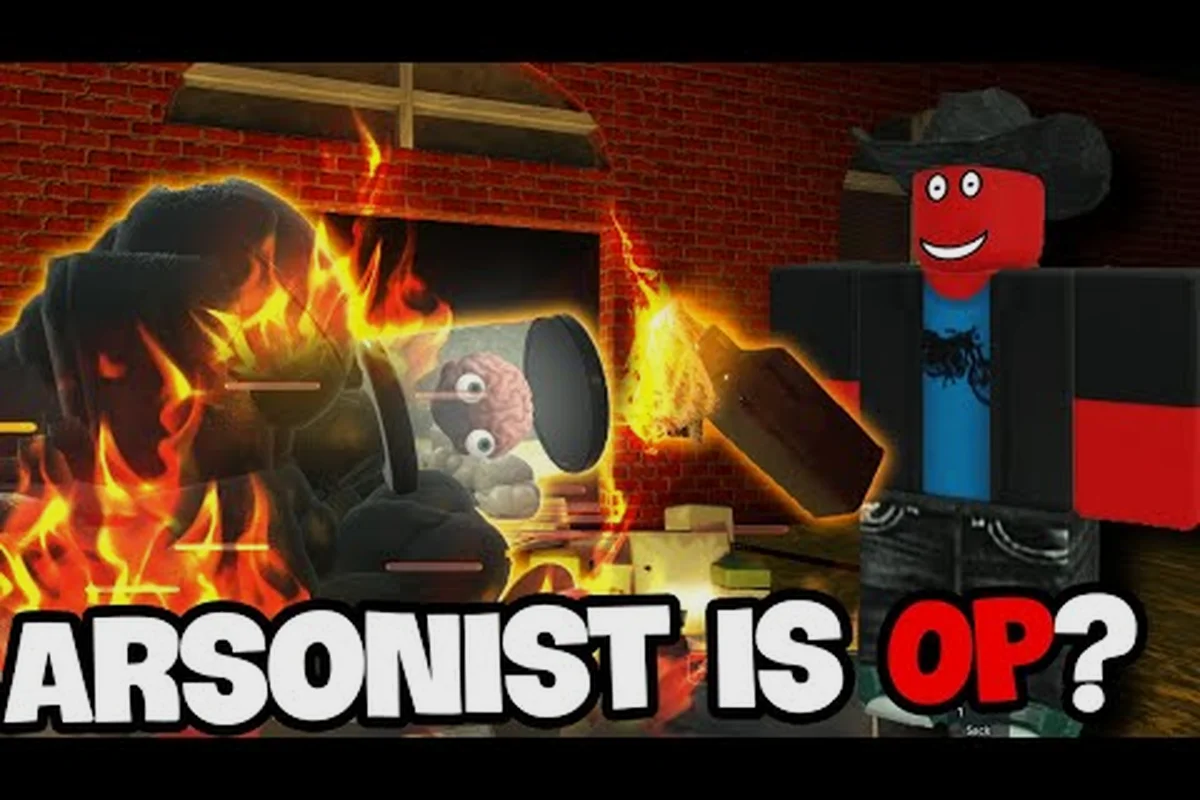
The dead rails arsonist class turns controlled fire into your strongest survival tool, but its value depends on choosing targets and fuel priorities rather than burning indiscriminately. This guide explains its bond priorities, fire-focused abilities, practical upgrade paths, and the situations where it outperforms other crew roles. It also distinguishes the class from the dead rails priest class, conductor class, survivalist class, high roller class, and alamo class, showing how those alternative roles handle threats the arsonist can exploit through ignition, crowd control, and area denial.
Dead Rails Arsonist Class Core Role
The dead rails arsonist class is built around damage, crowd control, and turning dangerous terrain into a temporary advantage. Rather than relying on healing, heavy defense, or raw weapon damage, the Arsonist gives you several ways to punish clustered enemies and deny safe passage. That makes the class valuable during train attacks, bandit encounters, and other moments when enemies arrive in groups.
This role matters because a standard damage build can overpower a single target while struggling against several attackers. Fire-based effects add a different kind of pressure: they can discourage enemies from bunching up, create space around the train, and reward you for keeping valuable supplies away from burning ground. The result is a playstyle that is less forgiving of sloppy positioning than a pure fighter role, but more rewarding when you plan each engagement.
-
Primary strength: Area damage against groups of enemies.
-
Secondary strength: Pressure that changes enemy movement.
-
Best environments: Encounters with open lanes, wagons, structures, and other burnable surfaces.
-
Main weakness: Fire can become a liability when the crew is crowded or supplies are exposed.
-
Build goal: Create controlled distance without making the entire train unusable.
A useful Dead Rails classes overview can help establish how the Arsonist compares with tankier or utility-focused options. For this guide, however, the important distinction is simple: the Arsonist does not need to win every exchange directly. It wins by making the battlefield more expensive for enemies to enter.
Starting Loadout and Bond Principles
The Arsonist should begin with a clear objective: survive long enough to place fire where the enemy group is already committed, then move away before the flames spread into the train’s working area. Your first choices should therefore favor mobility, fuel reliability, and access to useful fire tools over passive bonuses that merely increase general durability.
Community field notes on the dead rails arsonist class describe the broader class roster as unusually varied, with more than thirty classes available across general selections, mastery paths, and unlock categories. The same notes highlight budget options such as Doctor and Miner at 15 bonds, but they do not provide a verified Arsonist bond value. Because of that uncertainty, treat specific prices as patch-dependent community information and verify the current selection screen before committing.
| Priority | Why it matters | Practical benefit |
|---|---|---|
| Reliable fire source | Supports repeated ability use | Less wasted time collecting fuel |
| Movement or positioning | Keeps you outside dangerous areas | Safer ignition and retreat |
| Area damage | Rewards clustered enemies | Better crowd control |
| Crowd separation | Exposes the priority target | Faster follow-up attacks |
| Supply protection | Limits friendly-fire mistakes | Safer long train runs |
These priorities describe the intended function of the class rather than a fixed, undocumented stat formula. If the current game version gives the Arsonist a specific starter item or bond cost, that displayed value should take priority over community estimates.
Early-Game Decision Checklist
Before you leave the starting area, confirm the following for your dead rails arsonist class setup: decide whether you will create a fire from a carried source or ignite an existing fuel surface, and identify a safe approach lane that lets you retreat without sealing the crew inside the burn. A simple example is to test one controlled ignition point, apply it to a train section rather than the entire engine, and keep enough distance for the burn to finish an enemy while the dead rails priest class can repair damaged cars and the dead rails conductor class can redirect movement. Treat these as role checks, not guarantees: burning the wrong train surface can disrupt the dead rails survivalist class and expose the dead rails high roller class to avoidable damage.
-
You have a dependable method for creating or carrying fire.
-
Your weapon can finish an enemy after the burn applies.
-
You know which train surfaces are safe to ignite.
-
You have room to retreat without crossing your own flames.
-
Your crew knows not to bunch up during a fight.
This checklist keeps the dead rails arsonist class from becoming a liability. Fire control is not merely about damage; it is about preserving the space your crew needs to repair the train, move supplies, and respond to follow-up threats.
Dead Rails Arsonist Class Fire Ability Mechanics
Fire is the defining resource of the dead rails arsonist class, and its usefulness depends on placement, timing, and escape space. Players who simply light the nearest target often trigger the most dangerous part of the mechanic: enemies spread out, the intended crowd-control effect weakens, and the burning area remains active longer than expected. Better play starts by identifying where the enemy path will be, not merely where an enemy currently stands.
Offensive Fire Placement
The strongest offensive setup uses fire as a funnel rather than a standalone damage source. Place it along a route the enemy must cross, confirm that your team has an alternate approach, and use a conventional weapon to finish threats that survive the flames. This creates layered pressure: fire slows or separates the group while your attacks remove the most dangerous target.
A good example is an enemy entering through a narrow path beside a wagon. If the Arsonist ignites the far side before the group commits, the burning area can discourage a straight approach. If the crew instead waits until enemies are already surrounding the train, even a powerful ignition may become less useful because there is no clean escape route.
| Fire target | Likely tactical value | Main risk |
|---|---|---|
| Enemy approach lane | Slows or redirects a group | May spread beyond the intended area |
| Enemy gathering point | Punishes clustered attackers | Can trap your own crew |
| Supply-side structure | Creates a defensive perimeter | Can damage valuables |
| Empty exterior ground | Delays pursuit | Offers little direct damage |
| Train-critical area | Blocks enemy access | Risks the train itself |
Treat this as a decision table for the dead rails arsonist class, not a specification of exact damage or burn duration. For example, an enemy approach lane may be used to delay a group, while a train-critical area can block access but threaten the train itself. If patch notes change flame size, duration, or damage scaling, reassess the placement and timing around the Arsonist’s fire rather than relying on a fixed numerical value.
Area Control Versus Single-Target Damage
A direct melee build may remove one dangerous enemy faster, while the Arsonist can affect several less powerful enemies at once. The right choice depends on the encounter, not a universal tier ranking. Against a compact group, fire is likely your best area-control tool. Against a fast elite or isolated attacker, use a reliable weapon and let the class contribute through positioning and follow-up pressure.
Community reports describe the dead rails priest class as a more recovery-oriented option and the dead rails conductor class as another role worth considering when team coordination matters. By contrast, the dead rails survivalist class should appeal to players who prefer flexible resource handling over dedicated damage. These comparisons are qualitative, because the supplied community data does not give verified ability coefficients for those classes.
| Encounter | Arsonist priority | Why |
|---|---|---|
| Several basic enemies | Area fire | Multiple targets share the pressure |
| Armored target | Weapon follow-up | Fire creates an opening, but focused damage still matters |
| Swarming attackers | Choke-point fire | A controlled lane can reduce simultaneous contact |
| Resource-rich environment | Distant fire | Avoid unnecessary damage to supplies |
| Emergency repair scene | Delay tactics | Create separation while the crew restores the train |
The practical lesson is that target density determines the build. A fire-control setup begins to resemble a normal damage setup when the encounter becomes a duel. Do not force the class fantasy onto every situation; adapt the tool while preserving the identity of the build.
Dead Rails Arsonist Class Bond and Build Priorities
A functional dead rails arsonist class build needs three connected layers: a way to start fires, a way to keep enemies inside the danger zone, and enough survivability to escape before the flames become your problem. Spending every bond on a single branch makes the build less versatile, especially if its core fire tools are unreliable or difficult to recharge.
Because exact Arsonist upgrade costs and final values are not present in the supplied research, avoid presenting invented percentages. Check the live upgrade panel for current costs, then compare its options using the role table below. This approach also makes the guide resilient after balance patches.
Balanced Solo Build
The balanced build is the safest choice when you do not know whether your crew will travel alone or in a small group. It prioritizes dependable fire application, personal escape speed, and enough direct damage to finish an enemy without standing in the flames. This version suits players who want clear decisions rather than a highly specialized setup.
| Bond category | Solo focus | Why it survives route changes |
|---|---|---|
| Fire application | Consistent activation | Keeps the class useful in every fight |
| Mobility | Quick repositioning | Prevents forced contact |
| Weapon damage | Reliable follow-up | Covers isolated enemies |
| Situational defense | Emergency protection | Useful during crowded emergencies |
| Utility | Carry and interaction value | Supports train maintenance |
For broader unlock information, the Dead Rails class mastery guide explains how class choices and mastery paths fit into the wider roster. The important point for this build is to avoid choosing a passive that sounds thematic but does not improve your ability to create a safe attack window.
Aggressive Co-op Build
The aggressive version spends more heavily on area damage and target pressure. It works best when at least one teammate can handle close-range defense and another can repair the train without needing your help. In a coordinated group, you can place fire farther ahead, attack from a safer angle, and focus your weapon on enemies that escape the initial blast.
Community field notes list the dead rails high roller class among the selectable roles, but they do not supply a direct Arsonist synergy or reliable bond formula. Treat class combinations as experimental unless the current game screen confirms a specific bonus. The dead rails alamo class is another roster option, though the available data does not establish a reliable relationship with fire builds.
| Aggressive choice | Best teammate need | Failure risk |
|---|---|---|
| Wider crowd pressure | Strong close-range defender | Overextension if damage is spread thin |
| Faster ignition | Dedicated repair support | Burning the repair zone |
| More aggressive pursuit | Reliable crowd clear | Aiming can leave the train exposed |
| Reduced caution | Sound route planning | Small mistakes become costly |
Resource-Focused Build
A resource-focused dead rails arsonist class prioritizes fuel access, carrying capacity, and sustained ability use. It is especially attractive on longer routes where repeated encounters could exhaust a small starting reserve. The drawback is that utility competes with offense in the bond budget, so you should confirm that the crew can handle threats while you collect or reposition.
The Dead Rails demolitionist class guide is useful for comparing another explosion-oriented playstyle. Both roles reward preparation and careful spacing, but the Arsonist’s identity is tied more closely to flame and area denial, while Demolitionist decisions center on explosive tools. This distinction matters when choosing a crew composition rather than copying a teammate’s equipment priorities.
Dead Rails Arsonist Class Team Compositions
The Arsonist rarely reaches its potential when every teammate makes the same choice. Because the class wants enemies separated, controlled, and exposed, crew composition should cover the tasks that fire cannot handle safely. A reliable defender, repair specialist, and flexible damage dealer can turn a risky ignition into a stable opening.
The supplied research identifies several useful comparison points. Doctor and Miner are reported as 15-bond options, with Doctor carrying bandages and snake oil and able to revive a teammate at a cost tied to the reviver’s health, while Miner brings a mining helmet, coal, and a pickaxe. These details may change with patches, but they illustrate why the dead rails priest class is often associated with support and the dead rails survivalist class with practical resource handling.
| Crew need | Preferred role type | Arsonist contribution |
|---|---|---|
| Close-range protection | Tank or skilled fighter | Attacks targets outside the defensive ring |
| Revive support | Doctor or support-focused teammate | Creates space for the rescue |
| Train repair | Miner or utility teammate | Holds enemies away from the work area |
| Resource gathering | Survival-oriented teammate | Covers threats during collection |
| Extra damage | Generalist or dedicated DPS | Completes the attack cycle after ignition |
Solo and Duo Play
For solo play, prioritize self-sufficiency over maximum theoretical damage. A smaller flame footprint, reliable weapon, and clear escape route are worth more than a spectacular ability that leaves you vulnerable. The class becomes easier to manage when every bond can support either fire application, movement, or finishing damage.
In a duo, one player can ignite and reposition while the other handles the immediate threat. Communication should be simple: identify the intended fire zone, announce the retreat direction, and avoid crossing that route. If the other player is the dead rails priest class, keep healing supplies and movement routes separate from the Arsonist’s burning ground.
Larger Crews and Enemy Waves
Larger crews provide more flexibility because a tank can hold an entrance while the Arsonist attacks from the flank. The risk is friendly fire and scattered decision-making. Establish a simple rule: only one crew member ignites a shared area unless the group has practiced a coordinated sequence. This keeps the dead rails arsonist class from becoming the cause of a chaotic, low-health emergency.
A Dead Rails arsonist class gameplay video can help with visual familiarity, although community videos may not reflect the latest patch. Use it to identify the Arsonist’s role in a larger crew—how the class approaches a fire zone, which upgrade choices alter that approach, and how the character positions itself near a tank, Conductor, or other crew members. After watching, confirm the current Arsonist class behavior, upgrade values, and targeting effects in-game before copying a route, because patch changes can make an otherwise accurate demonstration misleading.
Dead Rails Arsonist Class Combat and Route Tactics
The most effective dead rails arsonist class player is not the person who lights the most fires. It is the person who creates the most valuable fires with the fewest mistakes. That means recognizing when an encounter is worth contesting, selecting a surface that channels movement, and retreating through a route that remains usable after ignition.
The Safe-Burn Sequence
Repeat the same five-part cycle instead of improvising under pressure: identify the most likely enemy approach, mark a flame boundary with a clear crew lane, delay ignition until targets commit, finish weakened enemies with weapon pressure, then rotate to the next position. The caution is that arsonist options differ from the dead rails priest, conductor, survivalist, high roller, and Alamo classes, so preserve spacing and escape routes rather than assuming every class can use the same area-denial timing.
-
Identify the approach: Look for the path most enemies will use.
-
Mark the boundary: Choose a flame location that leaves a safe crew lane.
-
Delay ignition: Wait until the target group commits to the area.
-
Finish weakened enemies: Use a weapon to remove urgent threats.
-
Rotate immediately: Move before the fire spreads or enemies adapt.
-
Check the scene: Confirm that supplies and repair areas are secure.
This sequence works because it treats fire as a timed area-denial tool rather than a source of instant damage: its value is forcing enemies to approach or retreat along a route the crew controls. That makes coordination important in co-op, where a dead rails arsonist can place the flame boundary while a dead rails priest, conductor, survivalist, high roller, or Alamo class handles pressure from a different angle. For example, igniting a narrow entrance after pursuers commit can interrupt their advance, but igniting it beside the train’s repair area or the crew’s retreat lane can cut off that same escape route. The shared vocabulary is therefore “mark, delay, ignite, and rotate,” even when each class delivers damage, movement, and enemy control through different tools.
| Situation | Better approach | Avoid |
|---|---|---|
| Enemy entering a lane | Delayed ignition | Lighting their current position |
| Crew repairing the train | Fire beyond the work area | Burning the repair zone |
| Pursuing a single enemy | Direct weapon pressure | Chasing into a new blaze |
| Resources scattered nearby | Controlled separation fire | Unchecked area damage |
| Retreat under attack | Fire the choke point | Leaving an open flank |
Resource and Supply Safety
A fire build should never treat every flammable object as free space. Wagons, structures, and stored supplies can turn a strong ability into an expensive mistake. Before igniting, identify what is behind the target, what wind or spread direction may carry the flame, and where the crew must run afterward.
Community experience with the dead rails survivalist class suggests a practical lesson for every role: reliable resources can make a risky plan survivable. The Arsonist should still prioritize fuel continuity, safe carry capacity, and a visible retreat route. When those pieces are missing, lower-output abilities can outperform a stronger burst because they are easier to repeat.
Handling Elite or Isolated Threats
Fire is less decisive against a single armored or fast enemy because there is no crowd to punish. Change the plan instead of forcing the class template. Draw the target toward your burning lane, use the area denial to interrupt its approach, and focus your weapon on the armored portion of the threat. If the fight drifts away from useful terrain, disengage and let the crew create a better engagement zone.
The class-function test is simple: if fire creates a clearer decision, keep it; if fire merely adds visual drama, prioritize your weapon. This prevents the dead rails arsonist class from becoming a one-note build while retaining its area-control strengths.
Dead Rails Arsonist Class Build Troubleshooting
Most failed Arsonist runs come from a small number of repeated errors: igniting too early, fighting beside the crew, lacking a finishing weapon, or spending too many bonds on one branch. Troubleshooting should begin with your last three encounters. Identify the point where health, resources, and positioning deteriorated, then correct that specific problem rather than changing the entire build after one bad fight.
Common Failure Signs
A failed build often shows a clear pattern. If enemies spread out after every ignition, your flame may be too wide or poorly placed. If teammates begin taking damage during attacks, you need a narrower target area. If you run out of fuel immediately, prioritize access and carry efficiency. If isolated enemies nearly kill you, the build lacks a reliable weapon or escape tool.
| Symptom | Likely cause | Correction |
|---|---|---|
| Fire is ignored | Poor placement or timing | Ignite the likely route instead of the current target |
| Teammates are damaged | Unclear fire boundaries | Keep burning zones away from the crew lane |
| Fuel disappears quickly | Weak resource access | Improve carry efficiency or renewal reliability |
| Duel fights are difficult | Too little weapon damage | Add a dependable finishing option |
| Frequent rear attacks | No rear-lane control | Use fire to protect a rotating flank |
| Bond choices feel weak | Narrow investment | Rebalance across utility, movement, and offense |
When to Change Classes
The Arsonist may not be the right choice if you dislike positioning under pressure, cannot secure consistent fuel, or want a role centered entirely on healing. A support-focused player can compare the dead rails priest class, while someone seeking broad resource competence may prefer the dead rails survivalist class. Neither choice is inherently stronger; the better class is the one whose demands match your play habits and crew needs.
A separate Dead Rails release and update overview is valuable when a recent patch may have changed class balance. Community reports also mention that class mastery trees can alter established roles, including replacing Cowboy’s High Noon with Dead Eye. Those examples show why older builds need review after updates, even when no specific Arsonist change is documented.
The dead rails arsonist class succeeds when fire, positioning, and team support reinforce one another. Choose a dependable ignition method, preserve a safe escape lane, use bonds across fuel, movement, area pressure, and finishing damage, and avoid burning the crew’s working space. With that discipline, the class becomes a flexible area-control specialist rather than a risky novelty build.
Frequently Asked Questions
What is the dead rails arsonist class good at?
The dead rails arsonist class is good at area pressure, crowd control, and punishing enemies that group together. Its value comes from combining fire placement with weapon follow-up rather than relying on fire alone. It works best when the crew can create space, repair safely, and avoid clustering inside the burning area.
Does the dead rails arsonist class work in solo play?
Yes, but a solo build should prioritize dependable fire application, mobility, and enough weapon damage to finish threats. Without teammates to hold enemies, the Arsonist must disengage quickly after using fire. A compact flame area is generally easier to manage than a broad ability that cuts off the player’s own escape route.
Should the dead rails arsonist class use every bond on fire upgrades?
No. A balanced build should spread bonds across fire application, movement, direct damage, and situational utility. A large share devoted to flame may leave you unable to survive or finish enemies outside the affected area. Review the live upgrade screen after patches because exact costs and effects may change.
How does the dead rails arsonist class compare with the dead rails priest class?
The Arsonist specializes in area pressure and damage, while the Priest is treated as a more recovery-oriented option in community reports. Their roles can work together because the Priest can recover teammates while the Arsonist keeps threats at a distance. Exact benefits depend on the current class and mastery configuration, so verify them in-game.
Can the dead rails conductor class, high roller class, or alamo class improve an Arsonist build?
The available community data names the dead rails conductor class, dead rails high roller class, and dead rails alamo class but does not establish a confirmed Arsonist synergy. Treat combinations as experimental rather than guaranteed. Select them when their abilities cover a crew weakness, and test the setup in a low-risk encounter before relying on it during a difficult route.