
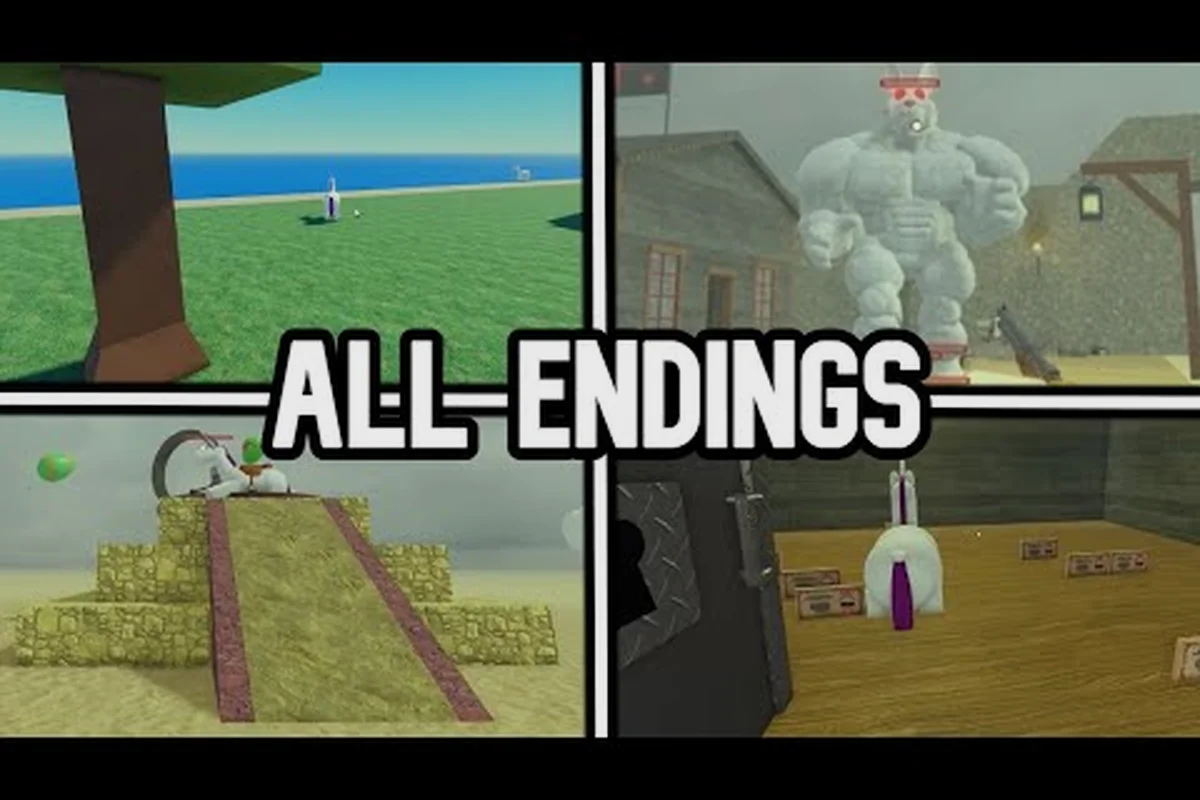
A reliable Dead Rails ending guide should map the full route to Mexico, not merely explain how to escape danger. It should break down train upgrades, repair decisions, fuel management, hostile encounters, and the safest stop locations for surviving the night. Knowing which threats to fight, which ones to bypass, and when to sacrifice resources can determine whether the crew reaches the final destination alive or the run ends beside the tracks.
Dead Rails Ending Guide: Route Overview and Victory Conditions
The main ending in Dead Rails follows the crew’s journey across a hostile 1899 wasteland toward Mexico. The locomotive is not merely transportation: it is the crew’s mobile base, so every mile requires fuel, boiler attention, and a functioning defense against enemies. Reaching 80 km and lowering the bridge completes a standard run, according to the gameplay reference from the Dead Rails ending guide gameplay video.
That final requirement matters. A crew can survive several days, build an impressive train, and still fail to reach the ending if it loses the locomotive, runs out of fuel, or cannot handle the bridge sequence. A dependable dead rails ending guide therefore treats the finish as two connected problems: reach the correct location with the train operational, then protect the crew through the final confrontation.
| Objective | What the crew must do | Common failure |
|---|---|---|
| Reach Mexico | Keep the locomotive moving through the wasteland | Fuel exhaustion or derailment |
| Reach 80 km | Maintain forward progress during every travel cycle | Wasting time in dangerous stops |
| Lower the bridge | Survive the final approach and complete the objective | Leaving the train or abandoning the controls |
| Preserve the run | Repair damage and protect crew members | Losing the locomotive during a night attack |
The three phases of a successful run
Treat the run as three connected phases instead of waiting for a final scripted battle. The preparation phase begins in the lobby, where players can purchase permanent class benefits before boarding. The travel phase covers the dangerous miles between towns, and the endgame phase centers on the 80 km mark, the bridge, and the last large attack.
This structure is especially useful when comparing dead rails all endings or planning alternate challenge runs. A route that reaches Mexico under normal rules may still require a different class loadout, avoidance plan, or survival priority for an unlock challenge. The same underlying survival principles still apply, however: preserve the boiler, control the train’s speed, and make every stop produce useful resources.
What “surviving the ending” really means
Reaching the destination is only half of the task. The train must remain intact while the crew interacts with the final objective. A weakened locomotive can make the bridge sequence much more dangerous, and a crew that spent every healing item during a night attack may lack enough supplies for the finale.
The best preparation is therefore defensive. Reinforce doors and windows before dark, keep emergency fuel available, and avoid scattering the crew across the train when a single hostile area can become the point of failure. Players should also understand the broader Dead Rails co-op guide, especially when coordinating roles such as driving, repair, and defense.
Preparing the Train Before the First Night
Community field notes report that sunset arrives around 9 PM, hostile spawning generally begins around 11 PM, and the danger period ends around 5 AM. These times may shift after updates, but they provide a dependable planning window: the crew should finish major construction and supply gathering before sunset rather than trying to repair everything after 11 PM.
The first night is where unprepared trains expose weak priorities. Many players have plenty of coal, ammunition, and weapons but no barrier at the most accessible entry point. Others board with excellent equipment but leave the boiler unattended. A good dead rails ending guide balances resource gathering, fortification, and train operation rather than treating them as separate tasks.
Prioritize defenses by entry point
Metal sheets can be fitted over windows and doors, while barbed wire slows melee attackers at entrances. A Maxim Turret is reported by players to cost $125 and can be welded to the train. Because prices can change, confirm the current value before committing funds, but the tactical value of a mounted turret remains its ability to create a controlled firing lane.
| Defense | Best use | Main limitation | Preparation timing |
|---|---|---|---|
| Metal sheets | Protect windows and doors from melee attacks | Requires materials and installation time | Before the first night |
| Barbed wire | Slow enemies crossing an exposed entrance | Less effective without another damage source | Before enemy spawning begins |
| Maxim Turret | Cover a predictable approach to the train | Placement and purchase cost matter | Before the most dangerous nights |
| Clear firing lanes | Let rifles or pistols engage attackers | Obstructed by cargo and crowds | During every stop |
| Working repairs | Restore mobility after a breach | Requires coal, parts, and crew attention | Maintain continuously |
Treat the train as a supply chain
A strong locomotive can still be stranded by a poor resource loop. Sheriff, Doctor, General Store, Gunsmith, and Furniture buildings can provide bonds, guns, ammunition, fuel, and other useful supplies. Players report that valuables can be sold at Trading Posts or Tailors, while cheap lobby purchases remain active for the run even when carried gear is lost on death.
That separation changes where a crew should spend money. Lobby purchases are comparatively safe investments, whereas items carried onto the train may disappear when a character dies. If a squad is considering a riskier route or an unlock condition, the Dead Rails class mastery guide can help identify which class benefits provide the most dependable advantage before departure.
A practical pre-night checklist
-
Fuel reserve: Keep enough fuel for ordinary travel and a margin for a detour or repair emergency.
-
Coal coverage: The boiler must remain fed because the train depends on it for movement. Use the Dead Rails coal guide to plan consumption around travel and combat.
-
Entry-point coverage: Block the easiest route first, because a single narrow opening can be exploited by several enemies.
-
Healing supplies: Reserve some medicine for the final encounter rather than spending it all on minor injuries.
-
Crew positions: Assign drivers, repairers, and defenders before darkness instead of waiting for a breach to reveal gaps.
| Stage | Primary goal | Secondary goal | Failure signal |
|---|---|---|---|
| Lobby | Buy a practical class | Avoid unnecessary luxury purchases | Overcommitting scarce funds |
| Early travel | Gather weapons and fuel | Learn enemy spawn patterns | Riding without basic supplies |
| Midday stop | Sell valuables and improve armor | Upgrade selected defenses | Buying random gear |
| Before sunset | Finish barriers and repairs | Stock emergency coal and fuel | Construction still underway at 9 PM |
| Night defense | Protect the locomotive | Preserve healing resources | Doors breached after 11 PM |
Reaching 80 km Without Burning the Run’s Resources
A fast route is valuable only if the train remains able to finish. The core objective is to reach 80 km and lower the bridge, but traveling too aggressively can cause damage, consume excessive coal, or leave the crew without supplies for the night. The best route is the one that reaches the final stretch with a functioning train rather than merely recording a quick arrival at the marker.
This is where a dead rails speedrun guide becomes a resource-management exercise. Speed comes from preparing the train before departure, choosing productive stops, and avoiding unnecessary fights. It does not come from ignoring the boiler or treating every conflict as a battle that must be finished.
Measure speed by useful progress
Every stop should answer a clear question: What does the crew need, and how much time will obtaining it take? A stop that provides ammunition is worthwhile if the train is nearly empty. A second shop visit for a minor upgrade may cost more time than the item provides.
| Stop value | Examples | Decision rule |
|---|---|---|
| Critical | Fuel, coal, repair supplies | Stop when the margin is too thin |
| High | Weapons, ammunition, medicine | Stop if the current supply cannot cover the next cycle |
| Medium | Armor, barriers, valuables | Take only when travel time remains reasonable |
| Low | Duplicate gear or minor cosmetics | Skip if the train needs to move |
| Risky | Long detour, exposed location | Continue only with a clear resource payoff |
Use the crew as a coordinated unit
A useful crew assigns responsibilities before departure. One player monitors the route and locomotive condition, another handles repairs, and others cover threats or collect resources. A single player cannot perform every task at once, especially during an attack, so role clarity can prevent deaths that have little to do with combat skill.
The Dead Rails challenges page is relevant for specialists who want to see whether their route can satisfy escape, pacifist, or unkillable conditions. Those goals often require different priorities: pacifist runs reduce unnecessary engagements, while escape challenges reward speed and careful avoidance.
Avoid the common speedrun trap
The largest mistake is treating the fastest segment as the entire run. A crew may reach a high speed early but arrive at night with a broken boiler, no coal, and no barriers. A slightly slower journey that preserves the locomotive often creates a better chance of reaching the ending. The 80 km route guide can provide additional detail on the approach to the bridge and final battle.
| Speedrun choice | Immediate benefit | Long-run cost | Better choice when |
|---|---|---|---|
| Skip every stop | Maximum travel speed | Higher risk of shortages | The train is fully stocked |
| Stop only for critical supplies | Balanced pace | Some upgrade opportunities lost | Fuel, coal, or ammo is low |
| Fight every hostile group | Gains loot and experience | Delays, injuries, and damage | The crew has a defensive advantage |
| Avoid avoidable combat | Preserves health and time | Fewer materials collected | A challenge or escape condition is active |
| Push through the night | Maintains distance | Increased repair and fuel cost | The locomotive is already secure |
Surviving the Night Attacks and Protecting the Locomotive
Night is the most common reason a promising run ends before the conclusion. The danger window reported by players begins around 11 PM, when faster zombies, vampires, werewolves, and outlaw ambushes can appear. Full moons and storm nights may bring several special enemies at once, so the crew should respond to the sound of an approaching threat before the first enemy reaches an opening.
Armor provides a useful trade between speed and survivability, but it cannot compensate for poor positioning. A crew member standing beside the engine while attackers approach from three sides may lose the train even with strong equipment. Defensive layers work best when each one delays or redirects enemies long enough for the next layer to function.
A layered defense plan
Start with the locomotive itself. Make sure the engine, boiler, controls, and bridge-related equipment are not exposed to a direct path. Then cover the easiest exterior approach, restrict doors and windows, and add a ranged firing position where attackers must pass through a narrow lane.
Layer 1: Distance forces enemies to approach a chosen direction, turning the locomotive’s surroundings into a controlled funnel rather than a free-for-all. For example, place the engine behind a car or fixed rail obstruction so attackers must emerge from one predictable side, giving the crew time to react. A narrow approach also limits how many hostile NPCs can reach the locomotive simultaneously, preventing their damage from stacking while preserving space for a defensible firing position.
Layer 2: Obstruction uses doors, sheets, wire, and the train’s structure to slow attackers, giving the crew time to react rather than being overwhelmed. For example, close or reinforce an exterior door, drape sheets across exposed openings, and stretch wire at ankle height along the approach to the locomotive. The goal is not to make the train impregnable, but to create several short delays: each obstacle breaks enemy movement, exposes them to a firing lane, and reduces how many hostile NPCs can pressure the engine at once.
Layer 3: Firepower uses a turret, rifles, pistols, or other weapons to reduce pressure. Concentrate fire on the narrow approach established by the locomotive’s layout, because a turret can cover more of the funnel than a crew member can watch alone. Save limited ammunition for attackers emerging from the same obstruction, and use weapon spread or a scoped rifle against clustered NPCs so one shot does not leave the firing lane exposed.
Layer 4: Recovery uses repairs, coal, fuel, and medical supplies to restore the train after a breach, turning a damaged locomotive into a temporary fighting position instead of a one-shot loss. Keep repair materials, coal, and fuel away from exposed boarding points so attackers cannot destroy the recovery resources during an approach, and assign a crew member to monitor the locomotive’s health. If the train’s engine is damaged, prioritize restoring movement or defensive capability over cosmetic repairs; a stationary locomotive is easier to surround, while a moving train can break contact and preserve the crew’s escape options.
A player who sees the locomotive as a single health bar may miss the actual problem. If attackers destroy the engine, a weak train may be lost even when the crew has plenty of health. Protect the locomotive core, keep a repair team nearby, and avoid placing essential resources where one enemy can destroy them.
Combat priorities during a breach
| Priority | Reason | Action |
|---|---|---|
| Stop the entrance breach | Prevents attackers from reaching the engine and interior | Reinforce the threatened opening and focus fire |
| Clear the closest special enemy | Special enemies can accelerate a collapse | Remove it before the rest arrives |
| Protect the driver and repairer | Losing essential roles can stop movement | Place armor or cover around these crew members |
| Restore mobility | A stationary train cannot escape or reposition | Assign repairs while others defend |
| Preserve medicine | The final encounter may require healing | Use consumables for serious injuries first |
When to fight and when to move
A train under attack can sometimes escape faster than it can win. If enemies have breached the rear, the boiler is secure, and the track ahead is clear, moving may reduce exposure. Staying becomes preferable when the locomotive is damaged, the crew lacks ammunition, or the surrounding terrain limits maneuverability.
A dead rails how to escape approach should not mean abandoning the run at the first sign of danger. Escape tactics only work when the train remains controllable, the coal supply is sufficient, and the crew knows which direction is clear. If those conditions are missing, fight defensively until the train is stable.
The Finale: Lowering the Bridge and Completing the Run
The final phase begins when the locomotive reaches the 80 km area and must lower the bridge. This objective is the decisive step in a normal completion, but it also concentrates risk because the crew cannot treat the finale as ordinary travel. The train needs to approach correctly, and the crew must keep enough people free to operate the required mechanism.
A common mistake is spending every defensive resource on earlier nights and arriving with an empty medicine bag and no functional weapon. Another mistake is leaving the locomotive idle while several players run far ahead. A successful ending keeps the train, controls, and required crew positions close enough to coordinate.
Final-phase priorities
| Priority | Why it matters | Practical preparation |
|---|---|---|
| Operational locomotive | The bridge interaction and escape still depend on the train | Repair major damage before the final approach |
| Accessible controls | An isolated player cannot complete the objective | Keep players near the relevant train section |
| Ammunition and weapons | Special enemies may arrive during the final engagement | Preserve a basic fighting load |
| Healing supplies | Damaged players reduce the crew’s ability to operate and defend | Save medicine for severe injuries |
| Clear communication | Conflicting movement can leave the bridge unattended | Assign one player to coordinate the objective |
Separate victory from survival
Completing the bridge objective ends the standard run, but the quality of the result depends on how the crew handles the last attack. A flawless crew arrives with a healthy train, coordinated roles, and no avoidable losses. A damaged crew may still finish, but the margin for error becomes small.
When checking dead rails all endings, remember that the standard route is a completion, not a complete list of every mode. Challenges may impose additional restrictions, while different class choices and routes can produce very different final conditions. Confirm current objective wording in the game because seasonal events and updates can alter the final sequence.
Common finale mistakes
-
Leaving the engine unattended: A stationary locomotive can become the focus of every attacker.
-
Splitting the crew too widely: Players spread across the train lose the ability to defend one another quickly.
-
Spending all healing early: Earlier encounters may seem more urgent, but the finale often produces the most dangerous combination of attacks.
-
Ignoring fuel and coal: A successful bridge interaction is less useful if the train cannot move afterward.
-
Assuming the first attempt is safe: When the environment resets after failure, rebuild with a conservative defense plan rather than repeating an aggressive route unchanged.
Speedrun Route Planning and Class Preparation
A strong dead rails speedrun guide balances travel efficiency with survival. The fastest crews are not those that ignore every enemy; they are those that prevent long, destabilizing engagements and arrive with usable resources. Class choice matters because the lobby purchase remains permanent, while equipment carried into the run may be lost on death.
Before a speed attempt, decide whether the goal is simply a quick standard completion, a challenge completion, or a safer learning run. The route can be optimized for each, but the objective must remain clear. Chasing a personal time while ignoring the bridge sequence, for example, defeats the purpose of a speed guide.
Compare common route priorities
| Route style | Travel pace | Combat approach | Best for |
|---|---|---|---|
| Direct sprint | Fastest | Avoid most encounters | Experienced teams with strong supplies |
| Efficient stops | Fast | Fight only when necessary | Most speedrun attempts |
| Resource-rich | Moderate | Clear nearby groups | Learning the route and securing upgrades |
| Defensive | Slower | Fortify and preserve resources | Lower difficulty or high-risk modifiers |
Choose the class for the risk you accept
A class that improves movement, combat, repair, or resource handling can shape the entire route. The right choice is not simply the strongest class in isolation; it is the one that reduces the team’s most common failure. A repair-oriented choice may be excellent for a long run, while a faster or more aggressive option can help crews escape difficult encounters.
| Planning factor | Questions to ask | Route effect |
|---|---|---|
| Starting money | What can the crew buy before departure? | Determines early armor, weapons, and supplies |
| Mobility | Can the crew flee a bad encounter? | Opens faster routes |
| Repair value | Does the class preserve the locomotive? | Reduces recovery time |
| Combat strength | Can the crew protect a narrow entrance? | Improves night survival |
| Team synergy | Does the class duplicate another role? | Avoids an unbalanced crew |
Practice the ending, not only the travel
New crews often practice the journey but rush the finale. A better dry run focuses on assignments: who drives, who repairs, who operates the bridge, and who protects each area. These Dead Rails all endings and escape conditions can become much less fragile when every player knows their role before the train reaches 80 km.
Treat the final approach as a timed operation rather than a simple arrival: start checking locomotive, boiler, bridge controls, and supplies while the train is still moving, then confirm the driver and defenders are positioned before the engine reaches 80 km. A useful dry run is to pause at a safe stretch, mark each role, and test the bridge objective once; this exposes missing ammunition, blocked controls, or an incorrectly arranged train before enemies can exploit the approach. In a speedrun, rehearsing this sequence saves time at the objective and reduces the chance that the escape ending fails because a mechanic was left behind or a required control was inaccessible.
-
Confirm that the locomotive and boiler are operational.
-
Verify that the bridge objective and its required controls are accessible.
-
Keep ammunition, healing supplies, fuel, and coal available.
-
Assign the driver, repairer, objective operator, and defenders.
-
Remove barriers or distractions that could slow the final movement.
-
Approach with the train arranged so enemies cannot trap the objective area.
Frequently Asked Questions
What is the main ending in Dead Rails?
The standard completion requires the crew’s locomotive to reach 80 km and then lower the bridge. The train must remain operational throughout the journey, and reaching the final objective does not excuse weak preparation for night attacks or damage to the locomotive.
How do I survive the night in Dead Rails?
Finish major repairs and fortification before sunset, reported by community data to arrive around 9 PM. Focus barriers on likely entry points, keep the boiler and engine protected, and preserve fuel, coal, ammunition, and medicine for the pressure that begins around 11 PM.
Is it possible to escape without fighting every enemy?
Yes. Avoiding unnecessary encounters can save time and resources, provided the train remains fueled, controllable, and defensible. In practice, a crew should disengage when enemies threaten the locomotive’s boiler, fuel supply, or bridge-control access, since a damaged engine can make the 80 km objective unreachable. Moving away from a breach is often better than fighting when the locomotive is secure, the route ahead is clear, and the crew can repair damage, resupply coal, and reach the ending with the train still operational.
Which route is fastest for reaching Mexico?
A direct route with only critical supply stops is often fastest, but its practicality depends on the crew’s starting equipment and combat strength. A slightly slower route that preserves the train and reaches 80 km with supplies is usually more reliable than a reckless sprint.
What should a crew bring to the final battle?
Bring a functioning locomotive, accessible bridge controls, basic weapons with ammunition, healing supplies, and enough coal and fuel to keep moving. Divide crew roles: one player drives and manages speed, another handles repairs and refueling, and the rest protect the locomotive and bridge-control area. Since a late-night breach can cost more time than it saves, keep the boiler, engine, and controls secure before continuing toward 80 km.