
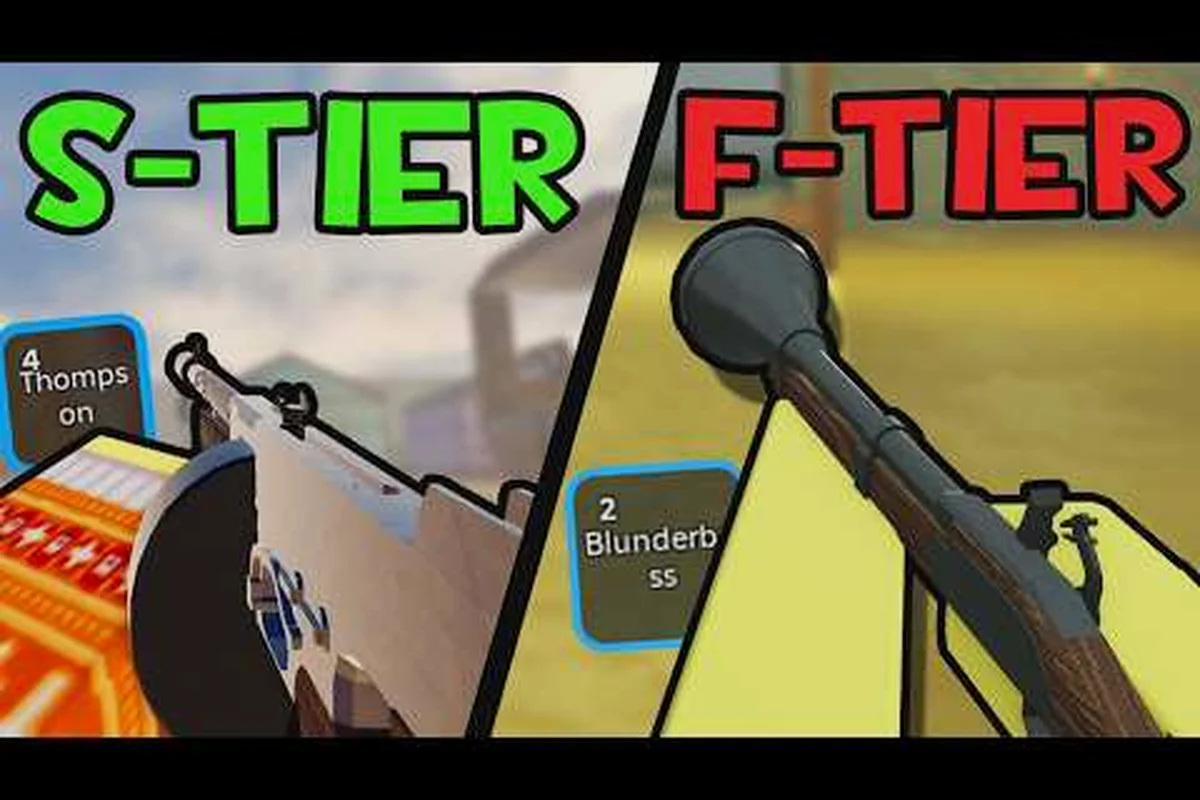
Dead rails weapons determine whether you can survive close-range attacks, hold a corridor, or fight from a train. The right comparison balances base damage, headshot potential, ammunition cost, and accessibility, not just a single damage number. This guide ranks the available arsenal and explains which gun suits each encounter.
Dead Rails Weapons Overview: Damage, Price, and Access
A useful Dead Rails weapons comparison starts with the practical details. Some options are inexpensive and easy to obtain, while others depend on exploration, rare drops, or a gamepass. Community testing and the Dead Rails weapons gameplay video provide useful baseline figures, although prices and balance can change after patches.
The core choices fall into three useful groups based on access, damage, and combat role. A $35 Revolver offers dependable early defense, while the $75 Rifle trades affordability for stronger long-range headshots. Items from the Tesla Lab and Mauser gamepass sit higher in the acquisition curve but can change an encounter quickly: the Electrocutioner deals about 100 lightning damage, and the Crucifix can instantly kill most enemies on contact.
-
Standard firearms: The Revolver, Navy Revolver, Rifle, Shotgun, and Mauser C96 cover most early and mid-run needs.
-
Special weapons: The Electrocutioner, Crucifix, and Maxim Turret deliver unusual effects rather than simple upgrades.
-
Situational tools: A firearm may be strongest in the hands, but a correctly timed special item can solve a dangerous encounter faster.
| Weapon | Reported cost or access | Capacity | Reported base damage | Best use |
|---|---|---|---|---|
| Revolver | $35 at the Gunsmith or 3 bonds in the lobby | 6 rounds | 35 | Accessible all-round defense |
| Navy Revolver | Fort Constitution and world loot | 6 rounds | 50 | Stronger early revolver option |
| Rifle | $75 | 6 rounds | 60 | Longer-range headshot damage |
| Shotgun | $50 | 6 shells | 24 × 5 pellets | Close-range crowd control |
| Mauser C96 | Mauser gamepass or lucky world loot | 10 rounds | 40 | High-capacity sidearm |
| Electrocutioner | Tesla Lab | Not applicable | About 100 lightning damage | Lightning-oriented encounters |
| Crucifix | Special discovery | Not applicable | Instant kill on contact against most entities | Emergency enemy removal |
| Maxim Turret | $125 plus dedicated ammo | Turret-fed | Weapon dependent | Deployable defensive fire |
Damage Is Not the Whole Value
A high-damage gun is not automatically the Dead Rails best weapon. The Revolver's lower reported body damage becomes much more valuable when its headshot multiplier is applied, while the Shotgun can defeat several nearby targets without requiring precise aim. Likewise, a weapon that is difficult to obtain may be weak in practice simply because you rarely have enough ammunition for it.
Availability is especially important during the opening portion of a run. The Revolver can be purchased directly from the Gunsmith or acquired in the lobby for three bonds, making it one of the most dependable starting choices. More expensive options are better when they solve a problem your current gun cannot, not merely because they look more powerful.
Quick Tier Classification
The following broad Dead Rails weapon tier list reflects performance, access, and ammunition needs rather than raw damage alone. A weapon such as the Electrocutioner can occupy the S tier during a lightning-based encounter, while the Shotgun ranks in A tier when enemies, including a werewolf, are forced into close range. Conversely, the Maxim Turret falls to C tier because its strong deployment value is offset by a high purchase cost and a requirement for special ammunition; the Revolver and Mauser C96 also score lower when their limited access or modest base damage restricts consistent use.
| Tier | Dead Rails weapons | Why they fit this tier |
|---|---|---|
| S | Electrocutioner, Crucifix | Exceptional situational power when their acquisition conditions are met |
| A | Rifle, Shotgun, Navy Revolver | Strong damage, headshots, or close-range stopping power |
| B | Revolver, Mauser C96 | Reliable and useful, but limited by access or modest base damage |
| C | Maxim Turret | Strong deployment value, though expensive and dependent on special ammunition |
This classification is situational. The Shotgun is excellent against a werewolf at close range, but the Electrocutioner may be nearly useless unless lightning is part of the encounter. Likewise, the Crucifix can delete a standard enemy, although it does not make every weapon in the inventory obsolete.
Dead Rails Best Guns for Combat Situations
The Dead Rails best gun changes with the distance between you and the threat. A player facing one distant outlaw needs precision, while a group entering a cramped train car rewards stopping power. Comparing those roles explains why a practical loadout matters more than defending one weapon as universally best.
Revolver and Navy Revolver
The standard Revolver offers 35 body damage and 50 headshot damage from a six-round cylinder. It costs $35 at the Gunsmith or three bonds in the lobby, so it is accessible even if a run begins without a strong weapon. It also teaches players the value of aiming because the headshot bonus can double the listed base damage.
The Navy Revolver improves on that foundation with approximately 50 body damage and 80 headshot damage from the same six-round capacity. It comes from Fort Constitution and world loot. Players who can secure it early gain a noticeable damage increase without accepting a more complicated weapon or rare-ammunition requirement.
| Comparison point | Revolver | Navy Revolver |
|---|---|---|
| Base damage | 35 | 50 |
| Headshot damage | 50 | 80 |
| Magazine | 6 | 6 |
| Acquisition | $35 Gunsmith purchase or 3 lobby bonds | Fort Constitution and world loot |
| Best moment | First reliable defense | Stronger defense after early exploration |
These revolvers remain excellent choices for players who favor measured, ammo-efficient fights. The Dead Rails enemy tier list can help match headshot-sensitive weapons to enemies with enough health to justify careful aim.
Rifle
The Rifle costs $75, holds six rounds, and has reported 60 body damage with 120 headshot damage. It is the strongest conventional option in the supplied community data when a headshot lands. At longer range, that doubled headshot value can remove a dangerous target with less ammunition than close-range weapons require.
Its limitation is accessibility and the cost of each attempt. A missed shot wastes one of only six rounds, and the purchase price may be too high for an early run. The Rifle therefore works best for players who can secure ammunition consistently, understand the weapon’s reach, and have time to line up precise shots.
Shotgun
The Shotgun costs $50, holds six shells, and fires a pellet pattern listed as 24 × 5 damage. Community field notes describe it as particularly strong against werewolves at close range. Five pellets make each shot useful against a large target, while the wide pattern can also discourage groups of smaller enemies from advancing.
Range is the important limitation. A Shotgun user who fires from too far away may get only one or two useful pellets, sharply reducing its practical output. The ideal user keeps it ready for an enemy entering a door, corridor, or train section, then uses cover to prevent the target from escaping.
Mauser C96
The Mauser C96 holds a 10-round magazine and deals approximately 40 damage. Its capacity makes it attractive for sustained encounters, but access is not dependable for every player. It can come through the Mauser gamepass or lucky world loot, so it should not be treated as a guaranteed early purchase.
This distinction matters when looking at dead rails all weapons. A strong weapon that never appears in your route offers less value than a reliable Revolver. Before planning around the C96, check the current run’s available resources and possible world drops. Community-reported figures are best treated as a baseline rather than a permanent guarantee.
Dead Rails Guns Compared by Role and Value
A complete dead rails gun tier list needs to account for what happens after the shot. Some options are easy to reload and feed, some require dedicated ammunition, and some are designed for one uncommon enemy type. The strongest role is the one you can actually operate when a train attack begins.
| Weapon | Damage profile | Ammo economy | Control difficulty | Tier |
|---|---|---|---|---|
| Revolver | Moderate body damage, useful headshots | Simple rounds; compact capacity | Easy | B |
| Navy Revolver | High body and headshot damage | Simple rounds; compact capacity | Easy | A |
| Rifle | Highest reported conventional headshot damage | Six rounds per load | Moderate | A |
| Shotgun | Five-pellet close-range burst | Six shells per load | Easy at close range | A |
| Mauser C96 | Moderate damage with larger capacity | Ten-round magazine | Easy | B |
| Electrocutioner | About 100 lightning damage | Recharges when struck by lightning | Depends on encounter | S |
| Crucifix | Contact-based instant kill on most entities | No conventional magazine | Easy to trigger, hard to acquire | S |
| Maxim Turret | Weapon-dependent sustained fire | Dedicated turret ammunition | Requires placement | C |
This table highlights a recurring rule: headshot efficiency improves the Revolver family and Rifle, while pellet count makes the Shotgun excellent at short range. A weapon can therefore deliver fewer listed body-damage points yet still be the better choice in the correct position.
Ammo Type Matters
The community notes divide normal ammunition into revolver rounds, rifle rounds, and shotgun shells. Carrying a reserve for the weapon you actually use prevents a common failure state: owning a strong gun but lacking the correct supply. Reserve capacity should match the six-round loaders on the Revolver, Navy Revolver, Rifle, and Shotgun.
The Maxim Turret adds another layer because it requires dedicated turret ammunition boxes. A player can spend $125 on the weapon and still lose its defensive value if those boxes are unavailable. Treat the purchase as a complete supply plan rather than an isolated weapon acquisition.
Headshots and Pellet Patterns
The supplied community testing reports 50 headshot damage for the Revolver, 80 for the Navy Revolver, and 120 for the Rifle. These figures explain why the Rifle ranks highly in the dead rails weapons rankings even though it is not described as a rapid-fire weapon. Each accurate shot has a major payoff, while a miss is expensive.
The Shotgun works differently. Its listed 24 × 5 pellet damage rewards positioning and short sightlines. Against a single werewolf, close range can create a decisive burst; against distant enemies, the same weapon may be mediocre. A Dead Rails best gun recommendation therefore depends on whether the player controls the engagement distance.
Dead Rails Best Weapon Picks for Every Player
No single Dead Rails best weapon fits every route. The strongest general-purpose pick is the Navy Revolver when it can be obtained early, because its reported headshot damage improves on the standard Revolver without changing the basic six-round format. When that model is unavailable, the Revolver remains the most dependable starting purchase.
Best General-Purpose Option
The Navy Revolver sits near the top of the dead rails best weapon list because it combines meaningful body damage, high headshot potential, and no special ammunition requirement. It is particularly useful for players who want a straightforward firearm rather than a special item tied to a narrow encounter.
The standard Revolver is a close second in practical terms. Its three-bond lobby price and $35 shop price make it much easier to acquire. If a run ends before you find the Navy Revolver, having a Revolver is more valuable than carrying an empty slot reserved for a rare gun.
Best Close-Range Option
The Shotgun is the preferred option when enemies must be stopped at arm’s length. Six shells provide several chances to land the full five-pellet pattern, and a 24-damage value per pellet can produce 120 total damage against an overlapping target. It is especially effective against a werewolf, according to community field notes.
Its weakness is equally clear: short engagement distance. Keep the Shotgun equipped when moving through cars, stations, and narrow tunnels, then switch to a precision firearm when the route opens into a long exterior stretch. A mixed loadout can preserve the benefits of both without treating one gun as a complete solution.
Best Special-Weapon Option
The Electrocutioner stands apart in the dead rails weapon tier list because it deals about 100 lightning damage and recharges when struck by lightning. The Tesla Lab is its reported location. That combination makes it excellent in lightning conditions and potentially weak elsewhere, so confirmation of a relevant route or encounter matters.
The Crucifix has an even higher potential payoff because it instantly kills most entities on contact. Community reports specifically mention deleting a werewolf or Tesla coil. Its single-purpose lethality makes it invaluable in a crisis, but it does not provide the repeated utility of a firearm, and the game’s most dangerous encounters may not reward contact at all.
Best Defensive Deployment
The Maxim Turret can create a protected firing point, but it is not automatically the Dead Rails best gun. Its $125 price and dedicated ammo requirement make it a deliberate base-building investment. The value improves when the player controls an area, can protect the device, and has a reliable source of turret ammunition.
For broader information about cost and access, the Dead Rails gun prices and weapon locations guide complements this comparison by focusing on where weapons can be obtained and what budget requirements may apply. That distinction matters during a run: a stronger rifle is a poor defensive choice if its ammunition is too expensive to replace, while a common weapon can be more effective when its ammo supply fits the player’s budget. Comparing the listed price, expected damage, and likely ammunition cost helps determine whether a weapon is a practical upgrade or merely a higher-tier option that drains resources faster.
Special Weapons and Acquisition Priorities
Special equipment can outperform a standard gun, but only when the route supports its acquisition. The Electrocutioner, Crucifix, and Maxim Turret should therefore be treated as route-dependent choices rather than mandatory shopping goals. Saving bonds for a specific item often means choosing between a guaranteed weapon and a possible advantage.
Prioritization Checklist
-
Buy the Revolver if you need immediate protection and cannot locate the Navy Revolver.
-
Secure the Navy Revolver through Fort Constitution or world loot for stronger conventional damage.
-
Save for the Rifle when long-range headshots fit the route and ammunition is reliable.
-
Carry the Shotgun when narrow spaces and werewolves are the main concern.
-
Treat the Mauser C96 as a bonus unless the gamepass or world-drop opportunity is confirmed.
-
Pursue the Electrocutioner only when the Tesla Lab and useful lightning conditions align.
-
Keep the Crucifix for emergency contact kills rather than ordinary target practice.
-
Purchase the Maxim Turret only after budgeting both its price and dedicated ammunition.
Route Planning Over Constant Shopping
Dead rails all weapons are not equally accessible during a single run. A route that passes Fort Constitution creates Navy Revolver options, while one that reaches the Tesla Lab opens a different special-weapon path. Check destinations before committing your entire budget to ammunition or a turret.
The Dead Rails Ray Rifle overview explores one of the game's unconventional ranged options and how unusual weapons fit into broader farming routes. Comparing those mechanics with the standard firearms makes it easier to decide when experimentation is worth the time and inventory space.
Loadout and Ammo Planning for Dead Rails Weapons
A strong weapon becomes much more effective when the rest of the loadout supports it. The central decision is how to divide limited carrying space among a primary firearm, a close-range option, ammunition for each, and at least one special item. The best answer changes as soon as the train enters a different combat situation.
Recommended Loadout Patterns
| Player situation | Primary option | Secondary option | Ammo planning |
|---|---|---|---|
| Early run with low funds | Revolver | Keep money for later upgrades | Carry revolver rounds only |
| Fort Constitution route | Navy Revolver | Revolver for backup | Prioritize matching revolver ammunition |
| Long outdoor sections | Rifle | Navy Revolver | Keep enough rounds for precise shots |
| Train and tunnel defense | Shotgun | Navy Revolver | Maintain shells plus a small rifle reserve |
| Lightning-focused route | Electrocutioner | Revolver | Carry backup rounds in case recharge conditions fail |
| Fortified defense | Maxim Turret | Any reliable firearm | Bring dedicated turret ammo and personal defense rounds |
Players who prefer a single weapon can still improve consistency by learning its weak range. A Rifle user should prioritize safe firing lanes, while a Shotgun user should protect the doorway and avoid unnecessary shots. This minimizes wasted ammunition without requiring a complicated inventory.
Use Headshots Without Emptying the Cylinder
The Revolver’s headshot value rises from 35 body damage to 50, and the Navy Revolver rises from 50 to 80. These increases are meaningful against enemies with enough health to survive several body shots, particularly the reported 300–500 health range for some werewolves, although that estimate should be checked against the current version.
Avoid holding the trigger against moving targets when accuracy is poor. One clean Rifle headshot can reach 120 damage, but missing a six-round load can leave the player exposed. The best ammo strategy preserves emergency shots for dangerous enemies rather than spending everything on a routine target.
Keep One Backup Plan
Even a specialized weapon should have a backup. Players using the Electrocutioner still need a normal gun if lightning fails to trigger a recharge. Players carrying a Crucifix need distance for enemies that survive contact, and turret users must remain mobile if the device is destroyed. A dependable Revolver is inexpensive insurance against those moments.
| Risk | Failure case | Simple backup |
|---|---|---|
| Electrocutioner | No recharge opportunity | Revolver with spare rounds |
| Crucifix | Enemy survives or contact is unsafe | Navy Revolver or Rifle |
| Shotgun | Target remains at long range | Rifle with accurate aim |
| Rifle | Ammo runs dry | Revolver for close defense |
| Maxim Turret | Ammo box or placement is lost | Personal-use firearm |
Dead Rails Weapon Tier List and Final Recommendations
The completed dead rails gun tier list places Electrocutioner and Crucifix in S-tier for their exceptional effects, while the Rifle, Shotgun, and Navy Revolver form a strong A-tier group. The Revolver and Mauser C96 remain practical B-tier choices because access and ammunition availability influence their real value more than their core damage.
Final Ranking by Use Case
| Rank | Pick | Reason |
|---|---|---|
| 1 | Navy Revolver | Strong body and headshot damage with a simple six-round format |
| 2 | Rifle | Best reported conventional headshot damage and strong outdoor performance |
| 3 | Shotgun | Exceptional five-pellet burst at close range |
| 4 | Revolver | Best accessibility, affordable ammunition, and useful headshots |
| 5 | Electrocutioner | About 100 lightning damage and recharge potential in the right encounter |
| 6 | Mauser C96 | Ten-round capacity and 40 damage when access is reliable |
| 7 | Crucifix | Instant contact kill against most entities as an emergency tool |
| 8 | Maxim Turret | Valuable area defense with dedicated ammunition and a high total cost |
This list is not a claim that one purchase solves every encounter. The Dead Rails best weapon for an ordinary run is the Navy Revolver or Rifle, while the Shotgun can outperform both in a confined space. The dead rails weapons that define memorable runs are often the special tools, but their route requirements make them less dependable than the standard arsenal.
A practical final choice depends on availability, range, and ammunition. Buy the Revolver when you need a gun immediately, upgrade to the Navy Revolver or Rifle when you can, and carry the Shotgun when enemies will come close. Save the Electrocutioner, Crucifix, and Maxim Turret for routes and situations that reward their unique functions rather than treating them as mandatory shopping-list items.
Frequently Asked Questions
What is the Dead Rails best weapon for beginners?
The Revolver is the most accessible starting choice because it costs $35 at the Gunsmith or three bonds in the lobby. Its six-round capacity is easy to manage, and the reported 50 headshot damage makes accurate aim valuable. The Navy Revolver becomes a stronger alternative once players can reach Fort Constitution or find one as world loot.
Which Dead Rails best gun has the highest headshot damage?
The Rifle leads the reported conventional firearm figures with 120 headshot damage and 60 base damage. Its six-round capacity makes accuracy important, so it works best when players have room to aim. The Navy Revolver offers 80 headshot damage and may be more practical in close quarters.
Is the Shotgun stronger than the Rifle in Dead Rails?
The Shotgun is stronger when enemies are very close because it fires a five-pellet pattern listed at 24 damage per pellet. The Rifle is usually better at range because its reported 120 headshot damage rewards precision. Weapon value therefore depends more on encounter distance than on a single raw damage number.
Are the Electrocutioner and Crucifix worth using?
Both can exceed ordinary firearm performance when their conditions are met. The Electrocutioner deals about 100 lightning damage and recharges after a lightning strike, while the Crucifix instantly kills most entities on contact. Their access and situational limitations make them powerful supplements rather than guaranteed replacements for a dependable gun.
How should players choose among Dead Rails all weapons?
Choose based on access, ammunition, and the threats likely on the route. The Revolver is broadly useful, the Navy Revolver improves conventional damage, the Rifle favors precision, and the Shotgun controls close spaces. For broader route planning, compare the Dead Rails train list with the weapon destinations available along that route.