
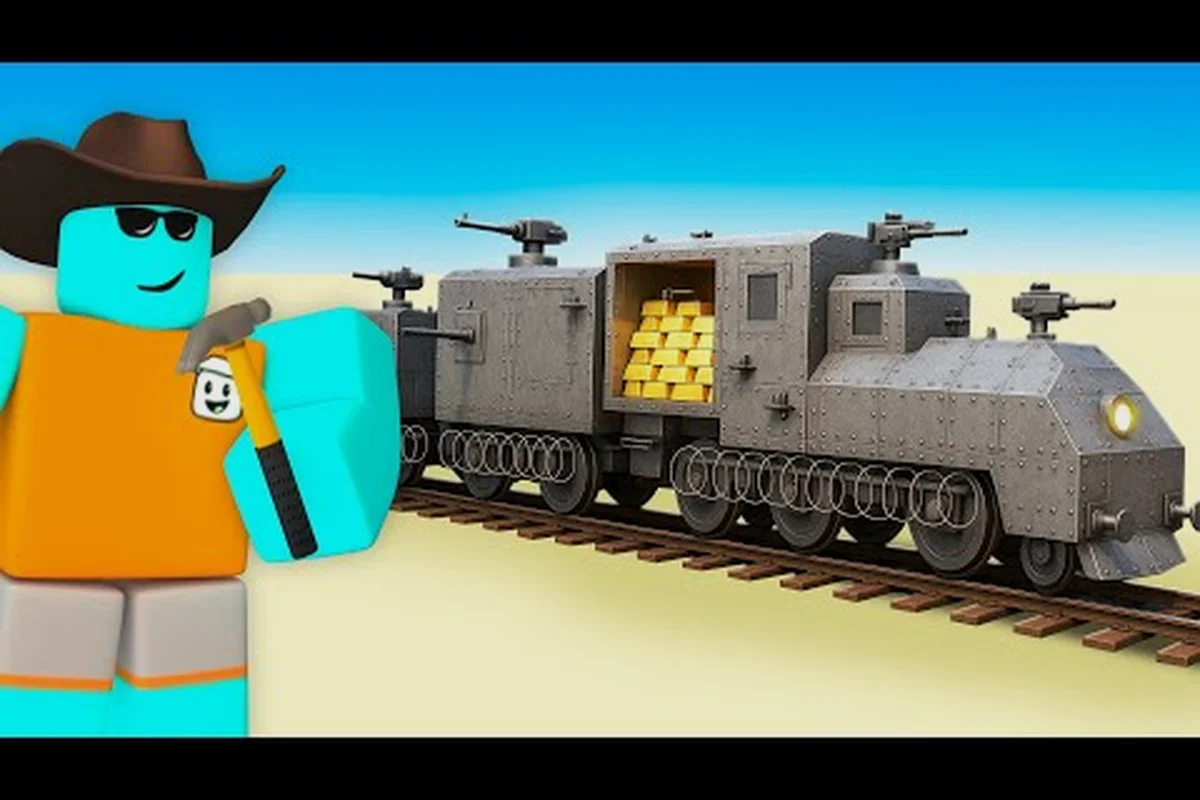
Dead rails train armor can turn a fragile carriage into a mobile fortress, but every defensive upgrade changes speed, handling, and fuel use. The right balance depends on whether you are crossing open country or preparing for sustained fire at a fort or boss encounter.
Dead Rails Train Armor Choices and Tradeoffs
The most useful dead rails train armor setup is not the one with the most protection. It is the build that gives your crew enough time to repair the train, return fire, and keep moving without wasting resources on empty stretches of track. A armored train can absorb outlaw gunfire, yet that added weight produces a noticeable speed cost, according to community gameplay references.
That tradeoff makes dead rails train defense a route-planning problem rather than a shopping decision. You need to decide which threats matter, how long you expect to remain in a fight, and whether the train can still escape after the shooting starts.
| Build priority | Recommended defense | Main advantage | Main drawback |
|---|---|---|---|
| Fast travel | Light fortification | Preserves speed and fuel efficiency | Limited protection during long fights |
| Balanced travel | Metal sheets | Covers vulnerable openings | Adds weight and slows the train |
| Roadblock defense | Barbed wire | Makes boarding or doorway access harder | Does not provide broad armor coverage |
| Boss preparation | Turret | Adds automated fire against attackers | Requires space, resources, and careful placement |
| Maximum survival | Combined defense layers | Covers several attack vectors at once | Highest speed penalty and resource cost |
The table makes the central decision visible: protection is valuable only when it solves a problem the crew will actually encounter. A lighter train may travel farther between fuel stops, while a heavily fortified train can be better suited to a difficult route or a planned fight.
Identify the Threat Before Buying Protection
Outlaw gunfire, boarding attempts, and stationary assaults do not require identical defenses. Metal plating handles projectiles striking windows, doors, and exposed sections of the train. Barbed wire is more useful when enemies need to approach a doorway or attempt to board. A turret supplies offensive pressure, which may matter more than adding another passive layer when attackers can approach indefinitely.
Before selecting a dead rails train fortify loadout, ask what the crew can actually repair during the encounter. A weapon that supports a nearby fighter, such as the bolt-action rifle equipment guide, may provide more practical value than a small amount of extra plating if the train is already difficult to escape.
A useful evaluation has three parts: the likely attack route, the crew’s repair capability, and the train’s fallback plan if a defense fails. For example, metal sheet train armor is strongest against gunfire entering exposed windows and doors, while barbed wire train defenses punish boarding attempts at a designated access point. A train turret can cover a persistent approach, but only if its arc, ammunition supply, and crew position are practical. A balanced dead rails train fortify loadout should preserve mobility rather than turning the locomotive into a stationary bunker that attackers can surround.
-
Attack coverage: Does the build address the likely attack route?
-
Recovery time: Can the crew repair damage before the next impact?
-
Escape ability: Will the train remain mobile if the defense fails?
This approach avoids spending precious inventory space on defenses that do not match the route. For example, if a locomotive is raiding an exposed rail yard and the crew can dodge incoming fire, metal sheet train armor may be less valuable than a barbed wire train defense placed around a single boarding point. Likewise, reserving train turret slots for a confirmed enemy approach is stronger than treating maximum dead rails train armor as automatically superior, because a stationary turret with a poor firing arc consumes equipment without improving the crew’s escape options.
Start With a Lightweight Baseline
A useful baseline includes a reliable weapon, a modest supply of repair materials, and only the fortification needed for the next expected engagement. This gives the crew a chance to respond before investing in heavier components. It also leaves room to add one specialized upgrade after the player learns how the train handles under load.
Community reports consistently favor flexible defense over a permanent maximum-armor configuration. Speed-sensitive sections favor a lighter carriage, while fort approach zones justify reinforced windows and doors. This is a practical rule of thumb rather than a fixed stat, because balance can change with updates and the selected locomotive.
Metal Sheets and Barbed Wire for Train Defense
Metal sheets and barbed wire solve different parts of the defense problem. Metal sheet train upgrades create a physical barrier against bullets, whereas barbed wire train obstacles discourage access to doorways. Treating them as interchangeable leads to poor resource allocation, especially when every added component reduces efficiency.
Community field notes describe metal sheets covering windows and doors, while barbed wire blocks entrances. The same notes note that armor slows the train, which explains why many crews remove or avoid plating for faster travel and restore their defense before a difficult encounter.
Compare Passive Fortification Layers
| Characteristic | Metal sheet train defense | Barbed wire train defense | Combined use |
|---|---|---|---|
| Primary role | Stops or reduces incoming gunfire | Discourages doorway access and boarding | Covers both projectiles and entry points |
| Best location | Windows, doors, exposed panels | Doorways, boarding points, access routes | Vulnerable openings and entrances |
| Speed impact | More noticeable as coverage expands | Depends on the amount installed | Highest cost in handling efficiency |
| Best use | Open-country firefights and boss routes | Camps, forts, and crowded encounters | High-danger routes with repair support |
| Main limitation | Weight and reduced maneuverability | Narrow defensive purpose | Resource demand and repair planning |
Layered openings provide stronger coverage than spreading a small amount of material across every carriage. Covering the cabin entrance and a frequently damaged window usually creates a more coherent defensive shell than adding minor protection to an area the crew does not use.
Metal sheets remain valuable when enemies fire from a distance. They reduce the need for passengers to remain behind a single barricaded point, and they can preserve mobility within the train. Barbed wire, by contrast, rewards players who identify where access attempts will happen. Its value rises around a door that must remain usable but should be difficult to enter unexpectedly.
A Fortification Sequence for Normal Routes
-
Map the likely approach: Mark doorways, exposed windows, and sections where the train may stop.
-
Choose one vulnerable opening: Protect the first location the crew must pass when boarding the train.
-
Reserve repair supplies: Keep enough resources to recover from mistakes instead of treating armor as invulnerability.
-
Add speed protection: Use lighter coverage on open routes where enemies rarely board.
-
Recheck before the fight: Confirm that the train can still move when its full defensive load is installed.
This sequence creates a stronger dead rails train fortify plan because it treats boarding access and departure as one defensive problem rather than separate hazards. For example, a crew can stage dead rails metal sheet train panels around the first doorway while leaving a narrow passage for movement, then add dead rails barbed wire train coverage along the roof only where enemies can grab on. Coordinating attack protection with escape space also prevents the train from becoming trapped inside its own armor, while staged upgrades let the crew add a dead rails train turret after mobility, visibility, and route timing are confirmed.
Where Barbed Wire Loses Its Advantage
Barbed wire is poor protection against a sniper positioned far from the carriage. It cannot cover an exposed panel, and it does not replace a working weapon. If the enemy only needs to shoot, the barrier around a doorway may never be reached, making that installation less valuable than a turret or additional metal coverage.
It is also less effective when the train barely moves. Some enemies may simply wait, and a crew trapped in a slow-moving target can suffer repeated attacks without reaching the barricade. A nearby weapon, repair action, or emergency escape plan may therefore be more important than another layer of wire.
Doorway denial is the best reason to use barbed wire. When the crew expects a boarding attempt, it can turn a vulnerable entrance into a costly route. When the threat is only gunfire, metal sheets or a stronger weapon generally produce a more direct return on investment.
Dead Rails Train Turret Placement and Weapon Support
A turret changes the character of a defense because it contributes active fire rather than passive resistance. Dead rails train turret setups are most valuable when attackers remain in range long enough for automated weapons to matter. They can reduce pressure on the driver and create opportunities for the crew to repair the train, but they also require room, resources, and a clear firing lane.
The community gameplay reference used for this guide is a Dead Rails train armor gameplay video. It can help players visualize train layouts, although current builds should be checked before copying a route because balance and availability may change after patches.
Turret vs. Sheet Coverage
| Question | Turret answer | Metal sheet answer |
|---|---|---|
| What does it improve? | Offensive pressure and crew safety | Passive damage protection |
| Which threat does it counter? | Enemies approaching or holding position | Bullets striking exposed areas |
| What can limit it? | Firing space, aim, ammunition, and placement | Speed and material weight |
| Best encounter stage | Before or during an approaching attack | Immediately upon taking fire |
| Crew action required | Monitor targets and protect the weapon | Repair damaged sections |
| Strong pairing | Metal sheets around the firing position | A turret covering exposed approaches |
The best build usually assigns each component a clear job. Turret coverage handles approaching enemies, while sheet coverage protects the crew and the weapon platform. Treating the turret as a replacement for armor leaves it vulnerable before it can create useful pressure.
Placement matters as much as acquisition. A turret blocked by a carriage, aimed into a wall, or placed where a boarding enemy can attack immediately is much less effective than one with a clean field of view. The crew should also avoid placing every defense around the same doorway, because that creates one overloaded failure point.
A Practical Turret Defense Sequence
-
Secure the firing position: Protect the section containing the automated weapon before combat starts.
-
Clear nearby obstructions: Keep the firing lane available to mounted and on-foot crew members.
-
Add one access barrier: Use barbed wire where enemies could reach the turret without passing through a protected opening.
-
Reserve fuel and repair space: A defensive train still needs enough power and materials to leave the encounter.
-
Test the approach: Watch where enemies gather before adding more armor around the same area.
Turret and fort combinations reward deliberate positioning. Before adding a heavier gun, players may want to compare it with the broader options in the Dead Rails cannon overview, since projectile behavior and firing space can influence whether the turret fits the route.
Pair Defense With Crew Equipment
Armor cannot shoot, repair itself, or choose a better route. A dead rails train defense plan should therefore pair passive protection with weapons that the crew can carry into exposed positions. The vampire knife equipment reference covers a close-range option that may help when boarding enemies reach the carriage.
Melee weapons are particularly useful around a fortified entrance, where enemies must approach closely and the train’s speed can limit escape options. Ranged equipment offers a different advantage: it allows a crew member to cover an exposed position without standing directly beside it.
The best combination depends on enemy behavior: give a stationary train strong metal sheet armor, a protected turret position, and enough barbed wire to delay boarders, but preserve mobility if ambushes are frequent. A practical setup is to use the carriage’s armored sides as cover for crew-operated weapons while keeping a clear escape route toward the locomotive and fuel supply; otherwise, a turret may stop a group without preventing enemies from surrounding the train.
-
Distant shooters: Emphasize metal coverage and a usable turret lane.
-
Fast boarders: Emphasize barbed wire, a protected doorway, and close-range weapons.
-
Large groups: Emphasize turret pressure and a reserve of repair materials.
-
Repeated ambushes: Emphasize mobility, because a durable train still loses if it cannot escape or reach fuel.
Best Train Armor Build by Journey Stage
The strongest dead rails train armor build changes as the journey develops. Early travel demands efficiency because resources and familiarity are limited. Mid-route encounters reward balanced protection. The final stretch may justify a heavily fortified train, provided the crew can still manage speed, fuel, and repair costs.
There is no single universally optimal setup, so evaluate the train armor around three stage-specific factors: incoming damage that can be absorbed, response time before attackers reach the locomotive, and crew mobility after repairs. A front-facing metal sheet plate can trade protection for a larger turning radius, while a turret and barbed wire improve defense but may slow the train. Likewise, keeping fuel and repair supplies in reserve is more useful than maximum armor if a damaged engine can still limp forward.
| Journey stage | Armor balance | Suggested build | Reasoning |
|---|---|---|---|
| Early expedition | Light | A few sheets, basic weapon, repair reserve | Learns fuel use and train handling without wasting resources |
| Mid-route exploration | Moderate | Sheet coverage plus one access barrier | Handles mixed encounters while retaining reasonable mobility |
| Fort or boss approach | Heavy | Expanded sheets, wire, turret coverage | Prepares for concentrated and sustained fire |
| Escape after a boss | Speed focused | Reduced defense if the fight is won | Prevents a slow, damaged train from becoming trapped |
| High-value cargo run | Balanced and adaptive | Protection matched to expected road conditions | Protects the reward without making every mile costly |
Early Journey: Protect Without Overbuilding
Early players should prioritize a weapon and basic repair supplies before committing to every available defense slot. A small amount of metal sheet train coverage around the main entrance is usually more manageable than a complete fortress. The crew can learn where damage occurs and expand from actual experience.
The main risk is building around imagined threats. Spending heavily before understanding the route may leave the player with a slow train, low reserves, and a defense positioned in the wrong place. Keeping the build modest also makes later changes less expensive.
Mid-Journey: Balance Protection and Maneuvering
The mid-route stage is where the most common dead rails train fortify mistakes become costly. Players add one part for every visible weakness, but forget that the train’s speed affects fuel use, enemy approach, and escape options. A balanced build covers the cabin and most-used entrance while leaving handling available.
One specialized defense is enough for many routes. That could be additional metal coverage against gunmen or a turret against grouped attackers. It should be selected from observed threats rather than installed because it appeared strong in a general build list.
Boss Routes: Prepare for Sustained Fire
Boss areas reward preparation because enemies can remain near the train and repeatedly test the same defenses. Community notes recommend re-arming after speed sections and before a fort or boss fight. This supports a planned transition: travel lightly, stop in a safe location, add sheets and wire, position the turret, and repair existing damage.
Before the fight, check the route beyond the arena. Even a successful defense leaves the crew facing a damaged train. If the next section is long or fuel-intensive, excessive armor may turn a narrow victory into a failure farther down the track.
When to Remove Armor
Removing armor is not a defeat; it is a routing decision. Tactical stripping can restore speed after a fight, during a safe stretch, or when the next objective emphasizes travel time. The crew should remove only what is no longer needed rather than stripping the train by default.
This matters because armor is a continuous cost while active, whereas a fort or boss encounter has a defined duration. A balanced player protects the train where protection has a measurable benefit and keeps it lean elsewhere. This is the most reliable way to make dead rails train defense sustainable across an entire run.
Fuel, Repair Planning, and Defensive Overbuild
Armor competes with fuel, repair supplies, and cargo space. The stove can burn coal, wood, paper, and furniture, with coal generally treated as the most efficient common fuel in community reports. Since speed affects how quickly the train consumes fuel, heavy armor can increase the cost of a journey even before the first enemy appears.
Community estimates for coal needed to reach 80 km vary with train speed and driver efficiency, so no single reserve works for every setup. The sensible approach is to carry a margin, measure actual consumption, and adjust after a few legs of the route.
Resource Budget for a Fortified Journey
| Resource | Fortification effect | How to manage it | Common overbuild mistake |
|---|---|---|---|
| Fuel | Heavy armor reduces speed, increasing travel time and fuel use | Carry a reserve and record consumption per leg | Assuming coal cost stays constant at every speed |
| Repair materials | Sheets and equipment take damage during attacks | Keep materials for the most exposed sections | Treating every component as equally vulnerable |
| Weapon ammunition | Turrets and crew weapons consume supplies during fights | Match ammunition to expected enemy count | Overbuilding defense while understocking ammunition |
| Cargo capacity | Armor and barriers occupy usable room | Protect the cabin first, then valuable storage | Reinforcing areas the crew rarely enters |
| Crew attention | Multiple systems require monitoring during combat | Assign someone to the turret or repairs | Giving one person too many critical duties |
The most damaging overbuild is often not visible on the train. It is the missing repair reserve, depleted fuel supply, or exhausted ammunition that leaves a well-armored carriage unable to continue. A strong build plan records these indirect costs before the crew leaves a safe location.
Estimate the True Cost of Protection
A practical comparison should include more than defense strength. Consider travel speed, expected fuel use, likely repair frequency, and the importance of the cargo being protected. A high-value cargo train can justify heavier protection than a scouting run, while a mobile scouting train benefits from lighter defense.
Players can use a simple three-route estimate: open travel, settlement crossing, and fort or boss zone. For a typical run, assign light protection to open travel, moderate coverage for settlement crossings, and heavy armor or turret support for high-threat zones, then adjust the loadout from remaining reserves after repairs. This keeps the dead rails train armor decision proportional to expected danger while preserving speed, fuel, and the ability to retreat.
| Planned segment | Expected threat | Protection level | Operational priority |
|---|---|---|---|
| Open travel | Low | Light | Preserve speed and fuel |
| Settlement crossing | Medium | Moderate | Cover doors and windows |
| Fort or boss zone | High | Heavy | Maximize survivability |
| Post-fight escape | Uncertain | Adjust after repairs | Restore mobility |
| Return journey | Variable | Reassess from reserves | Avoid ending the run stranded |
This route-based method keeps protection decisions tied to the train’s next segment rather than spreading fuel, repairs, and build space evenly across the whole trip. For example, reserve metal sheet train armor and barbed wire train defense for a fort or boss zone, where blocked approaches and turret support justify the added mass. For a settlement crossing, prioritize covered doors and windows, then remove vulnerable fittings before open travel so speed and fuel use stay viable. This makes the dead rails train fortify decision easier to justify: every component should answer a specific threat, while preserving enough movement to escape or reach the next route objective.
Build a Repair and Retreat Plan
A repair plan identifies who fixes damage, where materials are stored, and when the crew abandons a bad position. This is especially important for a train because enemies can target both passengers and the engine. A stationary crew may patch one window while another section fails, creating a cycle of repair that never ends.
A repair rotation assigns one person to monitor the engine, one to handle opponents, and another to repair the most vulnerable opening. Solo and small crews can simplify this by prioritizing immediate fire and the most important structural weakness. A turret helps because it buys time, but it should never distract the driver from maintaining movement or fuel.
If a damaged train can no longer move, escape options become secondary because a stationary train remains an easy target for enemies attacking the engine, carriages, and passengers. Repair mobility first, such as restoring the engine, fuel supply, or damaged running gear, before adding cosmetic protection to a carriage that is rarely shot. For example, if a metal sheet train has suffered fire damage, prioritize a usable engine path and keep the turret functional; cosmetic plating should come only after the crew can relocate, evade, or reach a safer route.
Frequently Asked Questions
Is full train armor better than a lightweight defense?
Not always. Full armor improves survival against gunfire, but the added weight reduces speed and can increase fuel use. A lightweight build preserves travel efficiency, while heavy protection is more valuable during forts, boss fights, and routes with frequent attacks.
Should metal sheets and barbed wire be used together?
Yes, when they cover different weaknesses. A metal sheet train can shield exposed windows, doors, and weak panels from gunfire, while barbed wire blocks doorway boarding and slows attackers attempting to reach the crew. Using both is strongest against mixed threats: keep metal sheet over vulnerable openings, reserve barbed wire for accessible entrances, and avoid adding so much coverage that speed and coal efficiency suffer.
Where should a dead rails train turret be placed?
Place it where it has a clear firing lane and is not surrounded by avoidable obstructions. Protect the turret section with metal coverage, keep nearby paths usable by the crew, and leave enough space to repair or service the weapon during combat.
Is dead rails train defense worth the lost speed?
It is worth the cost when sustained attacks are likely or the train carries valuable cargo. Before a long travel section, removing unnecessary protection can restore mobility. Before a known fort or boss encounter, reapplying armor usually offers better odds than trying to outrun repeated fire.
How should beginners balance train fortification and fuel?
Begin with one important opening, a working weapon, and a fuel reserve. Add specialized protection after observing the route. Community estimates for coal use to cover 80 km vary with speed and driver efficiency, so record actual consumption rather than relying on a fixed amount.