
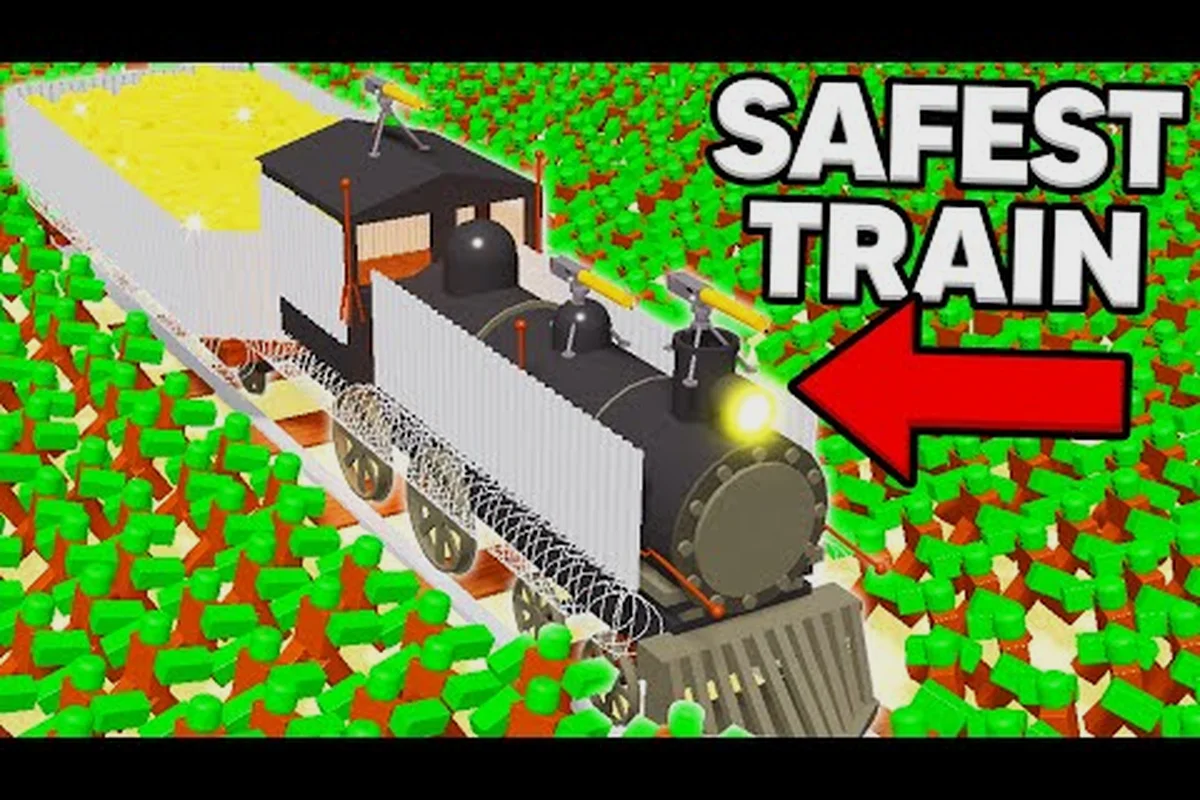
A strong Dead Rails train build protects the crew, preserves coal, and avoids turning a dependable locomotive into a slow target. Learn which carriage, fuel, and defense choices work together.
Dead Rails Train Build Core Priorities
A useful Dead Rails train build balances four linked systems: propulsion, fuel capacity, passenger or cargo space, and protection from outlaws. Because armor adds weight and extra structures increase demand, the best configuration depends on the route, crew size, and expected encounters rather than one universal recipe.
The Default Train is the free starting option, with a driver’s cabin and one empty carriage. That carriage can carry coal, passengers, or defensive equipment, but every addition changes the train’s behavior. The Cattle Car provides additional carriage space and is especially useful for separating supplies from the locomotive.
A community walkthrough of Dead Rails train build gameplay video shows that fourteen locomotives were available at the time of that reference, with different compromises involving speed, cargo capacity, or armor. Because train availability and balance can change after patches, check the current in-game selection before committing bonds.
| Build priority | Main benefit | Main drawback | Best for |
|---|---|---|---|
| Light rail | High speed and easier acceleration | Less protection and storage | Fast early routes |
| Coal carrier | Long travel capacity | Slower and less defensive | Long-distance expeditions |
| Armored rail | Better survival against gunfire | Noticeable speed cost | Dangerous routes and forts |
| Cargo-heavy rail | More room for valuables | Higher fuel demand | Collecting and transporting loot |
Start with the locomotive that fits your route rather than assuming the largest train is the strongest. A fuel reserve, a clear path, and a crew that agrees on driving priorities are more valuable than additional decoration.
Selecting the Dead Rails Default Train and Cattle Car
The Dead Rails Default Train works well as a teaching platform because it gives players room to learn the stove, track, obstacles, and fuel economy without locking them into an expensive purchase. Its empty carriage is not wasted space; it is the foundation around which a practical Dead Rails train build takes shape.
For a new player, retain the starter train until you understand how coal consumption changes with speed, cargo weight, and terrain. Buying a different locomotive before learning those relationships can leave a crew with a fast train that runs dry or a heavy train that cannot escape a threat. The overview of Dead Rails trains can help narrow the choice by comparing speed, cargo space, and protection.
| Early configuration | Carriage use | Fuel plan | Defensive plan |
|---|---|---|---|
| Default Train | Coal plus personal supplies | Keep a small emergency reserve | Collect materials before upgrading |
| Default Train with extra cargo | Valuables and collected scrap | Reserve coal for return travel | Use portable equipment |
| Default Train for co-op | Passengers and shared supplies | Assign a fuel handler | Keep one carriage accessible for defense |
The Dead Rails Cattle Car is valuable when you need more usable capacity than the Default Train offers. It can help a crew separate passengers from fuel or carry additional building materials without filling every available slot with the same type of item. That organization reduces the chance that one damaged carriage leaves the locomotive with nothing useful.
When the Default Train Is Enough
The Default Train remains a strong choice for short outings, early learning, and routes where speed matters more than maximum protection. It also gives you a practical baseline: every later purchase should solve a problem the starter configuration actually creates.
A useful test involves tracking the number of refills, the time spent managing the stove, and whether crew members can move around during an attack. If the train routinely runs short of fuel, prioritize capacity. If it survives but takes too long to clear threats, invest in defense. If it remains stable, save for a better locomotive rather than making an unnecessary early purchase.
When the Cattle Car Adds Value
The Dead Rails cattle car train arrangement becomes attractive when passengers, coal, and scrap all compete for the same limited space. A separate carriage prevents cargo from blocking access to the stove and gives the crew a clear place to organize supplies.
Player reports emphasize that organization matters during long journeys because clutter slows decision-making. Keep coal where a crew member can retrieve it quickly, place fragile or valuable items away from the most exposed end, and leave enough room to move during an emergency. If weapons are competing for budget, the Dead Rails gun price guide can help prioritize early firearm purchases.
Fuel, Coal Storage, and Route Planning
Coal is the most efficient commonly reported fuel, although wood, paper, and furniture can also feed the stove. The exact amount required for a journey varies with train speed, route length, cargo weight, and driver efficiency, so a single fixed coal number is less useful than maintaining a reserve.
Community estimates for coal needed to travel roughly 80 kilometers differ between players. Treat that distance as a planning reference rather than a guaranteed requirement, because the same train can consume fuel very differently depending on how aggressively it is driven. Slower pacing around obstacles and deliberate fueling stops usually create a more controlled journey.
| Fuel decision | Advantage | Risk | Recommended action |
|---|---|---|---|
| Carry a large coal reserve | Fewer emergency refills | Slower acceleration and higher weight | Use on long routes |
| Carry a light reserve | Better speed and handling | More stops if problems occur | Use on short routes |
| Use mixed fuel | Covers temporary shortages | Lower efficiency than coal | Keep only as backup |
| Refuel whenever possible | Prevents stove failure | May waste coal or time | Do not wait for a critical warning |
| Assign one fuel handler | Fewer conflicting actions | Relies on communication | Keep a shared emergency stock |
The practical answer to Dead Rails how to upgrade the train is not always “add more coal.” Increasing the fuel reserve is valuable only if the carriage has secure, reachable storage. Dedicated coal storage lets the crew estimate its supply, protects the reserve from collisions, and makes it less likely that a passenger or loose item will block the stove.
Build a Reserve Before a Long Route
A dependable build carries enough coal for the planned journey and a backup for delays. Obstacles, night spawns, and mistakes can add distance that was not part of the original estimate. Two smaller fuel reserves are often easier to manage than one pile hidden beneath other supplies.
Before departing, designate a primary coal pile and an emergency reserve. The primary pile feeds normal travel, while the reserve remains untouched until the driver or fuel handler calls for it. This simple system reduces confusion when the train slows near an obstacle and the stove needs immediate attention.
Troubleshoot a Stalled Train
A stopped train does not always mean the locomotive is broken. The common causes are an empty stove, a blocked track, or a driver error. Inspect those three elements in that order because a fuel issue is easy to confirm and a track obstruction may require the crew to leave the safety of the train.
| Symptom | Likely cause | Immediate response | Preventive improvement |
|---|---|---|---|
| Train slows suddenly | Fuel running low | Add coal and resume carefully | Maintain an emergency reserve |
| Train cannot move | Track obstruction | Clear debris ahead of the locomotive | Watch farther down the line |
| Wrong movement pattern | Driver input conflict | Assign one driver | Clarify crew roles |
| Slow acceleration | Excess cargo weight | Reduce or redistribute cargo | Separate heavy supplies |
| Sudden course change | Steering error | Correct the heading | Keep the route visible |
Regular fuel checks should occur before obstacles and after major confrontations, not only when the stove warning appears. This is particularly important in co-op play, where two players may both attempt to manage the same system. The Dead Rails items reference can help identify useful fuel and storage materials without making assumptions about values that may change.
Armoring Doors, Windows, and Turrets
Metal sheets cover windows and doors, while barbed wire blocks entrances. Turrets add automated fire, giving the crew a way to return fire while it handles the locomotive. These upgrades improve survivability, but community reports consistently note that armor reduces speed, so every plate has an operational cost.
The best armored configuration protects access points first. A door or window that allows bullets or hostile figures to enter can defeat the purpose of otherwise strong plating. Turrets then reinforce those protected approaches without requiring every crew member to abandon a vital job.
| Protection option | Main function | Speed impact | Best placement |
|---|---|---|---|
| Metal window covering | Reduces exposed openings | Moderate | Passenger and cabin windows |
| Metal door covering | Protects an entrance | Moderate | Most frequently used doors |
| Barbed wire | Slows entry through a doorway | Low to moderate | Chokepoint-style entrances |
| Turret | Fires automatically at attackers | Adds weight and demand | Facing a predictable approach |
| Light armor package | Preserves speed | Lower | Open routes and early travel |
| Heavy armor package | Improves resistance | Highest | Forts, boss routes, and crowded areas |
A good Dead Rails train build often uses layered defense rather than maximum defense everywhere. Cover the main doors, protect the cabin, place one turret on the most exposed side, and leave a lighter option for stretches where speed determines survival.
Remove Armor for Speed Sections
Armor is valuable when the train is under sustained fire, but speed matters more when escaping, searching for a clean route, or moving before an obstacle. A practical crew can carry removable panels and reattach them before entering a fort or boss encounter. This flexible approach uses the armor-speed tradeoff instead of forcing the train into one permanent configuration.
Community players report re-arming before expected fights, then removing plating to regain speed afterward. The exact penalty changes with train weight and current game version, so test the difference on a familiar route. A train that is too slow may never reach the point where its added protection can matter.
Position Turrets Deliberately
Turrets are most effective when they cover a likely approach and do not block access to doors. Point them toward exposed track approaches, but keep crew paths clear. An automated weapon that cannot fire because an object blocks its line of sight is wasted capacity.
During co-op play, explain who protects the turret, who repairs the stove, and who drives. The train continues moving, so a good defense plan must account for changing angles. If the train turns, a turret that covered the old route may now face empty track while a new threat approaches from the side.
Dead Rails How to Build the Train for Solo or Co-op Play
The most effective way to build a train is to begin with a clear route plan, allocate every carriage to a specific role, and then test the configuration on a short trip. This prevents common mistakes such as filling the engine with decorative items, placing fuel in hard-to-reach corners, or upgrading defense before confirming that the train can reliably move.
For a solo player, simplicity matters more than maximum capacity. Use the starter carriage for coal and essential supplies, keep tools within reach, and avoid carrying large quantities of low-priority cargo. You must also manage driving, fuel, and incoming threats yourself, so a streamlined layout reduces interruptions.
| Build stage | Action | Purpose | Result |
|---|---|---|---|
| One | Choose a route and estimate distance | Establish fuel needs | Set a realistic coal target |
| Two | Assign each carriage a role | Prevent clutter | Easier access under pressure |
| Three | Add fuel and basic defense | Cover core risks | Stable early train |
| Four | Test acceleration and turning | Reveal weight problems | Better handling |
| Five | Add turrets or heavier armor | Answer specific threats | Specialized final build |
| Six | Revisit cargo before departure | Remove unnecessary weight | Faster, safer journey |
For co-op, divide roles without making the train dependent on one person. A second player can handle fuel, repairs, or rear-facing threats, but the driver should retain control of the locomotive. This role split is more valuable than having every player perform identical actions.
Use the Default Train as a Training Platform
The Dead Rails default train gives players enough structure to test fuel plans, defensive layouts, and job assignments. It is also a safe fallback if the team cannot agree on a purchase. Before comparing prices, understand what each carriage solves and whether your crew can use it effectively.
Dead Rails train prices can change with updates and available offers, so the supplied research does not provide a reliable current table of exact costs. Check the live game interface and avoid buying solely because a locomotive looks impressive. Compare price against cargo capacity, speed, and protection, then ask whether the train improves your weakest survival factor.
Match the Train to the Mission
Different routes reward different qualities. A long convoy needs coal capacity and clear cargo organization. A run toward a fort benefits from doors, windows, and turrets. A competitive or time-sensitive route rewards a lighter train. A mixed route benefits from adaptable layers that can be installed when danger becomes predictable.
The best train build is therefore not the one with the most attachments. It is the one where every attachment answers a known problem without slowing the train unnecessarily. If a planned feature does not improve fuel safety, mobility, or defense, leave it out.
| Route situation | Recommended emphasis | Avoid |
|---|---|---|
| Long open journey | Coal reserve and cargo separation | Unnecessary decorations |
| Frequent enemy encounters | Doors, windows, and turrets | No firing angle |
| Short risky sprint | Speed and compact cargo | Heavy armor |
| Fort or boss approach | Temporary heavy protection | Permanent slow build |
| Mixed co-op route | Clear jobs and labeled storage | Everyone controlling everything |
| New player route | Default Train and simple supplies | Costly premature upgrades |
Upgrading Dead Rails Train Purchases and Defense
Train upgrades should follow observed problems. If the locomotive runs dry, buy coal capacity or improve storage. If enemies breach the passenger area, cover doors and windows. If the crew cannot answer threats while driving, add a turret. If acceleration feels sluggish, remove cargo before adding more weight.
This process makes Dead Rails how to build the train decisions measurable. A run with no fuel trouble but several attacks calls for armor; a run with repeated fuel shortages calls for reserve space. Without that diagnosis, purchases become random spending rather than planned progression.
| Problem observed | Best response | Why it works |
|---|---|---|
| Frequent fuel warnings | Add or rearrange coal storage | Extends travel without constant stops |
| Enemies enter through doors | Cover doors and block access | Protects the crew and useful cargo |
| Driver cannot defend | Install a turret | Adds automated fire |
| Poor acceleration | Remove excess cargo | Reduces weight |
| Frequent track debris | Improve route awareness and speed | Prevents emergency stops |
| Conflicting crew actions | Assign clear roles | Prevents wasted actions |
The Dead Rails best train build changes as the crew improves. A quick default setup may be enough for the first short route, while a later expedition can justify a locomotive with dedicated capacity, stronger protection, or more specialized carriages. Compare upgrades with the Dead Rails first-purchase guide before spending limited resources.
Sequence Upgrades by Urgency
Start with fuel, then speed, then protection. Fuel prevents a hard stop; manageable speed helps the train react to track problems; protection reduces damage during combat. If the budget cannot support all three, preserve mobility first, then use temporary defensive measures until more resources are available.
This sequence also reduces wasted money. A heavily armored train still needs coal, and a coal-heavy train still needs a usable speed advantage. Improvements should reinforce one another rather than create isolated upgrades that do little for the overall journey.
Reevaluate the Build After Every Major Fight
Damage can change priorities. If a fight tears away an entrance, reinforce it before continuing. If collected loot fills the train, protect the valuable cargo or redistribute it. If the stove consumed most of the reserve, shorten the route or source additional fuel rather than continuing with a false margin of safety.
Keep a short post-fight checklist covering fuel, damaged openings, turret position, and cargo weight. This habit takes less time than diagnosing a failure after the train stalls or the crew is overwhelmed, and it preserves the useful parts of the current configuration.
Carriage-by-Carriage Build Checklist
A completed Dead Rails train build should have a clear role for every carriage, visible fuel, protected access points, and a speed plan. The final configuration may use the Default Train, a Cattle Car, or a purchased locomotive, but each choice should support the same route plan.
Before departure, inspect the train from front to back. Confirm that the locomotive is clear, the coal reserve is reachable, cargo is secured, and the crew understands its jobs. A visual inspection can catch problems that a menu description does not.
-
Fuel: Primary coal supply plus a protected emergency reserve
-
Storage: Each carriage assigned one clear purpose
-
Defense: Main doors and windows covered before a known fight
-
Speed: Heavy cargo removed or redistributed if acceleration is poor
-
Crew: One driver, one fuel handler, and one defense role in co-op
-
Navigation: Track checked ahead of the locomotive
-
Recovery: Repair and replacement materials carried for the route
-
Purchase decisions: Current train prices checked in the live game interface
The final takeaway is simple: build for the journey rather than the showroom. Fuel capacity keeps the locomotive moving, clear carriage roles prevent costly confusion, and temporary armor handles danger without permanently sacrificing speed. A well-tested Dead Rails train build gives the crew more control over every mile, whether they are using the Default Train, adding a Cattle Car, or specializing a purchased locomotive for combat.
Frequently Asked Questions
What is the best Dead Rails train build for beginners?
The best beginner build uses the Default Train, a small coal reserve, and one dedicated storage carriage. Keep the layout simple, secure the main doors, and avoid carrying unnecessary cargo. Learn how speed affects fuel use before purchasing a specialized locomotive, then add turrets or heavier armor only after identifying a persistent problem.
Should I buy the Dead Rails Cattle Car train?
Buy or use the Cattle Car when passengers, coal, and collected materials compete for limited space. Its extra capacity helps organize supplies and reduces clutter around the stove. Compare its current in-game price with the cargo you genuinely need, because train prices and balance may change after updates.
How much coal should a Dead Rails train carry?
Carry enough for the planned route plus a backup for delays, obstacles, and unintended distance. Coal is the most efficient commonly reported fuel, but consumption varies with speed, cargo weight, and driver efficiency. Community estimates around 80 kilometers differ, so test a short route and use player reports as a planning reference rather than a fixed guarantee.
Does armor make the Dead Rails Default Train too slow?
Heavy armor can make the Default Train slower because added protection increases weight. Use removable metal sheets and temporary defenses for known fights, then reduce them on open or escape-heavy sections. Test the speed difference on a familiar route and retain protection wherever the train cannot otherwise outrun danger.
Is it better to upgrade the train or buy more weapons?
Upgrade the train when recurring problems involve fuel, cargo access, entry protection, or slow acceleration. Buy more weapons when the crew has a safe operating train but cannot answer attacks. A balanced setup usually includes both: a mobile train with protected entrances and enough weapons to handle threats that automation cannot cover.