
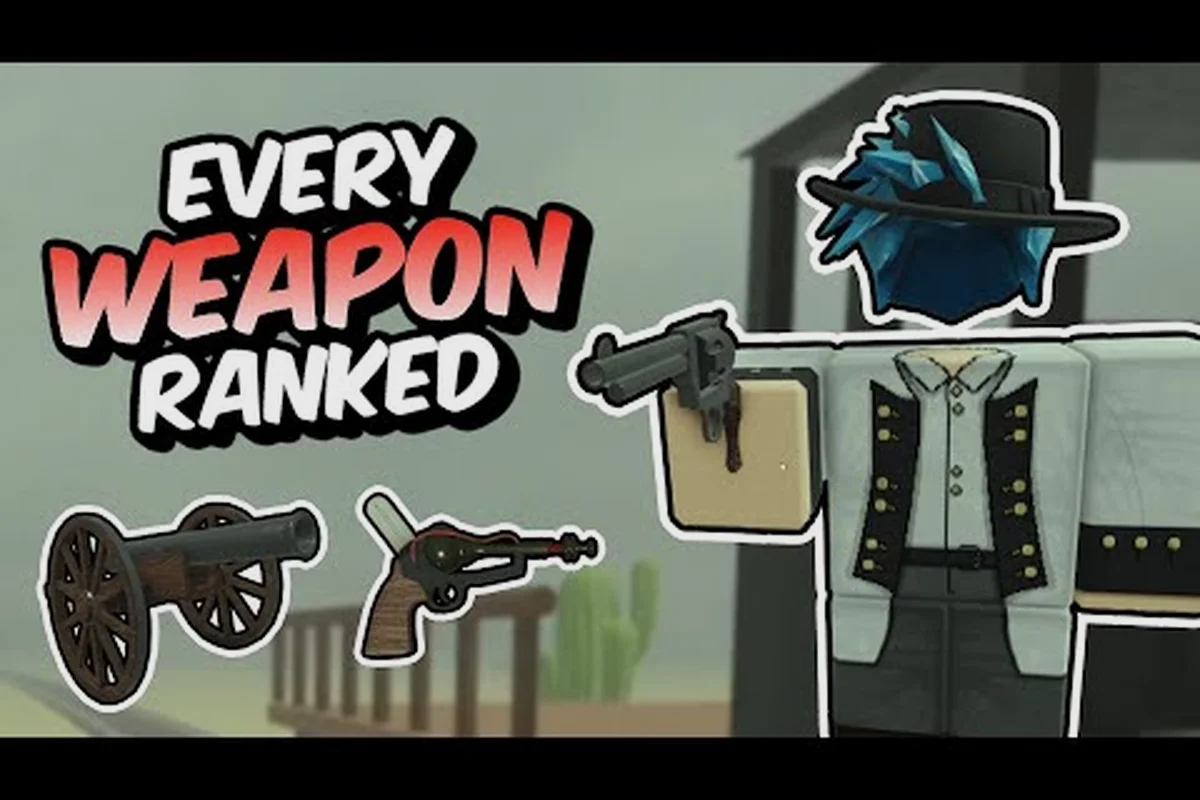
The dead rails bolt action rifle delivers 60 base damage and a six-round magazine, making it a strong option when headshots and ammunition efficiency matter. Learn its limits, the ammunition it consumes, and when a revolver, shotgun, melee option, or special weapon is the smarter choice.
Dead Rails Bolt Action Rifle Performance and Core Stats
The dead rails bolt action rifle is a high-impact firearm whose value comes from the combination of 60 base damage and a 120 damage headshot reported in community testing. That makes it especially effective against durable enemies, although its six-round capacity means positioning and reload timing remain important. It is not simply a stronger revolver: it trades faster follow-up access for greater punch per accurate shot.
| Weapon | Reported base damage | Reported headshot damage | Capacity | Practical identity |
|---|---|---|---|---|
| Revolver | 35 | 50 | 6 | Affordable, flexible early firearm |
| Navy Revolver | 50 | 80 | 6 | Stronger revolver with higher headshot value |
| Bolt Action Rifle | 60 | 120 | 6 | High-impact precision firearm |
| Shotgun | Weapon-family dependent | Weapon-family dependent | Weapon-family dependent | Best suited to close-range groups |
These values come from community testing and may change after patches. The official community gameplay reference is useful for seeing weapons in motion, but it should be treated as a visual reference rather than a permanent balance sheet. You can watch the Dead Rails bolt action rifle gameplay video while comparing the rifle’s role with the other firearm families.
Headshots create the biggest value jump
The difference between the rifle’s 60 base damage and 120 headshot damage is substantial, so accuracy matters more than simply emptying the magazine. Against an enemy with many hit points, one well-placed headshot can be worth several body shots. Against quick or erratic targets, however, a missed aimed shot can be more costly than the raw damage comparison suggests.
The same principle applies to the revolvers. A standard revolver reportedly deals 35 damage and 50 on a headshot, while the Navy Revolver reaches 50 and 80. Headshots therefore improve the efficiency of every firearm, not just the bolt-action rifle. If you want a deeper comparison of these values, the Dead Rails gun damage reference provides useful context for choosing between them.
The six-round magazine requires deliberate use
A six-round magazine is enough to handle several encounters, but it is not generous when a group surrounds the train. The best approach is to use the rifle against priority targets instead of treating it as a general-purpose close-range weapon. Save the shot for a dangerous enemy, a valuable target, or a moment when a clean line of sight allows a headshot.
The rifle’s reported $75 price also makes it a major early investment compared with the revolver’s reported $35 cost. That does not make the rifle weak, because one precise hit can create a much larger advantage, but it does mean that a player carrying no reserve ammunition may regret spending every available dollar on the gun.
Ammo Needs, Reloading, and Early-Game Decisions
Rifle ammunition belongs to a separate family from revolver rounds and shotgun shells. The dead rails bolt action rifle therefore cannot simply eat every cartridge found in a loot container, and players should check the weapon’s ammunition type before assuming a stack will help. A broader Dead Rails ammo guide can help distinguish the three supply categories and plan purchases more efficiently.
| Ammunition type | Weapons it supports | Main tactical benefit | Main limitation |
|---|---|---|---|
| Revolver rounds | Revolver and Navy Revolver | Flexible use with common early firearms | Lower damage than the rifle’s best-case hit |
| Rifle rounds | Bolt Action Rifle | Supports the weapon’s high per-shot impact | Six rounds and a higher upfront price |
| Shotgun shells | Shotgun family | Effective against enemies at close range | Less suitable for distant precision targets |
| Thrown explosives | Dynamite and Molotov | Can damage clustered enemies without a firearm | Risks area damage and wasted resources |
Community field notes specifically recommend carrying a reserve for the weapon family you actually use. That advice is especially important with the rifle because a full six-round magazine offers little margin during a difficult fight. Keep enough ammunition for a meaningful attempt at headshots, not merely enough for a single encounter.
Budgeting the rifle during the opening stretch
The standard revolver costs $35 at the Gunsmith or three bonds in the lobby, according to community data. By comparison, the rifle is reported at $75. A practical early purchase order depends on whether the player has found a working revolver and whether enough rifle rounds are available.
-
Secure a basic firearm and learn the enemy attack patterns.
-
Use revolver rounds until a reliable rifle-round source is available.
-
Buy the bolt-action rifle when its ammunition can be replenished.
-
Keep a secondary weapon for emergencies when the magazine runs dry.
-
Reserve part of the remaining money for bonds, healing, or another weapon that uses the ammunition you are most likely to find.
This is not merely a spending hierarchy; it is an ammunition plan. A high-damage firearm that cannot be fed is less reliable than a modest weapon with a full supply of compatible rounds.
Reload timing changes how targets should be selected
Because the rifle fires a fixed number of rounds before requiring a reload, players should identify the most dangerous target before taking the shot. Firing into the nearest weak enemy may clear space, yet it can also consume ammunition that would have removed a larger threat. Community reports emphasize that headshots make the rifle and revolvers especially ammunition-efficient, provided the shot connects.
Treat the weapon as a precision tool rather than a continuous stream of damage. A clean shot at a dangerous outlaw can prevent the enemy from reaching the train, while a missed shot may allow that enemy to close the distance and force a panic reload. Accuracy is therefore not merely a damage multiplier; it is also a way of preserving the tactical advantage that the rifle’s price and scarce ammunition created.
Comparing the Dead Rails Bolt Action Rifle With Other Weapons
The dead rails bolt action rifle occupies a narrow but valuable segment: high base damage, excellent headshot potential, and limited magazine capacity. Other weapons are stronger in different circumstances. A revolver offers convenience, a shotgun handles groups at close range, melee tools conserve ammunition, and unusual equipment can change the rules of an encounter.
| Encounter or need | Recommended option | Why it fits | Weakness to manage |
|---|---|---|---|
| Accurate shot at a dangerous target | Bolt Action Rifle | 60 base damage and 120 headshot damage | Limited magazine and rifle-specific ammo |
| General early-game shooting | Revolver | Lower price and broader access to useful ammunition | Lower damage per hit |
| Close-range crowd pressure | Shotgun | Multiple targets can be pressured together | Less effective for distant targets |
| No ammunition reserve | Melee weapon | Removes the need to reload | Greater danger from fast or grouped enemies |
| Repeated area fights | Special equipment | Can affect clusters without precise aim | Resource limits and possible self-damage |
| Mobile defense around the train | Rapid firearm setup | Easier to keep firing while repositioning | Lower single-shot impact than the rifle |
The best weapon depends on the problem presented by the encounter. A player who owns every firearm but carries only rifle rounds still lacks a dependable revolver or shotgun, whereas a player who carries several melee tools may have little use for the rifle’s superior headshot value. Inventory capacity and actual pickup availability can matter as much as raw statistics.
When a revolver remains the better answer
The standard Revolver is not simply a weaker version of the rifle. Its reported $35 cost leaves more money for bonds or other equipment, and revolver rounds may be easier to acquire. The Navy Revolver improves on the baseline weapon with 50 base damage and 80 headshot damage, making it a more credible alternative when rifle ammunition remains inconsistent.
The revolver is better when a target is moving, the available ammunition belongs to the revolver family, or the player needs a weapon that can be bought early without emptying the entire budget. Its headshot multiplier remains meaningful, even though the result is lower than the rifle’s reported 120-damage ceiling. The Dead Rails gun prices reference can help compare purchase cost before committing to a more expensive setup.
When a shotgun or melee weapon is preferable
A shotgun is the better conceptual answer when enemies arrive as a compact group at close range, because precision ammunition is less important than placing pressure on several targets. Melee equipment is preferable when ammunition is nearly gone, although community reports warn that vampires and werewolves can punish players who stay in melee range too long.
Among the available dead rails melee weapons, the Cavalry Sword offers a sword-style option, while the Tomahawk provides a different throwing or impact profile. Their exact handling may vary by version, so the safest comparison is based on opportunity cost: each slot occupied by a melee tool is a slot not filled with a firearm or healing item.
Where unusual equipment changes the calculation
The dead rails electrocutioner is a special weapon rather than a normal substitute for the bolt-action rifle. Players looking for the dead rails how to get the electrocutioner should treat it as a separate unlock objective, because acquiring the special weapon does not automatically make the rifle obsolete. The rifle remains a dependable firearm with clear damage statistics and straightforward ammunition needs.
| Special or experimental option | What it changes | Comparison with the rifle |
|---|---|---|
| Electrocutioner | Introduces an electrical weapon experience | Special-purpose choice rather than a standard damage upgrade |
| Maxim Turret | Adds a deployable or automated defensive option | Can cover an area without requiring each shot to be hand-placed |
| Molotov | Applies area denial or damage | Useful against groups, especially with crowd control |
| Dynamite | Offers a powerful thrown burst | Better reserved for planned opportunities than constant use |
The dead rails maxim turret is worth considering when the main problem is protecting a position rather than winning a precise duel. A turret can create a defensive layer, although community reports used for this guide does not provide reliable turret health, placement, or ammunition values. Treat any single-source numerical estimate as provisional and check the current game behavior before building a strategy around it.
Practical Loadout Strategies for the Dead Rails Bolt Action Rifle
A strong loadout does more than place a powerful gun in the inventory. It supports the rifle with compatible ammunition, a fallback for close approaches, and enough supplies to recover from missed shots. The dead rails bolt action rifle works best as the centerpiece of a prepared kit rather than the only tool available.
| Loadout style | Primary tool | Secondary tool | Supply priority | Best use case |
|---|---|---|---|---|
| Precision specialist | Bolt Action Rifle | Cavalry Sword or Tomahawk | Rifle rounds plus healing | Dangerous enemies at medium or long range |
| Budget survivor | Revolver | Cheap melee tool | Revolver rounds | Early travel and uncertain pickups |
| Close-range defender | Shotgun | Cavalry Sword | Shotgun shells | Dense groups near the train |
| Resource saver | Melee weapon | Revolver | Mixed rounds and throws | Low-ammo stages and emergency defense |
| Special-effects build | Electrocutioner or Maxim Turret | Revolver | Ammo for the backup weapon | Experimental or location-specific fights |
Build one dependable fallback
A melee backup should cover the period when the rifle is empty or when an enemy reaches the player. The Cavalry Sword fits players who want a close-range defensive option, while the Tomahawk can appeal to players who prefer a thrown solution. Neither removes the need to position carefully, especially against enemies that can close quickly.
The most important rule is to avoid carrying several items that solve the same problem. A rifle, a shotgun, and the Tomahawk may look flexible, yet each occupies space and may divide attention. One precise firearm, one close-range tool, and one reliable source of ammunition usually create a more understandable emergency plan.
Test targets before treating the headshot bonus as guaranteed
The reported 120 headshot damage comes from community testing, so the practical value depends on enemy hit boxes, movement, and the current build. Practice against a stationary target until the shot becomes familiar, then move to lightly moving enemies. Headshots should be an opportunity created by good positioning, not an expectation that every exchange will produce a perfect result.
The same caution applies to the comparison against the Navy Revolver. Because both weapons reward headshots, their real difference may be smaller against poorly exposed targets and much larger against carefully lined-up shots. A clear Dead Rails ammo reference can prevent the common mistake of buying the right gun without bringing the right rounds.
Special Weapons and Situational Alternatives
The dead rails electrocutioner and the dead rails maxim turret offer styles of power that a conventional bolt-action rifle cannot reproduce. They should be evaluated by their availability and combat role, not simply added to the top of a tier list. A special item that cannot be obtained before a dangerous stretch is less useful than a dependable firearm for the journey leading there.
Evaluating the Electrocutioner acquisition path
When planning the dead rails how to get the electrocutioner, focus on exploration, objective progression, and checking locations associated with unusual equipment. The supplied research does not establish a verified exact unlock location or purchase requirement, so any specific route should be treated cautiously. Community-reported answers may become outdated following updates.
Once acquired, the electrocutioner should be tested in a safe situation before it replaces the rifle. Compare its handling, range, reload needs, and effect against the threats most common during your route. Because the available data lacks reliable Electrocutioner statistics, the fair conclusion is that its performance is build-dependent rather than numerically superior in every case.
Using the Maxim Turret as a layered defense
The dead rails maxim turret is most useful when the player needs to protect an area while handling another task. Unlike a manually aimed rifle, a turret can add defensive pressure, but only if its placement, ammunition, and operating conditions fit the encounter. Players should not assume that acquiring a turret removes the need for a personal firearm.
A practical combination is to use the turret for threats approaching from a predictable direction while keeping a revolver for movement and a melee option for emergencies. That arrangement preserves flexibility without assuming the turret can cover every angle. The Dead Rails Ray Rifle guide offers another look at experimental weapon choices if you enjoy comparing special-equipment roles.
Recognizing when to stop upgrading the loadout
Chasing rare equipment can weaken a run if the basic setup is neglected. Before pursuing the electrocutioner or turret, confirm that the player has a working gun, compatible ammunition, healing supplies, and a melee fallback. Once those fundamentals are secure, a special weapon can add value without becoming a distraction.
Avoid replacing a proven setup merely because a new item has a more impressive name. Test the acquisition route, compare the new weapon against the current rifle in ordinary encounters, and retain the simpler option if it produces faster, more consistent clears. Efficiency is more valuable than novelty on a dangerous run.
Community-Confirmed Rifle Facts and Final Recommendations
Community testing is the clearest source in the available research for the dead rails bolt action rifle’s reported numbers: $75 cost, six rounds, 60 base damage, and 120 headshot damage. These figures provide a reliable framework for understanding the weapon, but they are not guaranteed to remain unchanged after patches. The $35 standard revolver and 50-damage Navy Revolver create a meaningful price-to-damage comparison.
| Decision | Recommended answer | Evidence-based reason |
|---|---|---|
| Buy the rifle immediately after one revolver? | Usually no | The reported $75 price leaves less room for supplies and backups |
| Carry the rifle as the main weapon? | Yes, when rifle rounds are dependable | It offers the strongest reported per-shot impact |
| Keep a melee fallback? | Yes | It covers empty-magazine and close-range emergencies |
| Replace every other weapon with the rifle? | No | Ammunition availability and encounter range still matter |
| Favor the Navy Revolver? | When its ammunition is easier to find | It offers stronger hits than the standard revolver at a more moderate tier |
| Pursue the electrocutioner or turret? | After the core kit is stable | Special equipment adds utility but should not weaken survival basics |
The most important conclusion is that the dead rails bolt action rifle rewards preparation. Its headshot value makes accurate shooting highly efficient, while its price and ammunition type make the surrounding loadout just as important. Build a secure basic kit first, then use the rifle to remove priority threats rather than waste its strongest shots on the first enemy that appears.
Before starting a run, verify the current patch, test the weapon in practice, and check that compatible rounds remain in stock. A precise weapon can turn difficult encounters into manageable ones, but only when the player has enough ammunition, a sensible fallback, and a clear plan for where every shot will go.
Frequently Asked Questions
How powerful is the dead rails bolt action rifle?
Community testing reports 60 base damage and 120 headshot damage for the rifle, with a six-round magazine. These figures make it especially strong against dangerous targets when accuracy is high. Because patch changes may alter balance, confirm the current values in-game rather than relying exclusively on old community tests.
What ammunition does the dead rails bolt action rifle use?
The rifle uses rifle rounds, which are separate from revolver ammunition and shotgun shells. Carrying unrelated cartridges will not help when the magazine is empty, so reserve supply should match the weapon you expect to use. Plan purchases around compatible rounds and keep a secondary firearm for emergencies.
Is the bolt-action rifle better than the Navy Revolver?
The rifle is stronger when accurate headshots are possible, while the Navy Revolver is more practical when revolver rounds are easier to obtain. The reported rifle hit reaches 120 on a headshot, compared with 80 for the Navy Revolver. Ammo availability, price, enemy movement, and magazine timing can outweigh raw damage.
Should I buy the rifle before a revolver?
Usually, buying a cheaper firearm first is wiser because the rifle reportedly costs $75. That leaves room for ammunition, healing, bonds, and a backup tool. The rifle becomes a stronger purchase once its ammunition supply is dependable and the player can handle its precise, limited-magazine style.
When are melee weapons better than the dead rails bolt action rifle?
Dead rails melee weapons such as the Cavalry Sword and Tomahawk are useful when ammunition is depleted, enemies are already close, or a firearm would be wasteful. They remain risky against fast enemies and large groups, so keep a melee option as a backup rather than relying on it as the only weapon.