
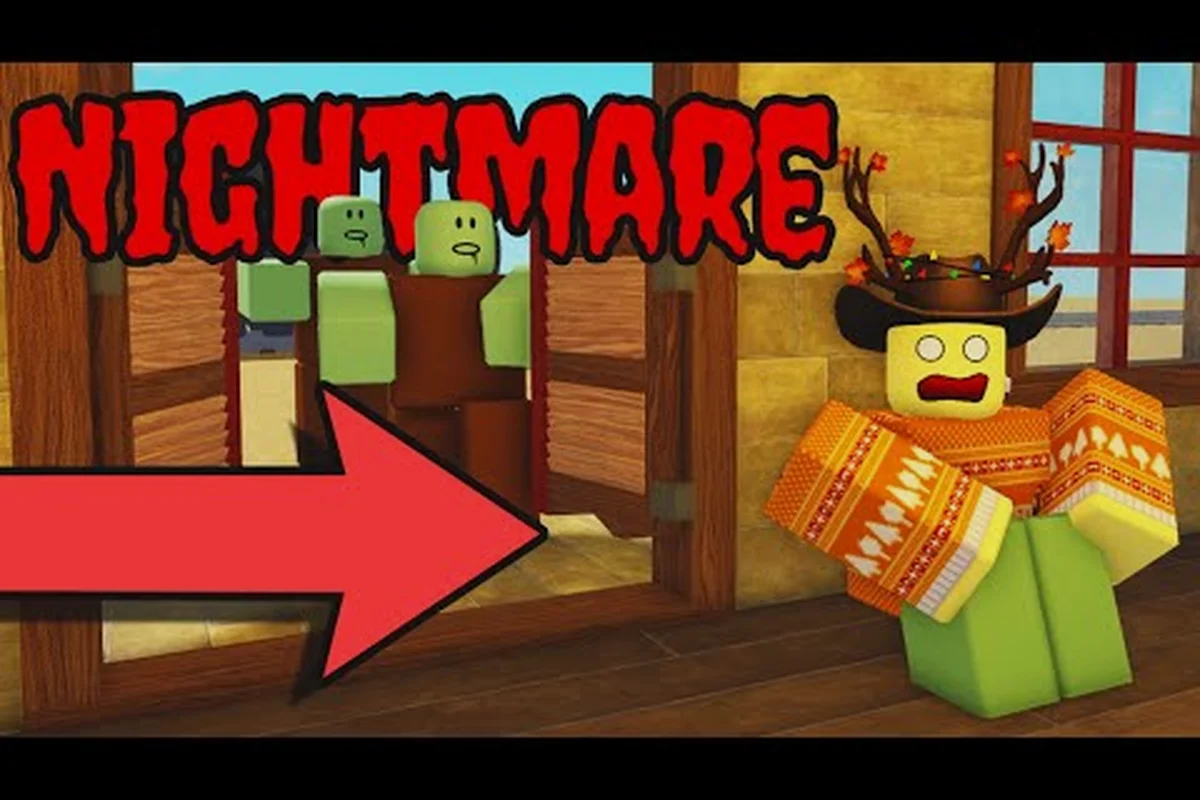
Surviving a Dead Rails storm depends on preparation, because night attacks can overwhelm a crew that wanders beyond the train without reliable protection. This Dead Rails storm guide explains how to read the night cycle, use armor, and position your group before hostile enemies arrive.
Dead Rails Storm Guide: Timing the Night Cycle
The safest storm plan begins before sunset. Community field notes place sunset at roughly 9 PM, hostile spawns around 11 PM, and the end of the night period near 5 AM. Because those timings can change with patches, treat them as planning landmarks rather than exact alarms, and return to the train early whenever the sky darkens.
The train is both your transport and mobile base, so it should become the center of your storm defense. Fuel, lighting, perimeter checks, and access to weapons all matter more after dark. If the boiler cools during a long night, your options narrow quickly because hostile groups can approach from several directions while your crew is occupied with repairs.
| Night milestone | Reported timing | Recommended action |
|---|---|---|
| Sunset | Around 9 PM | Finish looting and return to the train |
| Hostile activity | Around 11 PM | Lock in positions and confirm ammunition |
| Night period ends | Around 5 AM | Scout carefully before leaving cover |
| Storm-related effects | Patch-dependent | Assume lightning or visibility hazards may occur |
These timings come from community reports rather than a permanent developer schedule. For a broader explanation of how darkness affects fuel planning and train movement, use the Dead Rails day and night cycle reference. That preparation matters because a storm response becomes much harder when the crew is already separated from the locomotive.
A Reliable Storm-Ready Routine
Begin with a 10-minute early check before the reported hostile-spawn window. Ask every player to confirm their weapon, ammunition, repair tool, and most durable clothing. Then inspect the train's stove and identify who will handle repairs, who watches the surroundings, and who communicates approaching enemies.
Next, build a simple perimeter around the train. Players should remain close enough to support one another but avoid clustering at the same doorway, where a single attacker may cause several weapons to jam. The night watch rotation should be short enough to prevent fatigue but long enough to prevent everyone from abandoning the same defensive position.
A productive routine includes these steps: review the storm forecast and compare it with the train’s route so the crew knows when to stop traveling; confirm that each player has a weapon, ammunition, a repair tool, and their most durable clothing; then assign clear roles for repairs, perimeter watch, and enemy communication. Before the hostile-spawn window, inspect the locomotive, stove, and accessible doors, and mark the locomotive and the coach interior as separate fallback positions. Keeping these jobs explicit prevents players from clustering at one doorway, where several weapons may jam, and gives the crew a functional fallback if the first defensive line is overrun.
-
Return before dark and secure valuables, ammunition, and fuel indoors.
-
Equip a fallback weapon so one damaged gun does not remove the crew's entire defense.
-
Mark safe gathering points near the locomotive and away from exterior doors.
-
Reserve repair supplies for damage that occurs during the storm rather than the approach.
-
Keep a visual signal for nearby teammates, since lightning may briefly reveal distant movement.
For a larger crew, coordinate the same routine with the Dead Rails co-op preparation guide. The important result is not memorizing a fixed formation; it is giving every player a role that remains clear when visibility drops and attacks arrive from more than one side.
Dead Rails Lightning Guide: Survive Electrical Storms
Lightning is most dangerous when it turns a routine repair or boarding task into a prolonged stop in the open. The key is to recognize the warning state, stop unnecessary travel, and ensure the train can remain operational without exposing the whole crew.
Current community references describe electrical storms as environmental threats that can threaten both players and train reliability, although exact electrical damage and control effects may change between updates. Do not rely on a single route or exploit, because the current build should always be treated as the source of truth. The Dead Rails storm guide gameplay video is useful for comparing movement and threat behavior, but community footage can age quickly.
What Changes During a Lightning Storm
The first change is reduced operational flexibility. A train that can move during clear daylight may need to remain stationary if the crew cannot safely board, repair, or defend it. Lightning can interrupt attention, expose players near the train, and make teams hesitate when a repair is needed under pressure.
| Hazard | Likely effect | Practical response |
|---|---|---|
| Sudden lightning | Briefly reduced visibility and disrupted attention | Pause looting and regroup near the locomotive |
| Electrical damage | Possible train or equipment disruption | Keep repair tools assigned and accessible |
| Split crew | Some players move ahead while others defend | Use fixed rally points before the storm starts |
| Panic response | Players leave safe cover independently | Require a short wait-and-report procedure |
This storm disruption does not necessarily mean one perfect counter. It means preserving your ability to repair, retreat, and concentrate fire. Players who scatter may believe they are reducing risk, but they instead create isolated targets and leave the locomotive with fewer defenders.
Keep the Boiler Ready for a Storm
Coal is reported to be the most efficient common fuel, while the train stove also accepts wood, paper, furniture, and even tumbleweed. Community testing has put a standard coal purchase at about $20 for roughly 12.5 of 50 fuel units, although the exact burn rate and price can change with balance patches.
Carry a reserve rather than relying on one full purchase. Fuel can determine whether you can relocate to better terrain, keep a generator or related electrical system working, or preserve the locomotive as a safe base. In practice, a reserve is insurance against a storm that lasts longer than expected or a detour that consumes more fuel than planned.
Prioritize the locomotive’s boiler and essential electrical systems over optional equipment when allocating fuel, because coal is the most efficient common fuel for both feeding the train stove and maintaining a reliable base. A $20 purchase of roughly 12.5 fuel units is a useful baseline, but balance changes can alter the burn rate and price, so verify the current furnace value before committing the reserve. If the train’s generator or boiler interfaces are intact, keeping the locomotive operational may prevent a forced relocation to more exposed terrain during the storm.
-
Keep the boiler active so the train remains a dependable base.
-
Hold back emergency fuel rather than spending every available unit immediately.
-
Avoid unnecessary departures during the most dangerous part of the night.
If electrical activity threatens the train, disconnect nonessential equipment only if the interface allows it and the action does not create a new hazard. Never abandon the locomotive merely because one system is damaged; a disabled train may be safer than an exposed one, provided your crew has enough supplies to hold position.
Dead Rails Armor Guide: Choosing Protection That Helps
Armor is valuable during a storm because it can absorb mistakes, but the best protection is the set that allows you to keep fighting, repairing, or moving without slowing the crew down. Compare protection, mobility, and availability together instead of assuming that the heaviest clothing is automatically the best choice.
The armor layer should be treated as one part of a loadout. Weapons determine how quickly enemies are removed, while armor determines how many mistakes a player can survive. Because run gear is lost on death, buying equipment only at the moment of need can leave a crew unprotected during the approach to a dangerous area.
| Armor priority | Best use | Reason |
|---|---|---|
| Balanced protection | General night defense | Reduces incoming damage without making travel difficult |
| Maximum protection | Holding a fortified position | Useful when the player is not responsible for repairs |
| Mobility-focused gear | Scouting or boarding | Supports faster movement when the crew may be caught outside |
| Backup clothing | Surviving a failed attack | Provides a second chance after clothing is damaged |
Community sources agree that body armor is among the most important pieces of defensive equipment, but exact protection values and spawn rates can change after updates. Treat numerical claims from older videos as situational rather than permanent. The practical question is whether the item lets you survive long enough to finish the encounter or reach the train.
Match Armor to Your Role
Do not give every crew member the same setup. A front-line defender benefits from stronger protection, while a scout needs enough mobility to retreat and signal danger. A mechanic should carry repair tools without loading up so heavily that the journey becomes dangerous. This role-based approach preserves the usefulness of each item.
Evaluate each candidate piece of armor against the job it must perform during a Dead Rails storm run. A Sheriff heading into a human-raid may need broader protection and weapon capacity, while a Doctor or mechanic crossing storm zones should avoid excess weight that slows escapes. For example, a scout who must cover ground and report threats should favor mobility over maximum damage reduction, whereas a player assigned to hold a route may accept more armor and its movement cost. The right comparison is the protection gained for each point of encumbrance, not simply the armor’s highest stat.
-
Confirm the armor slot before spending money or discarding a useful item.
-
Compare movement penalties with the speed required by your assignment.
-
Keep a spare layer available for the player most likely to board during an attack.
-
Prioritize protection against the threat you actually face, whether that is a human attacker, an undead creature, or environmental damage.
-
Buy before the run when possible, because permanent lobby purchases are generally safer than gear that must be recovered after death.
The same acquisition rule applies to weapons and ammunition. Sheriff, Doctor, General Store, Gunsmith, and Furniture locations can provide bonds, guns, ammunition, and other supplies. Trading Posts and Tailors can be used to sell valuables or acquire equipment, depending on what you carry. Planning where you will spend money prevents a storm from becoming an equipment shortage.
Dead Rails How to Get Armor: Looting and Shopping Plan
Armor is easiest to secure when crews treat shopping as part of the route rather than an emergency purchase after the first attack. The best approach is to collect money early, identify what the group lacks, and make a deliberate stop before the hostile window begins.
Start by exploring buildings that offer bonds, guns, ammunition, and valuables. General Stores and Furniture buildings can contain useful trade goods, while a Gunsmith is valuable for backup weapons and ammunition. When a Trading Post or Tailor offers a better defensive item, compare the price with the value of items the crew could sell.
| Source | Useful resources | Storm preparation value |
|---|---|---|
| Sheriff | Bonds and law-related valuables | Builds the budget for armor or ammunition |
| General Store | Supplies and assorted goods | Provides useful emergency stock |
| Gunsmith | Guns and ammunition | Supports a stronger defense |
| Furniture building | Furniture and trade goods | Can create funds through resale |
| Trading Post | Purchases and sales | Best for converting valuables into equipment |
| Tailor | Clothing-related purchases | Useful for stronger protective clothing |
A successful search is not simply one that collects the most items. Storm readiness improves when the crew secures equipment, fuel, and repair supplies before separating from the train. Keep valuable but bulky loot limited, because a slow route or crowded train can create new problems.
A Four-Part Acquisition Plan
First, clear the nearest high-value buildings while daylight still provides a safe operating window. Divide the group into small teams, but require every team to report its findings before anyone continues alone. This creates a quick shopping list rather than scattered rumors about what one player found.
Second, sell at a Trading Post or Tailor before making a major armor purchase. A piece of clothing may be more valuable than an extra stack of ammunition, and turning surplus loot into bonds creates a clearer budget. The Dead Rails class mastery guide can also help players understand which permanent class purchase best supports their role before the run begins.
Third, equip for the expected encounter. A player guarding the train needs stronger protection, while a mobile scout may value speed and a ranged weapon. Keep ammunition distributed across several players rather than concentrated in one pack, because one death should not remove the crew’s ability to shoot.
Fourth, stop shopping before the reported spawn time. Returning to the train with a modest but complete kit is more valuable than being caught outside with perfect armor and no room to use it. If a route is unsafe, abandon the purchase and use the money at a later safer settlement.
This method answers the armor question without promising a single universal drop location. The available source buildings and stock can vary, but the dependable sequence remains the same: gather funds, compare protection, buy before danger peaks, and return to the locomotive.
Storm Defense Tactics by Crew Size
The best defense changes with the number of available players. A solo traveler or small team must prioritize escape and centralized supplies, while a full crew can create controlled firing lanes and repair positions. Even experienced groups should avoid splitting responsibilities so widely that nobody can watch the train.
Solo and Two-Player Survival
With few players, mobility and redundancy matter more than elaborate fortifications. Carry the strongest practical armor, a reliable weapon, spare ammunition, and enough fuel to relocate. Avoid staying outside after the reported hostile window, and use the locomotive as the only rally point.
| Small-Crew priority | Reason |
|---|---|
| Centralize on the train | A small group cannot cover separate objectives |
| Carry a backup weapon | One broken or depleted gun can end the defense |
| Save fuel for escape | Weather or enemies may force a quick relocation |
| Avoid contested loot | A late detour is more costly than missing an item |
If the locomotive becomes unsafe under a storm, withdraw only when movement is necessary, using cover and terrain to cross open ground. Once you disengage, keep the crew together; splitting up can let enemies isolate weaker players or force the group to fight in separate directions. Funnel pursuers toward one controlled route, then make the locomotive the destination. If a raid interrupts the return, abandon loot rather than extending the escape.
Medium and Large-Crew Positions
A medium or large crew can assign specialized roles, but the positions must remain connected. Place the most reliable shooter near the main boarding approach, keep a second shooter mobile, and assign repair responsibilities before the storm. A medic or support player can cover the locomotive but should not wander beyond communication range.
For large groups, create layered defense rather than one crowded line: split the crew into a locomotive guard, a flexible response team, and a short-range perimeter, while assigning one player to track tool and repair-kit availability. If a storm approaches, the outer scouts should avoid confrontation, return to the locomotive, and let the middle layer cover the approach; this prevents a single horde from surrounding the engine and leaves enough space for the medic, repair responsibilities, and a safe retreat route.
-
Inner layer: players and essential equipment stay at the locomotive.
-
Middle layer: shooters cover the most likely approach routes.
-
Outer layer: only fast scouts watch distant movement, and they retreat when enemies commit.
This arrangement avoids blocking repairs and gives every group a fallback. It also makes it possible to rotate tired players without leaving an unguarded entrance. Community reports indicate that faster zombies, vampires, werewolves, and outlaw ambushes can make open desert travel particularly risky after dark, so the perimeter should be treated as a temporary boundary rather than an invitation to chase.
Live Storm Decisions: Fight, Fortify, or Relocate
When conditions change, a good storm guide must offer decision rules instead of a single scripted response. Fighting is sensible when the train is operational, the group has ammunition, and enemies are concentrated near one approach. Fortifying is better when the crew is under-equipped or repair tools are needed. Relocating makes sense when the train is disabled, visibility is terrible, and the crew has enough fuel for a safe move.
| Situation | Best decision | Reason |
|---|---|---|
| One enemy group approaches | Fight from a prepared position | Concentrated fire removes the threat efficiently |
| Multiple sides are active | Return to the locomotive | Split attention increases casualties |
| Train loses power | Fortify if possible | A stationary base remains defensible |
| Storm blocks visibility | Relocate if fuel permits | A controlled move is safer than scattered travel |
| Ammunition is nearly gone | Retreat to the train | Players need time to resupply or switch weapons |
The critical rule is to decide before the pressure peaks. A crew can handle one emergency if everyone understands the plan, but panic multiplies when each player reacts differently. Assign a captain for storm decisions, a fuel handler, a repair handler, and a boundary watcher in larger groups.
Avoid These Common Storm Mistakes
The most damaging error is treating the storm as ordinary travel. Another is splitting the group to maximize loot, especially after the reported spawn time. Do not use every valuable item as if it must be carried immediately; sell it later when practical.
Several additional mistakes are easy to fix: treating the storm as ordinary travel, splitting the group to maximize loot, and assuming every valuable item must be carried immediately can all derail a crew. Keep the locomotive, boiler, and essential supplies together, and assign a dedicated defender to watch for night enemies instead of letting everyone spread out across the train. The footage shows why careful positioning matters: a storm encounter can force a crew to board quickly, repair under pressure, and preserve enough resources for the route objective.
-
Overloading the locomotive with loot can reduce readiness and make boarding slower.
-
Relying on one gun creates a single point of failure for the whole crew.
-
Ignoring the boiler can force a crew into open ground during the worst conditions.
-
Standing under exposed edges saves travel time but leaves players vulnerable to lightning effects.
-
Starting a fight near valuable cargo risks losing both the items and the person carrying them.
Use community gameplay walkthrough footage to observe how the train and night enemies behave, but confirm details against the current version. A successful defense ends with the crew, boiler, and essential supplies still together. If continuing toward the route objective, consult the Dead Rails 80 km and bridge guide after the storm has passed.
Frequently Asked Questions
When do hostile enemies appear in Dead Rails?
Community reports place hostile activity at roughly 11 PM, with sunset around 9 PM and the night period ending near 5 AM. These times may shift after patches, so return to the train before the reported spawn window rather than treating them as exact alarms. Early return also gives your crew time to organize weapons, repair supplies, and defensive positions.
Can lightning damage the train in Dead Rails?
Lightning can create serious operational pressure, and electrical effects may interrupt repairs or leave the locomotive vulnerable depending on the current version. Keep the boiler supplied, assign repair tools, and avoid unnecessary travel while the storm is active. If electrical damage occurs, focus on preserving the train as a defensible base instead of rushing outside to investigate.
Where should players find armor?
Look for bonds and valuables in locations such as the Sheriff, General Store, Gunsmith, and Furniture buildings, then sell surplus items at a Trading Post or Tailor. Armor availability and prices can change, so compare the piece with your role. Strong protection helps a defender, while a scout may need better mobility and a ranged weapon.
Should the crew keep the train moving during a storm?
Usually, a prepared crew should stay near the locomotive and conserve fuel unless relocation is necessary. Movement becomes riskier when visibility is poor, the group is split, or the boiler is unstable. Keep an emergency reserve, but do not spend it on a panic evacuation before confirming that the new location is safer.
What is the most important preparation for a Dead Rails storm?
Preparation begins with a shared plan: return before hostile activity, keep the boiler fed, distribute weapons, and choose one or two rally points. Body armor is valuable, but it cannot compensate for poor positioning. The most effective crews combine protective equipment, backup ammunition, repair capacity, and clear responsibilities before darkness becomes dangerous.