
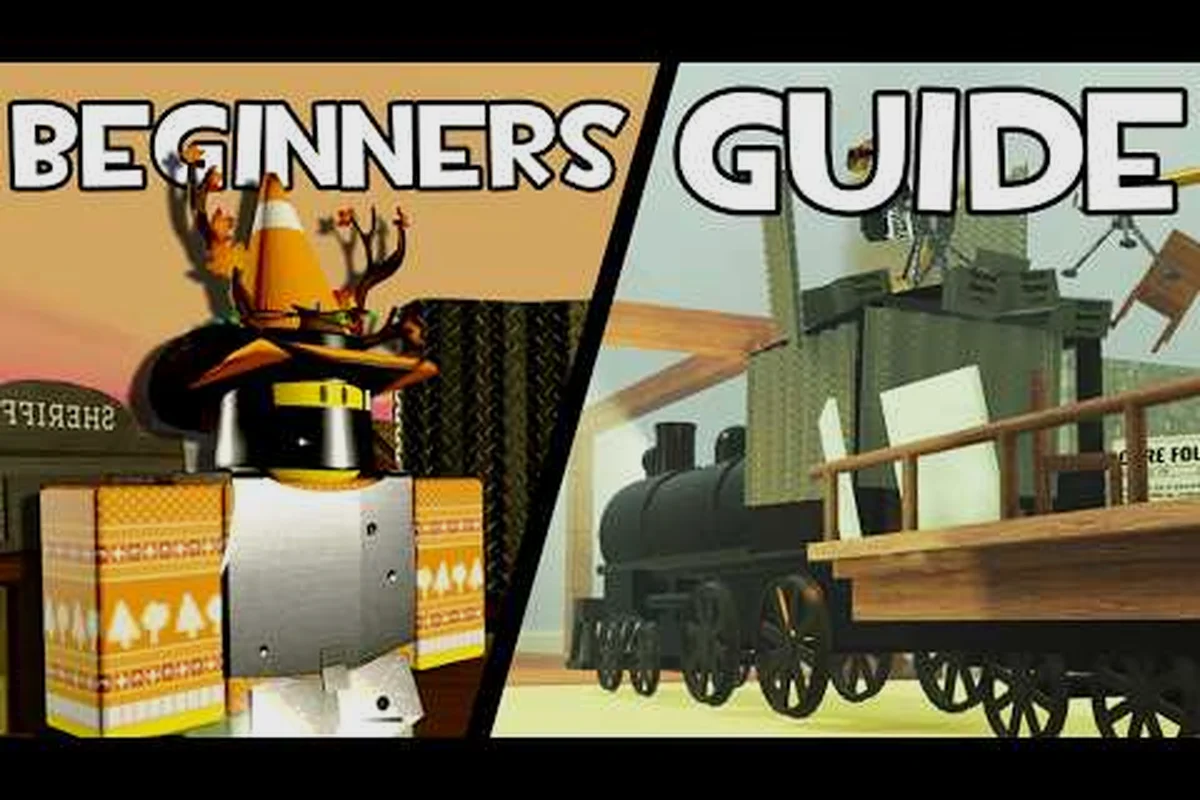
Dead rails tutorial planning can determine whether a new crew survives its first night, reaches Mexico, and turns scavenged valuables into a successful run. This guide explains the essential loop so you can spend less time confused and more time keeping the locomotive moving.
Dead Rails Tutorial: Build a Run That Can Survive
A successful run in Dead Rails depends on preparation, fuel management, looting, and teamwork. The train is both your vehicle and mobile base, so every stop creates a choice: explore for supplies, secure the locomotive, or push onward while the boiler still has enough fuel.
This section functions as a practical dead rails walkthrough for the opening phase of a run. The focus is on the systems that affect every later decision: boiler pressure, cargo weight, time of day, crew roles, and the difference between permanent lobby purchases and temporary run equipment.
A reliable opening checklist
Before leaving the starting area, confirm that every important job has an owner. A new crew can compensate for limited equipment with clear assignments, because a train with four active players behaves very differently from one in which everyone loots the same building.
| Opening task | Why it matters | Recommended action |
|---|---|---|
| Feed the boiler | The locomotive cannot remain a dependable base without steam | Assign a fuel handler and check pressure regularly |
| Select a class | Classes shape the crew’s usefulness and available purchases | Choose a role that complements the group |
| Inspect the train | Damage, leaks, and missing equipment create later problems | Repair what the crew can handle before departure |
| Plan the first stop | Randomized buildings rarely offer identical supplies | Scout with the map and establish a meeting point |
| Set a watch schedule | Night introduces faster enemies and special threats | Fortify before hostile activity begins |
Boiler Pressure is the most important early resource. A crew that treats fuel as a shared task is much safer than one that assumes someone else will refill it. Likewise, Crew Roles become more useful when each player has a clear responsibility, such as driving, fuel handling, scouting, repair, or combat.
Understand the core run loop
The basic structure is straightforward: move through the wasteland, loot useful buildings, manage the train, defend it when necessary, and eventually reach the run’s destination. According to the supplied community reference, reaching 80 km and lowering the bridge completes a run, although current objectives can change after updates, so the active interface should remain the final authority.
Treat each stop as a short planning cycle: compare the building’s expected loot with the time needed to accelerate, repair, refuel, and defend the locomotive, then commit to a collection window. For example, a promising station may justify a longer stop only if the crew can still return before the route darkens; otherwise, a quick fuel-and-repair visit preserves boiler pressure and train condition for the next leg. This approach turns the 80 km run goal into manageable checkpoints without overlooking the active interface’s current objectives.
-
Check the clock, boiler pressure, train condition, and available fuel.
-
Decide whether the building ahead contains a more valuable opportunity than the risk of stopping.
-
Assign a scout and a guard instead of allowing the entire crew to rush into the same doorway.
-
Set a collection deadline based on fuel and daylight.
-
Return, secure the loot, repair critical damage, and prepare for the next leg.
This collection deadline prevents looting from consuming the entire day. For example, if a station offers fuel but a nearby warehouse contains only low-value scrap, the crew should take only the fuel needed to preserve boiler pressure rather than detour into the warehouse. If a trading post is reachable before the route becomes dangerous, prioritize high-value cargo there; otherwise, even a full inventory may have little value once the locomotive must retreat from hostile territory.
Dead Rails Tips for Fuel, Loot, and the Boiler
Fuel and cargo determine how far the crew can travel and how quickly danger catches up. Strong dead rails tips begin with preserving enough boiler pressure for movement, then spending surplus resources on loot that remains useful after the train reaches a safer location.
Feed the boiler before it becomes an emergency
The boiler is the center of the entire operation because it powers movement and supports the train as a base. Do not wait for a warning animation or a failed interaction; keep a reserve, and treat refueling as a shared responsibility. A dedicated fuel handler can watch pressure while the rest of the crew focuses on repair, reconnaissance, and defense.
| Boiler situation | Immediate response | Likely cause |
|---|---|---|
| Pressure is comfortable | Continue the route and conserve excess fuel | Normal operation |
| Pressure is falling during travel | Add fuel before committing to another stop | Insufficient feeding |
| Pressure is low near an occupied building | Restock and postpone the expedition | Unsafe operating margin |
| Fuel reserves are heavy | Travel quickly or use another route | Excess cargo slowing progress |
Fuel Margin should be treated as a safety buffer rather than a scoring category. The further the crew travels from its starting point, the more valuable that margin becomes because a stopped train in hostile territory offers far less protection than a moving locomotive.
Community field notes report that fuel can be found through buildings such as the General Store, but availability changes with procedural generation and current patches. Treat the exact loot table as variable. A good general Dead Rails guide should teach the team to recognize useful resources rather than memorize one route that may not appear again.
Loot only what supports the run
The most valuable item is often not the one with the highest sale price. Ammunition, fuel, repair supplies, medical items, and defensive equipment may save a run that ends before a Trading Post or Tailor. Expensive cargo also increases the burden on the locomotive, so a modest load can produce a cleaner journey than a greedy one.
Player reports point to five particularly useful building types: Sheriff, Doctor, General Store, Gunsmith, and Furniture. Each serves a different need, from converting Bond Value and completing objectives to treating wounded crew members, stocking fuel, improving combat readiness, or trading usable equipment. Choosing the right destination can turn a scavenging stop into a practical milestone, so compare the building’s reported supplies with the crew’s immediate shortages before committing the locomotive.
| Building type | Reported supplies | Best use |
|---|---|---|
| Sheriff | Bonds and related valuables | Selling or completing objectives |
| Doctor | Medical supplies and other valuables | Supporting wounded crew members |
| General Store | Practical goods and possible fuel | Preparing for later travel |
| Gunsmith | Guns and ammunition | Increasing combat readiness |
| Furniture | Assorted valuables and usable equipment | Trading or upgrading the train |
Bond Value depends on where and when the crew sells it. Selling valuables at a Trading Post or Tailor turns exploration into progress, while leaving a successful scavenging run unbanked adds unnecessary risk. A sensible rule is to sell the first batch of high-value loot after the crew has enough money for basic repairs and emergency supplies.
Keep the locomotive light
Every item placed on the train consumes space and affects the difficulty of moving it. A crew can overcome weak armor with better positioning, but excessive cargo makes every fight and repair more difficult. Before departing a stop, ask the group to separate three categories: mission-critical items, useful trade goods, and miscellaneous cargo that can be discarded.
The broader Dead Rails beginner guide provides useful context for classes and core systems, while this tutorial concentrates on the decisions that occur after the first train begins moving. Combining those priorities helps new players understand the game without skipping directly into advanced route strategies.
Dead Rails Beginner Tips for Classes, Cash, and the First Night
The first night is a major difficulty spike because daylight exploration gives way to stronger zombies, vampires, werewolves, and outlaw ambushes. Treat sunset as the point when routine errands become a combat risk: finish essential shopping, collect cash, and secure your class loadout before enemy activity begins. For example, prioritize buying healing supplies and a reliable weapon rather than chasing optional upgrades; otherwise, a single vampire or outlaw attack can drain resources and turn a survivable encounter into a failed run.
Spend lobby cash wisely
A class purchased in the lobby is treated as permanent for that run, while gear found during the journey is lost when the player dies. This makes early spending decisions especially important. Save money if possible, but do not skip a needed role purchase merely to delay the purchase until the route is already dangerous.
Permanent Class Purchase is most useful when the crew lacks a critical function. One player with repair or medical knowledge can help everyone, whereas buying several overlapping roles leaves the train without adequate fuel handling, defense, or scouting. The Dead Rails how to beat guide can help with broader objective planning, but sound purchasing still depends on the team’s composition.
| Priority | Purchase consideration | Reason |
|---|---|---|
| Essential | A missing support or combat role | Fixes a clear crew weakness |
| Useful | A convenience that reduces repetitive tasks | Saves time and reduces mistakes |
| Late | A premium option with little immediate use | Permanence does not make it affordable |
| Avoid | Duplicate roles when another player can cover them | Wastes limited lobby funds |
Nightfall Prep and Spawn Timing
Community field notes indicate that sunset arrives around 9 PM, hostile spawns begin around 11 PM, and the danger period ends around 5 AM. These timings are based on community observations and may shift after patches, so verify them against the in-game clock. The practical lesson is that night preparation needs a generous buffer.
Defensive upgrades reported by players include metal sheets over windows and doors, barbed wire that delays melee attackers, and a Maxim Turret that can be welded to the train for $125. The turret price comes from community data rather than an official source and may vary by version. If the budget is limited, prioritize sealing entry points and keeping a weapon at each open position.
Assign a defensible night watch
The best defense is a simple assignment plan rather than a complicated formation. Divide the crew into watch positions, designate a fuel handler, and identify who can repair damage while others hold enemies outside. Players also need a rule for emergencies: if the locomotive is breached, everyone responds to the same critical point.
| Preparation step | Finished condition |
|---|---|
| Close and reinforce vulnerable openings | Metal sheets are installed where practical |
| Distribute weapons and ammunition | Every watch position has a usable defense |
| Stock the boiler | Pressure remains stable during the watch |
| Establish repair priority | The crew agrees on what gets fixed first |
| Set a meeting point | Separated players can regroup |
Fortification Window is the period between finishing useful daylight errands and the start of dangerous nighttime activity. Use that time to repair, organize cargo, and confirm assignments. A train that is well prepared can keep enemies away from its interior, while a poorly prepared train may force the crew to fight in narrow corridors.
Dead Rails Walkthrough for a Successful Mid-Run Strategy
Mid-run problems often come from poor timing rather than bad luck. The crew may linger too long in one building, carry too many valuables, or continue traveling without a clear plan. A strong dead rails walkthrough uses distance, time, and supply pressure to determine when to push forward.
Balance exploration against distance
The route is procedural, so repeating a specific sequence of buildings is unreliable. Instead, assign each stop a value and time cost. A valuable stop near the main route is worth entering, while a marginal reward far off the path may not justify the fuel and daylight consumed.
| Route condition | Recommended decision |
|---|---|
| Plenty of fuel and daylight | Search one or two nearby buildings |
| Moderate fuel with good team speed | Take a short detour for high-value loot |
| Low fuel or damaged boiler | Head directly toward the next useful stop |
| Enemy activity has begun | Return to the train or stay within its defense |
| Crew separated | Stop advancing until everyone reconnects |
Route Flexibility is a practical survival skill. A strong locomotive and sufficient speed can recover from a poor detour, but a slow or overloaded train pays for every deviation in fuel, daylight, and boiler strain. For example, if a detour adds enough travel time for nightfall, the crew may lose daylight even when the stop contains valuable loot. With low fuel or a damaged boiler, returning to the main route is usually safer than attempting another building search, since a disabled train can strand the crew far from the next objective.
Handle combat without abandoning the engine
Stopping the train makes the crew more vulnerable, but a moving train also carries noise and unpredictability. Use the current situation to choose a tactic instead of following one fixed rule. A small group may be safer fighting from a protected doorway, while a large group can clear a path around the train.
The useful principles from reported player experience are straightforward: read the locomotive’s current position, the crew’s available cover, and the approaching enemy pattern before committing to an engagement. For example, if a pack arrives while the train is crossing an exposed stretch, stopping can create a short defensive window, whereas moving past the threat preserves distance but makes the crew vulnerable to attacks from the open track. The strongest approach is the one that turns the locomotive, nearby terrain, and crew roles into a temporary combat plan rather than treating every encounter as a fixed stopping-or-running rule.
-
Use train geometry to limit how many enemies can attack at once.
-
Keep barbed wire and metal sheets between threats and vulnerable crew members.
-
Protect the fuel handler and engineers before chasing distant enemies.
-
Retreat indoors when the group becomes separated or the boiler needs immediate attention.
-
Avoid leaving the locomotive simply because a loot room is closer to another entrance.
Threat Funnel is created when players defend a narrow approach instead of spreading around the train, using the locomotive, cars, and nearby terrain to restrict how many enemies can reach the crew at once. This is especially valuable against melee enemies, such as walkers, because their attacks are limited by the corridor’s width; however, it does not remove the need to watch for ranged or special attackers. For example, if a group holds a doorway while another crew member covers the boiler, the funnel can prevent a swarm from surrounding the locomotive, but exposed angles still need attention from teammates. A narrow choke can also trap the group against the train, so confirm there is a usable retreat route before committing.
Prepare the endgame
The crew should know the objective before fuel reserves become critically low. For the run described in the supplied reference, traveling to 80 km and lowering the bridge completes the objective. Because mission details can change, players should confirm the active task marker rather than blindly following an old route.
A practical endgame plan has three stages: sell or discard unnecessary cargo, preserve enough fuel for the final approach, and assign one player to verify the objective interaction. If a Trading Post is nearby, selling valuables before the final stretch reduces train burden. If the bridge task is imminent, the group can stop exploring and organize the required teamwork.
For additional survival tactics, including faster victory routes and teammate revival, the dead rails fastest win guide builds on the same fuel-and-defense principles. The important point is not to rush blindly, but to arrive with enough steam, functioning equipment, and a crew still able to act.
Dead Rails How to Win: Team Roles, Trading, and Recovery
Winning requires more than reaching a distance marker. The crew must preserve the train, complete the objective, and avoid turning a manageable setback into a total collapse. These dead rails how to win priorities are most effective when assigned to specific players and reviewed after every stop.
Divide the crew into functional roles
Even without a formal class system, natural roles reduce confusion. One person can watch the route, one can manage fuel, one can repair, and others can fight or loot. In a smaller group, combine roles but name the person responsible for each task before leaving the train.
| Role | Primary responsibility | Backup behavior |
|---|---|---|
| Engineer | Boiler and repair checks | Second player watches fuel pressure |
| Scout | Route and building assessment | Pauses at the train entrance |
| Trader | Tracks valuables and selling points | Keeps a simple inventory count |
| Defender | Holds fortified positions | Rotates during long watches |
| Reviver | Checks injured teammates | Calls for backup before combat resumes |
Responsibility Map is a quick verbal checklist that keeps a crew synchronized during chaotic fights. Before advancing, assign a named owner for each immediate job—such as the Engineer checking boiler pressure, the Scout confirming the route, and the Defender holding the doorway—so players do not crowd the same enemy. Call out task changes aloud, like “Reviver on teammate,” and reassign jobs when someone must repair, loot, or rotate out. This prevents duplicated work and leaves the Engineer, Scout, Trader, Defender, and Reviver able to respond quickly when a new threat appears.
Sell valuables at the right stops
Trading Posts and Tailors are the reported destinations for selling valuables. A crew can improve its odds by saving high-value goods for a confirmed trading location instead of carrying them through every danger. Since prices and available stock may change after updates, compare purchases rather than following an outdated budget exactly.
A sound purchasing order is to repair the train before making optional purchases, because a reliable boiler and adequate fuel determine whether the crew can reach the next stop at all. After securing the carriage’s basic operation, buy a missing defensive tool or fuel supply, then consider crew protection only if the remaining budget allows. For example, purchasing a powerful weapon while the boiler has fuel for only a short route can leave the crew stranded before the weapon is useful. Reserving part of the budget for class purchases and future repairs prevents one upgrade from consuming every available coin.
-
Repair the train and preserve emergency supplies.
-
Buy a missing defensive tool or fuel supply.
-
Upgrade crew protection if the budget still allows.
-
Keep reserves for class purchases and later repairs.
This order prevents a player from buying a strong weapon while the boiler has only enough fuel for a short journey. The Dead Rails train equipment reference can help with train-related features, but the best upgrade remains the one that solves the crew’s most immediate failure point.
Recover after mistakes
A downed teammate, broken window, or empty fuel slot does not automatically end a run. Stabilize the immediate threat first, then address the train. A successful revival depends on the situation, so players should use the game’s available revival method without abandoning their own positions. A separate dead rails how to beat resource offers more focused information on completing difficult objectives.
| Problem | Immediate action | Longer-term correction |
|---|---|---|
| Teammate downed | Control nearby enemies and revive when safe | Keep revival supplies available |
| Window or door broken | Retreat and repair from a protected position | Reinforce the entry point |
| Boiler pressure low | Feed the boiler and pause the route | Assign continuous fuel responsibility |
| Crew separated | Hold position and communicate | Set a fixed regrouping point |
| Cargo too heavy | Discard low-value items | Sell valuables earlier |
Recovery Order should be consistent: people first, then the locomotive, then objectives, then profit. Reversing that order can leave a technically moving train with too few usable crew members to defend it or finish the mission. For example, if a crew member is downed while enemies are closing in, revive them before repairing the train; a functioning locomotive cannot complete a route without a crew capable of operating, defending, and handling objectives. This sequence also protects profit indirectly: securing the crew preserves your ability to reach the next stop, complete the delivery, and keep the run’s earnings.
A Practical End-to-End Dead Rails Tutorial Plan
A complete dead rails tutorial must connect early preparation with the final objective instead of presenting disconnected tips. The sequence below turns the game’s systems into a repeatable run plan and provides a strong basis for the requested dead rails walkthrough.
Boiler and Crew Checks Before Departure
Buy a class that fills a clear crew gap, inspect the locomotive, and assign fuel, repair, scouting, and combat responsibilities. Confirm that the boiler has enough fuel for the first route segment plus a reserve. Players should also learn where the nearest trading and healing opportunities are without assuming they will appear at the same place every run.
During daylight exploration
Move before stopping, establish a meeting point, and loot according to a time budget. A player assigned to the train can protect the locomotive and monitor pressure while the scout searches. Divide cash and valuables into groups where possible, because one destroyed backpack should not erase the entire team’s economic progress.
Before the night cycle
Return with enough time to repair damage, close openings, place weapons, and feed the boiler. According to community data, meaningful hostile activity begins around 11 PM, so crews should aim to be defensively ready well before that point. A nighttime journey can still work, but only if the train is already organized and the team has clear positions.
During the final approach
Stop accumulating unnecessary cargo, sell when a Trading Post is available, and confirm the active objective. Preserve enough fuel for the required interaction and avoid splitting up when the crew reaches the destination. The objective matters more than one extra collectible, especially after a long, costly journey.
What the community footage confirms
The supplied Dead Rails tutorial gameplay video provides a useful visual companion for the locomotive, route, and multiplayer setup. Because the video is community-created and game systems can change, use it to understand the flow rather than copying a fixed route. Current build information on the official game page or in-game interface should take priority when it conflicts with older footage.
This final sequence summarizes the core lesson: feed the boiler, reduce wasted movement, prepare before night, assign every important job, and protect the train as your shared home. Apply those principles consistently, and even a rough first run becomes a practical foundation for faster and more successful attempts later.
Frequently Asked Questions
What is the most important first skill in Dead Rails?
Boiler management is the most important early skill because the locomotive is both your transportation and your base. Keep a fuel reserve, assign someone to monitor pressure, and avoid making long detours while the boiler is low. The wider Dead Rails guide can help new players understand the other core systems.
How do I stay safe during the first night?
Return to the train early enough to repair damage, reinforce openings, distribute weapons, and refill the boiler before hostile activity begins. Community reports place dangerous spawning around 11 PM, although current patches may shift the timing. Barbed wire and metal sheets can slow enemies, while a fixed watch plan prevents the crew from becoming disorganized.
Should every player buy a class in the lobby?
No. Purchase only when the class fills a missing role or provides a dependable benefit for that run. Because lobby purchases are permanent while run gear disappears on death, saving money can matter. Coordinate with the crew first, choose complementary abilities, and place the available funds toward the most urgent weakness.
Is it better to loot every building or reach the objective quickly?
Neither extreme is reliable. Loot until the train has enough fuel, daylight, and crew capacity, then push toward the objective. High-value cargo is useless if it contributes to a slow, overloaded locomotive or prevents the group from completing the mission. Sell valuables at a Trading Post or Tailor when one is available.
How can a crew recover after someone is knocked down?
Control the nearby enemies, keep the rest of the crew on the train, and revive the teammate when the area is secure. Do not chase a distant target at the cost of the boiler or objective. The dead rails fastest win guide provides additional recovery tactics for tense runs and time-sensitive objectives.