
Surviving the Dead Rails how to beat challenge alone depends on preparation, fuel control, and smart defenses. This practical Dead Rails solo guide shows how to reach Mexico, handle dangerous nights, and keep the train moving without relying on a crew.
Dead Rails How to Beat Solo: Survival Priorities
A successful Dead Rails solo run comes down to preserving three resources: boiler fuel, usable equipment, and the train’s structural integrity. You do not need to clear every building or fight every enemy. Instead, choose objectives that support the next leg of the journey, return before the train is exposed, and treat every stop as a controlled operation.
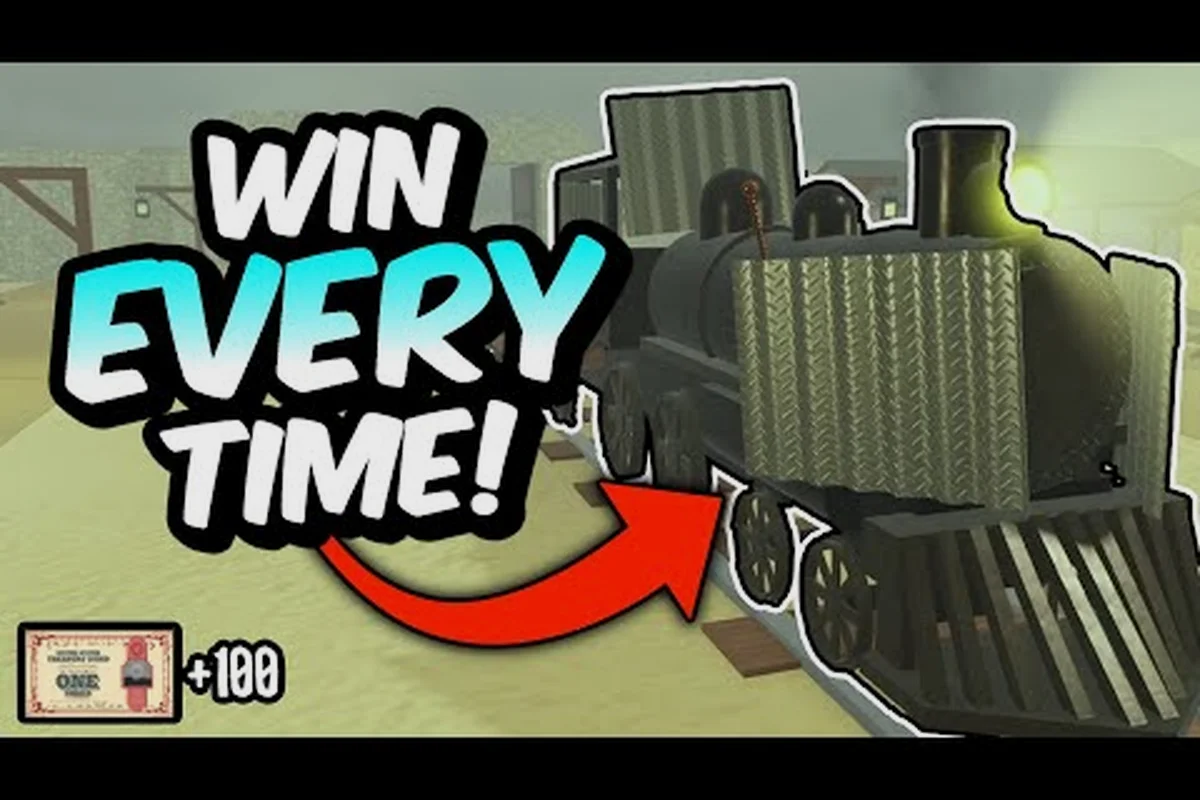
A run generally involves operating a steam locomotive through a procedurally generated wasteland toward a cure in Mexico. The locomotive acts as both transportation and a mobile base, while reaching 80 kilometers and lowering the bridge completes the objective according to community gameplay references. The Dead Rails how to beat gameplay video provides a useful visual comparison, although current build details should be confirmed in-game because enemy behavior, prices, and balance can change.
The following priorities should guide your first few solo runs: balance each stop against the locomotive’s condition, keep a workable escape route open, and depart before enemies can surround the train. For example, a brief scavenging run that yields a repair part or usable weapon can preserve the next leg, while lingering to clear every building risks boiler fuel, structural integrity, and daylight without a proportional reward. Because solo players must handle repairs, defense, and route decisions without crew support, a controlled retreat is often more valuable than completing a risky objective.
-
Fuel reserve: Maintain enough fuel to move, redirect, or escape rather than using every available resource.
-
Repair supplies: Carry the materials needed to patch the locomotive before damage becomes severe.
-
Flexible defense: Combine a physical barrier with a weapon that can protect you at close range.
-
Loot discipline: Take valuable items and clearly useful equipment, not every object in a building.
-
Night readiness: Finish repairs and fortification before darkness creates additional threats.
A repeatable opening routine
Start each run by checking the locomotive, gathering basic supplies, and identifying a nearby safe structure. Buy a permanent class before boarding if your available bonds allow it, because community field notes indicate that lobby purchases persist while equipment carried during a run is lost on death. That makes early class selection more important for a solo player than for a large group with several people sharing dangerous jobs.
Treat the opening minutes as a risk-control phase, not a delay: without boiler fuel, repair materials, food, and a reliable weapon, a solo run can become a one-way trip after the first building search. Use a short scouting ride to identify a trading post, tailor, or safe return point, then keep enough fuel in reserve to get the locomotive home before nightfall. This protects the train’s mobility and reduces the chance that a single bad encounter forces an early reset.
-
Inspect the train for missing or damaged parts.
-
Buy a class that improves your odds without requiring constant team support.
-
Collect fuel, repair resources, food, and at least one reliable weapon.
-
Look for a trading post or tailor before committing to a long route.
-
Ride a short distance to learn which buildings offer useful supplies.
-
Return while there is still enough daylight to inspect the train and prepare for night.
This approach may feel slower than rushing toward the first distant objective, but it creates the foundation for a dependable run. A solo player who starts with poor equipment often has to abandon valuable buildings simply because there is no fuel left for the return trip.
| Solo priority | Why it matters | Early-run action |
|---|---|---|
| Boiler fuel | Supports movement and emergency escapes | Keep a reserve before looting |
| Repair materials | Prevents the locomotive from becoming immobile | Carry enough for visible damage |
| Reliable weapon | Protects during searches and night attacks | Test it before moving far |
| Light armor | Improves survival with minimal crew support | Favor mobility over maximum weight |
| Permanent class | Survives across repeated attempts | Buy before boarding when possible |
Solo Loot Priorities and Bond Spending
Looting is the main source of money, equipment, and fuel, but it is also where a solo run can collapse. Buildings such as the Sheriff, Doctor, General Store, Gunsmith, and Furniture store reportedly contain bonds, guns, ammunition, fuel, and other useful items. Their exact contents and availability may vary, so treat community-reported inventories as a planning guide rather than a guaranteed spawn list.
The most important rule is to separate useful loot from optional loot. A gun may be worth carrying, but a second heavy weapon rarely is if your current loadout already handles common threats. A food item can prevent one emergency, but carrying enough for a large crew wastes storage space. One repair material is more valuable than three pieces of scrap that cannot be used.
Use a three-stage loot decision
Before committing to a building, compare its possible loot with your train’s carrying capacity, current fuel reserve, and the distance to the next Trading Post or Tailor. For example, if the engine is nearly full, prioritize fuel and repair supplies over ammunition; if a weapon is already usable, a duplicate may not justify the risk. This prevents a profitable-looking loot haul from turning into a slow, difficult escape toward Mexico.
| Loot category | Examples reported by players | Solo decision |
|---|---|---|
| Immediate priority | Fuel, repair supplies, bonds, usable weapons | Take unless carrying capacity becomes a problem |
| Situational value | Ammunition, food, class-specific items | Take when the next leg includes difficult terrain or a dangerous stop |
| Luxury value | Rare decorations, duplicate weapons, expensive objects | Leave behind unless the route provides an easy sell point |
Selling valuables at a Trading Post or Tailor can create the money needed for a better class, weapons, or train improvements. Yet a sale is only useful if you can return safely. Before entering a building far from the train, estimate the fuel cost of the round trip and the number of enemies you may encounter afterward.
A practical loot budget works better than greed. Take only what improves your ability to continue toward Mexico, and leave behind objects that do not solve a current problem. This approach makes it easier to move quickly, fight without delay, and return before a night encounter catches you in the open.
Bond income versus permanent progression
A solo run can be treated as both a survival attempt and a progression farm. Bonds collected in the field or sold afterward can support future permanent purchases, including a more suitable class. Community reports also describe inexpensive early classes as a sensible way to preserve money and survive repeated deaths.
If you want more detail on the economy, the Dead Rails sawed off gamepass overview explains related bond and money-making considerations. That progression information helps you decide whether a risky trip to a distant building is worth the potential gain.
The best target is not always the most valuable room. It is the building with a good combination of useful supplies, manageable travel time, and a safe route back. A shorter route lets you repair the train, sell goods, and continue even when a major objective proves too dangerous.
Dead Rails Solo Tips for Fuel and Locomotive Care
Fuel is the defining constraint in Dead Rails, and fuel discipline separates a cautious solo survivor from a player stranded beside the locomotive. The boiler must remain active because the train is the primary source of mobility and protection. Stopping for a long time in a dangerous area can therefore create a second emergency: enemies close in while your escape options disappear.
A useful operating rule is to leave every stop with a full decision. You should be able to continue to the next destination, turn back, or respond to an engine problem. If fuel is barely enough for one option, the run has little margin for a broken route, a missed building, or a nighttime detour.
Monitor the train between stops
Do not wait for a warning before checking the boiler. Make short inspections after each looting run and watch for fuel drain, boiler pressure, and engine damage if the current interface displays them. The precise indicators can change between updates, but the underlying principle remains: small problems become expensive when a lone player must handle repairs, fuel, and threats simultaneously.
| Condition | Risk if ignored | Solo response |
|---|---|---|
| Low fuel | Loss of mobility during an attack | Refill immediately or return to the train |
| Partial locomotive damage | Reduced speed or future failure | Repair before the next distant stop |
| Nearly empty supply inventory | No room for valuable finds | Sell or discard low-priority items |
| Late arrival at a building | Less daylight for searching | Skip optional stops after dark |
| Weak barrier | Enemies enter through a damaged section | Patch it and reinforce the entry point |
Community players report that metal sheets can be bolted over windows and doors, while barbed wire slows melee enemies at entry points. A Maxim Turret has also been reported at $125 and can be welded to the train. Treat that price as community data rather than a permanent guarantee, since train costs may change after patches. What matters is the defensive principle: slow enemies outside, then deal with any that still cross the barrier.
Repair before fortifying
A stronger wall cannot compensate for a broken locomotive. Prioritize structural repairs, then patch the most likely entry point, and only afterward add extra barriers. This order prevents a player from spending valuable resources on a polished defense while the train remains one hit away from becoming a stationary target.
If you want additional context for the final objective, the Dead Rails 80 km guide explains the distance and bridge-related endgame structure. Planning for the finish also helps with fuel management earlier, because the last kilometers can become difficult when the train is damaged, crowded with enemies, or low on fuel.
How to Beat Dead Rails Solo: Defending the Train at Night
Night is where preparation becomes visible. Community reports highlight full moons and storm nights as periods when multiple special enemies can appear, making armor and layered defenses more valuable. Because a solo player cannot assign guards to watch several directions, the train must be arranged so that one protected position can cover the most likely approach.
A strong defense creates distance, limits angles of attack, and buys time. Metal sheet barriers deny immediate entry, barbed wire slows enemies crossing a choke point, and a turret or firearm can remove targets before they reach the locomotive. The best combination depends on your available money and the train’s current condition.
Build layered entry points
Start by identifying the route enemies are most likely to use. Reinforce doors, windows, and exposed connections near the main exterior approach. Place physical barriers where enemies naturally bunch up, but leave enough space to move and repair. A completely sealed train may slow you down more than the enemies if a breach forces a panic repair.
A practical defense has three functions: Delay enemies at the most exposed approach, Focus their path so every defense covers the same choke point, and Punish them while movement is restricted. For example, a Maxim Turret placed behind barbed wire forces attackers into a narrow firing lane, but it still cannot protect a window or a rear track. Layer metal sheets over boarding points, use barbed wire to shape enemy movement, and keep repair materials close enough to patch a breach before the delay collapses.
-
Delay: Barricades and barbed wire reduce the speed of an attack.
-
Focus: Funnels enemies into a predictable direction.
-
Punish: Turrets, guns, or other attacks eliminate enemies during the delay.
| Defense layer | Best use | Solo benefit | Main limitation |
|---|---|---|---|
| Metal sheets | Cover windows and doors | Blocks direct entry | Can be damaged or need welding |
| Barbed wire | Choke points and exterior paths | Slows melee attackers | Does not stop every enemy type |
| Maxim Turret | Guard a key approach | Adds automated defense | Costs money and requires welding |
| Handheld weapon | Protect yourself near a breach | Flexible and portable | Reloads and positioning still matter |
| Armor | Survive mistakes and special attacks | Adds protection | Heavy armor may reduce mobility |
Do not assume that one turret solves every defense problem. A turret may cover a door while enemies approach from a window, and it can be destroyed or rendered ineffective if the train keeps moving. Check the full perimeter, and keep repair materials in easy reach.
Choose survivable equipment
Armor trades speed for protection, which can be sensible during a full moon or storm. However, excessive weight makes it harder to board, flee, or reach a defense. Prioritize enough protection to survive one mistake, not a full set that turns every sprint into a risk.
Weapons should serve a similar purpose. Bring enough ammunition for a difficult night, but avoid carrying several guns that require different ammunition types. A single dependable weapon with sufficient reserve ammunition is easier to manage alone. If a new class improves weapon handling, survival, or resource efficiency, check the Dead Rails class mastery guide before committing your next purchase.
The key victory condition is not killing every attacker; it is keeping the locomotive operational through the night. Use the daylight hours to repair damaged components, manage fuel, and choose a defensible route before threats close in, because a locomotive that stalls can become a death trap even when your armor and ammunition are strong. At first light, be ready to move: preserve mobility, keep an escape route open, and leave with the engine and cargo intact rather than chasing a perfect combat clear.
Solo Late-Run Survival Without a Full Crew
The final third of a solo route often fails because a player treats the train as a temporary stop instead of a permanent home. Late-game buildings may contain better rewards, but the surrounding area has fewer safe escape options. A determined player can still finish, provided the route becomes more disciplined rather than more ambitious.
At this stage, you should have a basic economy: money from sold valuables, a working defense, and enough supplies to travel. If one of those pillars is missing, prioritize it instead of chasing another distant building. A route that reaches 80 kilometers is more valuable than a route filled with abandoned loot.
Reduce the route to essential objectives
Plan the next objective around travel time rather than map distance. A nearby General Store may provide exactly the fuel or repair material you lack, while a distant building could offer more money but consume the fuel needed to return. Mark one primary destination and one fallback location.
| Late-run need | Why it becomes critical | Best response |
|---|---|---|
| More fuel | Longer remaining route | Visit a reliable fuel source immediately |
| Structural repair | Existing damage worsens under stress | Patch before another night |
| Ammunition | Night fights become more frequent | Reserve enough for one full defense |
| Lightweight armor | Speed becomes valuable when retreating | Upgrade only if mobility remains adequate |
| Class upgrade | Repetitive runs need stronger support | Buy a permanent class when funds allow |
Do not spend every bond immediately. Keep a small emergency reserve for class purchases, ammunition, or a necessary repair after a bad encounter. The game’s permanent lobby purchases can make a modest early investment more valuable than a temporary item that disappears when the run ends.
Keep an escape route open
Whenever you dismount, note the direction of the train and the landmarks between you and it. Do not let enemies gather behind a single narrow passage. If a building becomes too dangerous, abandon the loot rather than turning every optional objective into a life-or-death fight. The objective of the run is still the cure, not collecting every item.
For the bridge and final approach, review the Dead Rails bridge preparation guide before setting out from your last major stop. This also prevents the common mistake of reaching the final distance with an empty boiler, damaged train, and no defensive supplies.
A successful finish depends on controlled greed: take useful rewards, sell them, repair the train, and arrive with enough resources to complete the bridge. A modest, successful run is more useful than a spectacular run that ends beside a disabled locomotive.
Dead Rails How to Beat: Practical Solo Routine and Final Checks
A repeatable routine reduces mistakes during the most dangerous part of a run: the transition between looting, repairing, and defending the train. Before each stop, state the purpose of the trip and the condition required to leave. If the purpose is fuel, do not wander through several buildings. If the train is damaged, repair it before searching again.
Build the run around clear stop conditions: if a stop is for fuel, use the boiler as the limiting resource and avoid detouring into every house; if the train is damaged, repair the locomotive and restore the cabin before continuing. A practical example is to spend one stop collecting fuel, then make the next stop a repair point rather than pressing on with a weakened engine. This reduces the chance that a routine stop becomes a costly fight while the train is unsafe.
-
Boiler reserve: Enough fuel for the planned route and a contingency.
-
Damage report: Windows, doors, exterior panels, and engine condition checked.
-
Defense position: The strongest enemy approach is covered.
-
Inventory space: Useful loot fits without reducing movement.
-
Weapon readiness: Ammunition and reload access confirmed.
-
Exit timing: The return journey begins with enough daylight remaining.
Community gameplay references emphasize that the train is a mobile base, while community field notes emphasize defense, fuel, and careful shopping. Combine those priorities rather than treating one as a replacement for the others. Good gear cannot rescue a dry boiler, and abundant fuel cannot protect an unprotected cabin.
Decision rules for difficult situations
When two choices both appear useful, apply the following order: first preserve the locomotive’s ability to move, because a stopped train is vulnerable to night spawning and cannot be redirected; then weigh the reward’s necessity against the cost of boiler fuel, repair materials, and defensive equipment. For example, a rare upgrade may justify delaying a safe stop only if the train can still reach the next repair point, complete the current route, and return before enemy pressure peaks. Compare the reward’s expected value with the resources it consumes, and choose the option that improves survival without committing the run to a risky detour.
-
Can the train still move? If not, repair or refuel immediately.
-
Can the player survive without this reward? If yes, leave the optional loot.
-
Will enemies trap the train afterward? If there is a safe return window, finish quickly.
-
Does the purchase persist across runs? If so, it is often stronger than temporary equipment.
-
Is the route still viable after spending resources? Confirm fuel, defense, and repair capacity before continuing.
These rules produce a flexible strategy rather than a rigid checklist. They also help you distinguish a valuable risk from a merely exciting one. The best solo player is not always the most aggressive; it is the one who knows when the current opportunity is not worth paying with the locomotive’s survival.
The central takeaway is simple: fuel, repairs, defense, and disciplined looting form one connected survival system. Keep the boiler supplied, reinforce the train before night, preserve space for useful gear, and abandon optional objectives when they threaten the larger goal. With those habits, how to beat Dead Rails solo becomes a matter of consistent decisions rather than reckless heroics.
Frequently Asked Questions
What is the safest way to beat Dead Rails solo?
The safest approach is to keep the locomotive functional, carry a fuel reserve, and reinforce the most likely enemy entry points before nightfall. Limit looting to nearby buildings, return while daylight remains, and prioritize permanent class upgrades when possible. A cautious route that reaches Mexico is more valuable than a dangerous detour filled with unneeded loot.
Should a solo player buy a class before starting a run?
Yes, when your available bonds allow it. Community reports indicate that lobby purchases remain available across runs while equipment carried during a run can be lost on death. Choose a class that improves your ability to repair, fight, or travel without depending on teammates, and keep enough money for later upgrades.
How much fuel should a solo player reserve?
The practical minimum is enough to reach the next objective, return to the train, and handle one unexpected detour. Exact fuel consumption can vary with route, train condition, and game updates, so avoid traveling on an empty gauge. Refill before taking another building when the reserve no longer covers the planned round trip.
What is the best defense for a solo train?
Use layered defenses: metal sheets to block access, barbed wire to slow approaching enemies, and a turret or dependable firearm to attack the choke point. Armor adds valuable protection during full moons and storms, but excessive weight can slow a retreat. Always inspect windows and doors because protecting only the main entrance leaves another route open.
Is it worth taking rare loot near the end of a Dead Rails run?
Only when the trip is short, the return route is safe, and the reward supports the remaining objective. Rare items cannot repair a disabled locomotive or refill an empty boiler. If collecting them requires fighting through several special enemies or crossing a distant route, leave them behind and preserve the resources required to reach the bridge.