
Dead Rails game modes change the route, danger, and rewards of every run, so knowing their differences helps you choose the right challenge. Nightmare adds harsher enemy pressure and tougher encounters, while Scorched Earth emphasizes survivability against extreme environmental hazards; Invasion focuses on defending the train from waves of attackers, and Endless tests how long a crew can keep moving. Compare these featured modes before building your crew, since each demands different upgrades, resource management, and combat priorities.
Dead Rails Game Modes Overview
The best Dead Rails game modes serve different purposes rather than forming a simple difficulty ladder. Nightmare tests resource management under pressure, Scorched Earth raises environmental danger, Invasion changes the team’s objective, and Endless removes the normal finish line. Other limited modes add themed enemies, shorter runs, horses, or asymmetrical combat.
Understanding the available Dead Rails modes matters because the same train, crew, and weapon choices can produce very different results. A balanced route may work in a standard run but leave a Nightmare crew stranded. Likewise, the loadout that carries a long expedition can be far too slow for a short objective.
| Mode | Core objective | Main pressure | Best use |
|---|---|---|---|
| Nightmare | Complete the run under harsher conditions | Difficult spawns and tighter resources | Reward-focused experienced crews |
| Scorched Earth | Survive a brutal desert variant | Extreme hazards and resource strain | Testing defensive builds |
| Invasion | Protect lanterns from zombie forces | Asymmetrical team objectives | Players who enjoy coordination |
| Endless | Keep traveling without the normal finish line | Endless survival and build durability | Long-run testing |
| Edison’s Revenge | Defeat the themed final boss | Event enemies and boss pressure | Boss-focused crews |
| Bite Sized | Finish a shortened run | A compressed schedule | Speedrunners and bond farming |
| Horsing Around | Use the horse-focused format | Mobility and horse-based play | Players testing the Horse class |
| Private server | Practice without public interference | Coordination rather than competition | Route and boss preparation |
This overview comes from community field notes and a Dead Rails game modes gameplay video. Community-reported details can change after patches, so confirm the current mode selector in your client before planning a farm.
Matching a mode to your objective
Choose Nightmare when you want greater risk paired with a better payout. Select Scorched Earth when survival is more important than speed. Use Invasion to test role assignment, lantern defense, and communication. Pick Endless to investigate a train or weapon combination without reaching the ordinary endpoint.
Community reports describe a public server capacity of 16 players. Larger groups can accelerate looting and boss damage, but they also split the reward pool and create more opportunities for mistakes. Smaller crews have more predictable control over fuel, driving, and fortifications, which is particularly valuable in the hardest modes.
Dead Rails Nightmare Mode Rules
The Dead Rails nightmare mode is a high-pressure variant built around harsher spawns and less forgiving resource conditions. According to the community walkthrough, a completed Nightmare run pays more bonds than a regular run. That distinction makes it attractive for experienced players who can protect fuel, repair the train, and avoid unnecessary fights.
The central Dead Rails nightmare mode difference is the risk-to-reward ratio. Standard mode favors steady progress and broad weapon coverage, while Nightmare asks the crew to preserve momentum when every detour or broken component can become expensive. A single neglected weakness may be manageable in a regular expedition but become the reason a Nightmare run falls apart.
| Nightmare element | Practical effect | Crew response |
|---|---|---|
| Harder enemy spawns | Combat encounters can disrupt the route | Use defensive positioning and conserve ammunition |
| Tighter resources | Fuel, repair supplies, and recovery choices matter | Prioritize a few reliable systems |
| Higher bond payout | Clearing the run offers better value | Finish the objective instead of risking a last-second detour |
| Limited margin for error | A delayed fight can snowball into a failed run | Assign one player to monitor route and resources |
Because exact difficulty values are not available in the supplied research, avoid promising a fixed multiplier or unverified survival rate. The reliable comparison is qualitative: Nightmare increases danger while improving the value of a successful clear. The Dead Rails nightmare mode rewards therefore come with meaningful opportunity cost, not merely a larger number attached to the same run.
Preparing a Nightmare crew
A successful Nightmare crew needs roles that function under pressure. The driver should focus on the route, while another player tracks fuel and repair supplies. Fighters can protect the locomotive, but they should avoid chasing enemies across the train when that splits the group’s attention.
Before departure, agree on three rules: assign a clear locomotive operator and resource handler, establish a retreat threshold for the whole Nightmare crew, and decide who can engage enemies without leaving the train exposed. For example, if fuel falls below one usable tank, fighters should stop pursuing distant targets and return to protect the engine; setting that limit in advance prevents a single ambush from turning a coordinated run into a failed repair cycle.
-
Keep the train moving: Do not abandon a worthwhile fight if it causes a long delay.
-
Protect critical resources: Fuel and repair items take priority over temporary loot.
-
Use clear callouts: Announce attacks, breaks, and resource pickups before they become crises.
These habits also prepare a crew for how to beat Nightmare mode, where route planning, weapon coverage, and early recovery decisions matter more than simply carrying maximum damage. A strong build balances the locomotive’s repair needs against the weapons needed to handle close-range attacks and runaway enemies; for example, if fuel pressure limits the crew’s mobility, keeping extra repair supplies on the engine can be more valuable than adding another high-damage weapon that cannot be used safely. Recognizing when a route is becoming too costly—and returning to regroup before a fuel or repair shortage becomes critical—helps the crew preserve the train’s operating capacity for the next stretch of Nightmare.
Nightmare Difficulty Spawn and Resource Plan
Learning how to beat Nightmare mode requires a disciplined route rather than a single overpowered weapon. The best approach is to build enough stopping power to survive ordinary encounters, then preserve fuel and repair options for the moments when the route turns against you.
Run preparation
Begin with a loadout that covers several distances instead of concentrating entirely on maximum damage. A strong close-range weapon is useful when zombies reach the train, but a ranged option gives the crew more control over the fight. Armor and healing help preserve the people operating the locomotive, while reliable tools or utility items can reduce the pressure of each repair.
| Preparation choice | Benefit | Nightmare consideration |
|---|---|---|
| Balanced weapon coverage | Handles different engagement ranges | Avoid relying on one damage type |
| Armor with mobility | Protects the crew without slowing every action | Do not make the train awkward to move |
| Moderate fuel reserve | Creates room for detours and delays | Watch fuel before accepting another fight |
| Repair supplies | Restores damaged systems | Use them on critical components first |
| Clear roles | Reduces confusion during attacks | Driver, fighter, and resource roles should not overlap |
A Nightmare-focused strategy can establish a safer baseline route and loadout, but Nightmare’s tougher zombies and tighter resource pressure make late recovery nearly impossible. If the locomotive loses mobility only after a derailment or an extended night encounter, the crew may already have spent fuel, repair supplies, and ammunition that were needed earlier. A better example is to reserve one repair item for a critical locomotive component, keep the fuel reserve moderate, and retreat from a costly fight before the train is immobilized rather than attempting to save a damaged engine with no operational margin.
Route and resource decisions
A strong run treats every diversion as a cost. If the crew must leave the safe route, estimate the fuel required for the detour and the chance of meeting additional enemies before committing. A profitable stop that consumes most of the remaining fuel can be worth less than continuing directly toward the objective.
Use the train’s stopping power rather than the crew’s entire fighting power. A well-positioned locomotive can create a controlled engagement zone, allowing ranged players to fire while the driver remains ready to move. Once the group splits between repairing, fighting, and looting, the mode’s tighter resources make every delay more dangerous.
Team communication
Nightmare punishes unclear decisions. Before a fight, one player should own the target order; during it, another should watch the locomotive and crew health. A short callout system works better than constant discussion because it preserves attention for the game.
| Situation | Callout | Immediate action |
|---|---|---|
| Enemy reaches the train | “Contact on the train” | Fighters rotate to the threatened side |
| Fuel falls below the planned reserve | “Fuel reserve reached” | Driver avoids optional detours |
| A system is damaged | “Repair needed” | Assign the closest capable crew member |
| A pickup is contested | “Leave it” | Secure the crew and preserve momentum |
The best Nightmare Mode result is not always a flawless run with no damage. A damaged locomotive or injured crew member can still yield a strong clear if the team responds correctly: call out low fuel, repair a critical system, and avoid optional detours that consume the reserve needed for the final stretch. In Scorched Earth, the same logic matters even more because attrition and recovery opportunities are limited, so preserving fuel, repair materials, and crew health can matter more than chasing an early kill.
Dead Rails Scorched Earth Mode Compared
The Dead Rails scorched earth is a brutal desert variant with harsher hazards and a badge-level clear. Its defining challenge is environmental pressure: the landscape itself appears designed to punish a slow or poorly supplied expedition. The related Dead Rails scorched earth mode reference should therefore be treated as a survival test, not simply a longer normal route.
Community data identifies Scorched Earth as one of the reasons smaller crews can have an advantage. With fewer players dividing attention, fuel management and fortification become easier to coordinate. A crowded train might move quickly during looting, but the added activity can also create mistakes that consume the supplies needed for the desert crossing.
| Comparison point | Scorched Earth | Standard expedition |
|---|---|---|
| Environment | Brutal desert conditions | Broad range of normal route conditions |
| Main pressure | Harsh hazards plus resource strain | Mixed encounters and route demands |
| Completion | Badge-level clear | Standard run completion |
| Crew control | Stronger with a coordinated small team | More forgiving with a larger crew |
| Build priority | Durability, recovery, sustainable resources | Flexible damage, utility, and general travel |
This makes Scorched Earth different from Nightmare in both presentation and pressure. Nightmare is most clearly associated with harder spawns and better bond value, while Scorched Earth emphasizes hazardous terrain and the endurance of the train. The distinction matters for Dead Rails game modes because a Nightmare run can reward stronger enemy encounters and bond-focused builds, whereas Scorched Earth demands careful fuel routing, fortification upkeep, and recovery planning. A practical example is a small crew carrying limited fuel: stopping briefly to repair the locomotive may preserve the expedition’s resources, but lingering in a dangerous desert area can expose the train to escalating hazards and leave less capacity for the next stretch.
Choosing a durable build
Durability should be the foundation of a Scorched Earth loadout, but it should not make the crew too slow to respond. Use armor and equipment that preserve mobility, reserve healing for injuries that threaten a role, and avoid spending every supply on optional encounters. The locomotive also needs enough protection to remain functional when the route becomes punishing. The dedicated Scorched Earth clearing guide covers route preparation, badge objectives, and additional mode details. Use the comparison above to decide whether the run’s additional challenge justifies its time and resource cost.
Small crew versus full server
A full public server can help players gather supplies quickly, and the game’s shared loot and damage systems may make early encounters easier. However, the same crowd can turn a hazard into a chain reaction: one damaged player crowds the repair area, another player consumes healing, and the driver waits while everyone handles a separate problem.
A smaller crew can assign fewer but clearer responsibilities. Keep one person with the driver, one protecting resources, and one handling nearby threats when those roles fit the team size. Everyone can still help during a major emergency, but the first response should follow an agreed order.
Dead Rails Invasion Mode and Team Objectives
Invasion is a permanent asymmetrical mode introduced during Halloween Act 2. Survivors protect lanterns while an Invader commands zombies, giving it a different structure from the usual train defense. This mode is listed among the available Dead Rails game modes because it changes both sides’ goals rather than simply increasing enemy strength.
The Invader tries to disrupt the survivors, while survivors must keep the lanterns functioning. That creates a different kind of pressure from Nightmare. There is no need to defeat every zombie in the area, because ignoring the objective can be more damaging than finishing a fight. A clear assignment of lantern priorities helps the crew avoid spreading too thin.
| Invasion role | Main responsibility | Failure risk |
|---|---|---|
| Survivor | Defend lanterns and repair damaged objectives | Zombies overwhelm unattended lanterns |
| Lantern defender | Hold a priority position | Isolation leaves the defender vulnerable |
| Repair specialist | Restore damaged lanterns quickly | A repair delay lets the Invader gain ground |
| Support fighter | Handle wandering zombies | Excess pursuit pulls defenders away |
For a complete breakdown of the boss and asymmetrical structure, see Dead Rails Edison’s Revenge and Invasion mode. The core lesson remains the same: a coherent team plan is more valuable than having every player act independently.
Defending multiple objectives
When lanterns appear in different areas, survivors should identify the most exposed one immediately. Not every enemy deserves the same response. A small zombie group can be ignored when it is moving away from the objective, while a concentrated group near a lantern should receive immediate attention.
Repairing under pressure requires one person to clear the space and another to interact with the lantern. If a single player attempts both, the repair can be interrupted repeatedly. Players can also use the locomotive as a defensive anchor, but moving away from a lantern may trade one objective for another.
Endless, Edison’s Revenge, and Seasonal Modes
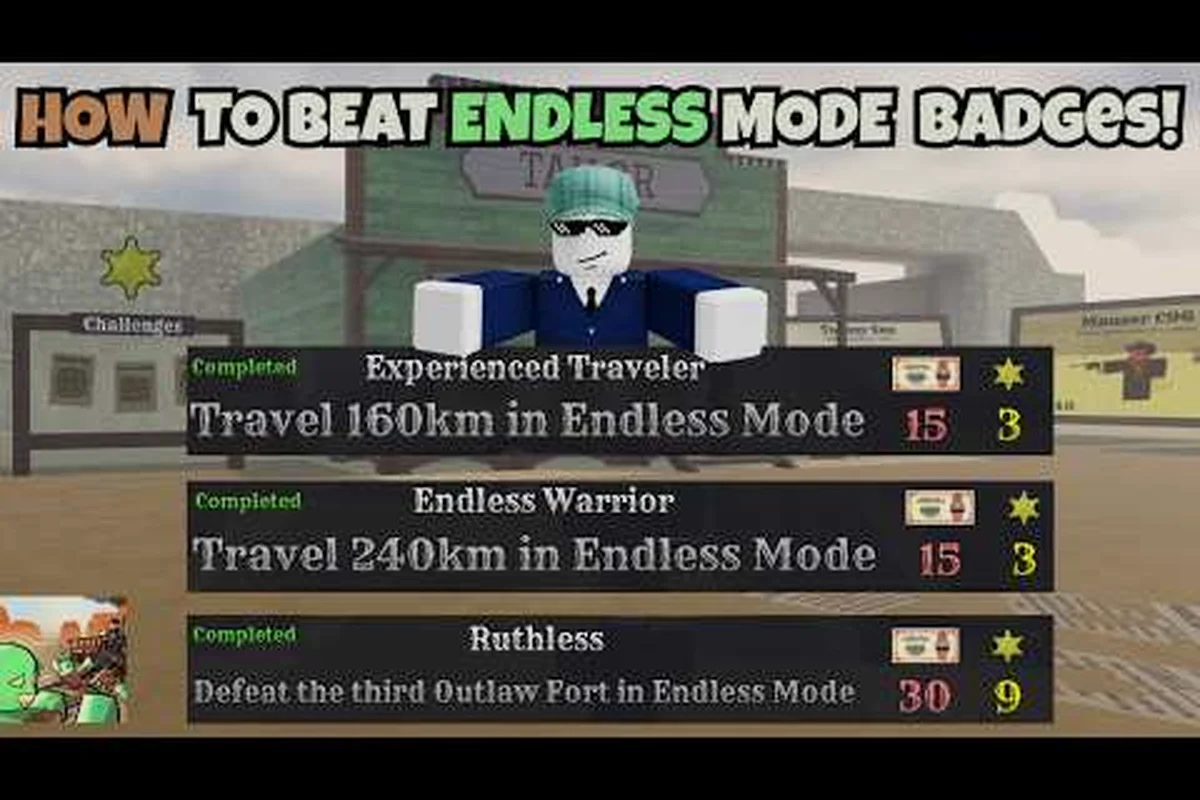
Endless removes the ordinary 80 km finish line, making it useful for testing trains, weapons, and long-duration builds. It is not simply a harder race. The objective is to keep operating successfully while the journey continues, so fuel, repair access, crew endurance, and recovery items determine how long the run lasts.
Seasonal modes offer a different kind of replay value. Edison’s Revenge is the Halloween mode featuring Edison Prime as its final boss and returned for the 2026 Dead of Night event, according to community field notes. Bite Sized provides a shortened run used by bond farmers and speedrunners. Horsing Around focuses on horses and unlocks the Horse class. These formats can be valuable even when their underlying systems are familiar because they change the route, schedule, or character focus.
| Mode | Main rule change | Recommended activity |
|---|---|---|
| Endless | Removes the 80 km finish line | Test train stability and long-run durability |
| Edison’s Revenge | Adds a themed final boss | Practice boss preparation and team focus |
| Bite Sized | Shortens the run | Farm bonds or improve completion speed |
| Horsing Around | Centers play around the Horse class | Test movement, routes, and horse abilities |
| Private server | Provides a controlled environment | Learn routes without public-server interference |
Mode availability can change with Dead Rails updates, so older Nightmares, Scorched Earth, and other limited modes may not appear during every event. Community notes mention Edison’s Revenge returning for the 2026 Dead of Night event, while the Dead Rails release and test-server overview helps readers separate current modes from removed content and outdated patch notes. Checking the live server is therefore the safest way to confirm whether a mode is accessible before planning bonds, boss attempts, or route-specific testing.
Using private servers for practice
A private server is especially valuable when learning a difficult boss or testing a fragile train build. Because public interference cannot interrupt the attempt, the crew can focus on timing, resource consumption, and positioning. It can also reveal whether a loadout wins because of genuine strength or because other players supplied missing resources.
Treat private practice as preparation rather than a substitute for public runs. For each attempt, record fuel consumed before the first serious damage point, the exact trigger for failure, and whether the crew reached its limit or completed the objective. For example, a Nightmare Mode run that fails when the engine’s armor breaks at 70% health reveals a different problem from one that stalls because the train runs out of fuel. Comparing these failure points across sessions turns a difficult boss, fuel shortage, or positioning mistake into a repeatable plan for the next public attempt.
Choosing the Best Dead Rails Mode for Your Crew
The best Dead Rails modes depend on whether your priority is bonds, mastery, speed, experimentation, or social play. There is no single mode that produces a better result for every crew. A mode with excellent rewards can still be a poor choice if its rules exceed the crew’s coordination level.
| Player goal | Recommended mode | Reason |
|---|---|---|
| Earn more bonds per successful run | Nightmare | Harsher conditions reportedly increase payout value |
| Master a survival route | Scorched Earth | Rewards careful travel and durable preparation |
| Test a new weapon or train | Endless | Extends the journey for observation |
| Practice a boss | Edison’s Revenge or private server | Concentrates attention on encounter preparation |
| Improve speed | Bite Sized | Its shortened format supports rapid runs |
| Play a coordinated role match | Invasion | Gives survivors and the Invader distinct goals |
| Explore horse mechanics | Horsing Around | Places the Horse class at the center of play |
A new crew should begin with a standard run, learn fuel and repair priorities, and then attempt a specialized mode with clear roles. Experienced crews can use Nightmare for a measured reward challenge or Scorched Earth for resilience testing. Private servers remain useful at every experience level because they provide a low-interruption place to test ideas.
A practical selection checklist
Before choosing a mode, ask several concrete questions. How much fuel can the crew preserve? Which teammate can remain with the train? Does the build have enough recovery to handle repeated attacks? Is the objective clear to everyone? If the answer is uncertain, practice that gap rather than immediately chasing a harder run.
Remember that exact spawn rates, payouts, unlock conditions, and mode availability may vary by version. The most reliable approach is to check the live mode description, test with a small crew, and compare the run’s time and resource use with a safer option. This approach makes the Dead Rails modes meaningful: each one becomes a distinct test of preparation, teamwork, and decision-making.
Frequently Asked Questions
What is the hardest mode in Dead Rails?
Difficulty depends on player skill, crew size, and current patch, but Nightmare and Scorched Earth are widely treated as the most demanding permanent formats. Nightmare emphasizes tougher spawns and tighter resources, while Scorched Earth focuses on environmental hazards. Invasion is demanding in a different way because its asymmetrical objective requires coordinated defense.
How are Nightmare Mode rewards different?
Community reports indicate that completing a Nightmare run pays more bonds than a standard run, although the supplied research does not confirm a fixed multiplier. Players should therefore treat the advantage as a higher-value successful clear rather than a guaranteed bonus. Time spent fighting, repairing, and detours can still reduce the total value of the run.
Does Scorched Earth Mode have a separate objective?
Yes. Community field notes describe Scorched Earth as a brutal desert variant with harsher hazards and a badge-level clear. That distinguishes it from a normal route with a larger enemy count. The dedicated guide includes more detail about badge requirements and the best way to prepare for its survival demands.
Can Invasion Mode be played as a normal team?
Invasion is asymmetrical: survivors protect lanterns while the Invader directs zombies. Players should therefore not approach it like a standard shared battle where everyone attacks the same target. A successful team divides attention between lantern defense, repairs, wandering enemies, and the pressure created by the opposing side.
Is Endless Mode useful for beginners?
Endless is useful for testing but demanding because it removes the ordinary 80 km finish line. Beginners can use it to observe fuel consumption and train durability in a controlled group or private server. The more suitable first challenge is a standard or shortened run, followed by a specialized mode once the crew understands its basic repair and resource priorities.