
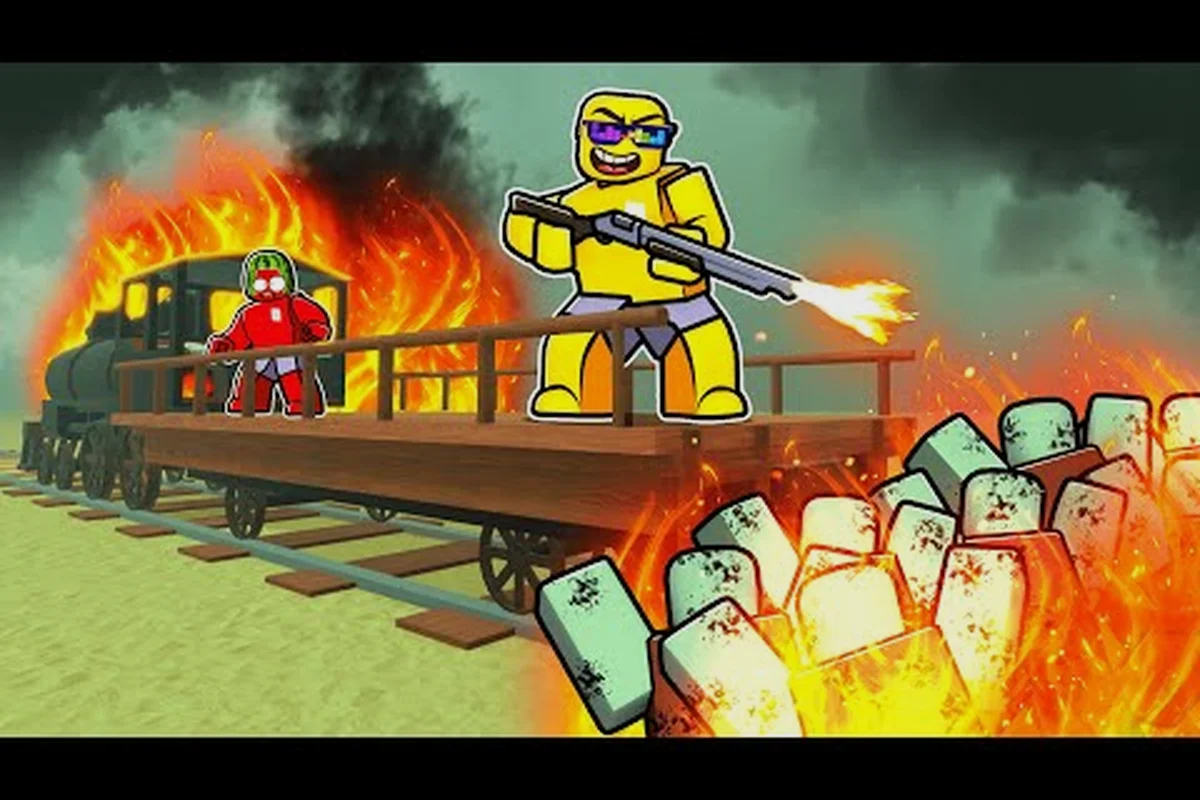
Learning how to beat Scorched Earth in Dead Rails means treating a 16-player desert run as a fuel problem before it becomes a combat problem. This walkthrough covers the four crew roles, a shared fuel ledger that keeps the locomotive moving through long dry stretches, the hazard chain that turns one wasted pickup into a stalled train, and the badge-level clear condition, so your crew reaches the final stretch with repair materials and ammunition instead of limping in on empty.
Scorched Earth Survival Plan for a 16-Player Crew
Dead Rails how to beat scorched earth comes down to coordination: secure fuel, limit desert damage, and preserve enough resources for the final stretch. A 16-player crew can clear this brutal variant, but only when every role has a clear priority.
Preparing the Crew Before the Train Leaves
Scorched Earth is a punishing desert variant with harsher hazards, limited recovery opportunities, and a badge-level clear condition. According to community walkthroughs, the mode uses a 16-player server, so every early decision can create congestion or waste supplies. A successful run begins before the locomotive starts moving, because late repairs rarely compensate for a badly prepared launch.
The best opening involves dividing the crew into four practical groups. Drivers control the train and watch its condition, engineers collect and protect fuel, looters search buildings efficiently, and defenders manage the train’s fortifications. The groups should be smaller than the 16-player cap so the crew can rotate positions when threats appear.
| Preparation role | Primary duty | Secondary duty | Failure warning |
|---|---|---|---|
| Drivers | Maintain speed and route control | Repair the locomotive | Repeated stops in exposed terrain |
| Fuel crew | Collect fuel and prevent waste | Supply generators or defensive tools | Nearly empty reserves before a hazard |
| Loot crew | Clear nearby buildings quickly | Recover crafting materials | Scattered players and missed loot |
| Defense crew | Repair barriers and use weapons | Protect vulnerable crew members | Broken defenses during enemy attacks |
Community field notes indicate that public servers create faster looting and boss damage, but they also split rewards and increase chaos. That makes role discipline essential: someone must own the fuel count, another must announce repairs, and a third should track enemies approaching from either side of the train.
Before departure, gather a balanced kit rather than every weapon in sight. Carry enough ammunition for the first encounters, repair materials for predictable damage, and extra fuel if the route appears likely to include long dry stretches. A smaller load makes swapping positions and defending the engine much easier.
Assign a Fuel Ledger
Fuel is the defining constraint in Scorched Earth, so a shared ledger can prevent avoidable failures. Mark every collected unit, reserve a minimum for emergencies, and never allow the entire team to consume supplies without a designated runner returning them to the locomotive.
The safest approach is to reserve enough fuel for movement and one emergency response. If the train stops for a long loot detour, a backup player should remain aboard with the reserve rather than joining the search. This prevents a successful loot run from ending with a stranded engine.
Managing Desert Hazards and Fuel
The central challenge in the Dead Rails how to beat scorched earth is avoiding a chain reaction: one wasted fuel pickup leads to a slow train, which creates more exposure, which leads to more damage and even less fuel. The crew must therefore treat fuel as both a movement resource and a defensive resource.
| Resource state | Recommended action | Why it helps |
|---|---|---|
| Abundant reserve | Fuel the locomotive and keep a protected backup | Supports detours and emergency escapes |
| Moderate reserve | Stop unnecessary looting and prioritize direct routes | Reduces time spent in exposed areas |
| Low reserve | Send a small team for fuel only | Limits the number of players caught in a failed run |
| Critical reserve | Abandon optional objectives and defend what remains | Preserves the train instead of chasing loot |
Desert hazards become much more dangerous when the train moves slowly or stops repeatedly. Players should watch for heat, dust, hostile creatures, and other environmental threats that may vary with the current build. Because patch changes can alter exact behavior, confirmed details should be checked in-game and against a recent walkthrough such as this Dead Rails how to beat scorched earth gameplay video.
Fuel Is Also Defense
Fuel does more than keep the engine moving. It may power equipment, barriers, or other survival systems, so the crew should decide what deserves fuel before spending it on unnecessary travel. A train with moderate fuel and intact defenses can survive an encounter better than a fast train with no protection.
Use a fuel decision order in Scorched Earth: treat each fuel allocation as a survival purchase, not a speed purchase. A useful comparison is a locomotive carrying extra fuel for a longer escape route versus one reserving that capacity for a defensive generator or weapon. If the next encounter includes a locomotive threat, intact armor, and a viable retreat, fuel spent on mobility may prevent a crew wipe; if the locomotive can be stalled safely, fuel can instead secure the position and protect the rewards already collected.
-
Confirm the locomotive can move safely.
-
Check whether a weapon, barrier, or generator is essential to the next encounter.
-
Keep enough fuel to escape an unfavorable position.
-
Only then assign the remainder to optional exploration.
Follow this order because every shortcut must preserve the locomotive’s ability to retreat. For example, if a crossing offers a short route to the next reward but leaves the train with barely enough fuel to continue, taking it can strand a damaged locomotive in a hostile area and cancel collected Scorched Earth rewards. Save the shortcut for a train that still has enough fuel to reach a safe depot; otherwise, retain enough capacity to escape, then use the remaining reserve for optional exploration.
Stop Before the Crew Spreads Out
Heat and dust punish prolonged exposure, but the real danger often comes from poor positioning. When the locomotive stops, assign squad boundaries so every player knows when to return. Looters who move too far create delays, while defenders spread across multiple locations cannot reinforce damaged barriers.
Public-server coordination can be noisy, so simple callouts are more effective than complex tactics. Mark incoming enemies, report fuel levels, and announce repairs. A calm, organized train attracts less unnecessary conflict than a group running in several directions without priorities.
Building Defenses Around the Locomotive
Scorched Earth punishes a passive run because enemy attacks and environmental damage can arrive while the crew is looting. The locomotive needs layered defenses rather than a single upgraded wall. A broad comparison of useful defensive priorities is shown below.
| Defense layer | Best use | Strength | Limitation |
|---|---|---|---|
| Outer barriers | Delay the first attackers | Absorbs early pressure | Can break quickly |
| Inner barriers | Protect fuel and operators | Creates a final safe zone | Does not stop every enemy |
| Elevated weapons | Cover the train's sides | Reaches attackers without exposing the whole crew | Requires a dedicated operator |
| Repair reserves | Restore damaged parts between fights | Extends the life of the locomotive | Must be stored safely |
Start with one solid outer layer and preserve enough repair supplies to restore it. Adding several weak defenses may create the appearance of security while allowing attackers to spread their damage. The survival barrier is more valuable than a decorative wall because it buys time for drivers to restore speed and defenders to focus targets.
Balance Firepower Against Crew Safety
Strong weapons can kill enemies quickly, but the best operator is the one who remains alive and functional. Assign weapon positions before an attack so that crew members do not block one another or leave a vulnerable side exposed. When a boss arrives, concentrate fire rather than spreading damage across several targets.
The broader Dead Rails game modes overview explains how Scorched Earth compares with other modes, including Nightmare, Bite Sized, and Endless. That comparison is useful because the best strategy changes with the mode's length and pressure rather than with a single universal “best build.”
Handle Boss Encounters as Team Phases
A boss encounter should have three phases: control the approach, damage during openings, and restore the train afterward. During the opening phase, keep ranged attackers behind barriers and let drivers prepare an escape route. During the damage phase, target the weak point or exposed area rather than firing blindly at the health pool.
After each fight, divide recovery tasks before anyone leaves the locomotive. One player repairs, one gathers fuel, and the remaining defenders secure the area. The repair window is critical in Scorched Earth because staying stationary can expose the crew to another hazard while everyone is still recovering.
Choosing a Route for Scorched Earth Rewards
Route selection determines both survival odds and the final haul, so the fastest line in the Dead Rails Scorched Earth desert variant is not automatically the best one. For example, a building-rich detour may yield repair materials or defenses worth taking despite its medium survival risk, while a dangerous landmark route can unlock a key item or badge-level clear only if the locomotive and crew can handle the encounter. If fuel, crew health, or locomotive condition is already poor, use the minimal exploration route and protect the remaining resources; a richer payout cannot offset a dead engine or failed run. Compare these trade-offs before committing to the detour.
| Route choice | Reward potential | Survival risk | Best reason to choose it |
|---|---|---|---|
| Direct main route | Lower | Lower | Reaching the finish without a critical resource failure |
| Building-rich detour | Medium to high | Medium | Finding materials needed for repairs or defenses |
| Dangerous landmark route | High | High | Securing a key item or completing a mode challenge |
| Minimal exploration route | Low | Low | Recovering after fuel, crew, or locomotive damage |
Community reports describe Scorched Earth as a desert variant with a badge-level clear, but exact reward values may change between builds. Treat claims about badge-level progression, material yields, and currency totals as community-reported until confirmed in the current interface.
Separate Run Completion From Farming
A badge clear is the immediate objective, while repeated farming is a separate goal. In Dead Rails’ Scorched Earth, chasing one rare item can cause a team to burn through fuel, miss repair supplies, and lose its rail cart before reaching the finish; for example, a badge run should not be abandoned merely because a valuable material appears at a later stop. Divide the loot into three priorities:
-
Run criticals: Fuel, repair supplies, and immediate survival tools.
-
Mode objectives: Items linked to the Scorched Earth clear or badge.
-
Farming targets: Valuable materials for a later trip.
Collect the first two categories before pursuing the third. A smaller final bag is preferable to arriving at the finish without the objective item or lacking a way to continue. In Scorched Earth, that means securing fuel and repair supplies first, then picking up any badge-related material needed for the clear; only open a farming detour once the rail cart can still finish the route. For example, if a valuable material appears after the last reliable fuel stop, leave it for a later run rather than risking the cart on a low-fuel detour, since losing the cart ends the attempt even when the loot itself is substantial.
Know When to Leave a Fight
A reward can never compensate for a failed clear. Retreat when the locomotive is near collapse, the fuel reserve becomes critical, or the defense crew cannot restore a broken side. Sometimes the best reward decision is to skip a contested building and preserve the route to the finish.
A community gameplay walkthrough can help players visually compare route layouts and hazard handling, although current build details should be confirmed before copying an exact route. A route that worked in an earlier patch may be less reliable after a balance change.
Comparing Scorched Earth With Other Dead Rails Modes
Scorched Earth is a survival-focused challenge, while Dead Rails Bite Sized and Dead Rails Endless emphasize different goals. In Scorched Earth, a 16-player crew must stretch fuel and locomotive condition across the 80 km route while handling desert hazards and surviving to the badge-level clear, making early resource control more important than a rapid badge rush. Bite Sized compresses that same journey into a shorter run, so securing high-value loot, avoiding unnecessary fights, and leaving before fuel becomes critical can matter more than long-term survival. Endless removes the 80 km finish line, shifting attention toward train stability, defensive builds, and fuel efficiency across an extended route. Choosing the right mode mindset helps the crew avoid treating fuel, route length, and survival priorities as interchangeable.
| Mode | Main structure | Core pressure | Best crew focus |
|---|---|---|---|
| Scorched Earth | Desert survival run | Harsh hazards, fuel demands, badge-level clear | Resource control and defense |
| Bite Sized | Shortened run | Limited time with compressed objectives | Fast looting and decisive routing |
| Endless | No 80 km finish line | Ongoing survival and build testing | Train stability and adaptation |
| Nightmare | Harder spawns and tighter resources | Combat and resource pressure | Coordination under limited supplies |
| Edison Revenge | A separate invasion-style mode | Threats tied to the mode's rules | Role assignment and target control |
Community field notes describe the Dead Rails Bite Sized mode as a shortened run used by bond farmers and speedrunners. In that context, Dead Rails Bite Sized tactics emphasize reaching the important loot quickly, minimizing unnecessary fights, and leaving before fuel or locomotive condition becomes dangerous. The same plan that works for a long survival run may waste too much time in a short mode.
By contrast, Dead Rails endless mode removes the 80 km finish line. The Dead Rails endless experience is therefore better for testing train layouts, defensive builds, and long-term fuel efficiency than for practicing a quick badge clear. The Dead Rails Endless location overview may help players study map features and routes that support extended runs.
When Edison Revenge Is the Better Practice Target
Dead rails Edison revenge refers to a different invasion-style challenge, and comparing it with Scorched Earth can reveal which skills need improvement. Edison Revenge emphasizes organized opposition and role discipline, while Scorched Earth places more pressure on travel resources and environmental endurance.
| Skill being trained | Scorched Earth | Edison Revenge |
|---|---|---|
| Fuel conservation | Central | Secondary |
| Mob defense | Important | Central |
| Objective routing | Important | Important |
| Train fortification | Strongly rewarded | Valuable |
| Invasion response | Limited relevance | Core priority |
If a crew struggles to protect the locomotive from multiple sides, the Dead Rails Edison Revenge mode guide offers a focused comparison. The two modes are not interchangeable, but the better communication habits from one can strengthen performance in the other.
Team Roles, Comms, and Recovery Tactics
Even a well-equipped train can fail when nobody owns the next task. Assign roles by temperament as well as equipment. A calm player can manage fuel, a reliable player can repair, and players who react quickly can watch for threats. Reassign roles when the run changes rather than waiting for someone to volunteer after a breakdown.
| Problem signal | Immediate response | Recovery goal |
|---|---|---|
| Fuel falls below the safe reserve | Suspend optional detours | Rebuild the movement reserve |
| One defense side breaks | Pull operators from the weaker side | Restore a continuous barrier line |
| Players become scattered | Recall groups by fixed markers | Re-form around the locomotive |
| Several crew members are downed | Create a temporary defensive ring | Stabilize the group before looting |
| Boss remains after the planned window | Retreat toward the engine | Reassess whether the fight is worth continuing |
Use Short, Predictable Callouts
A practical crew can communicate with a few short phrases: fuel low, repair ready, enemy left, objective secured, and retreat. These messages tell others what decision to make without requiring a long explanation. The engineer or fuel runner should announce when the reserve changes, because that event affects the entire route.
Assign one route leader so every detour receives a single decision instead of competing calls from the engineer, fuel runner, and other players. Before approving a detour, the leader should check current fuel, locomotive condition, crew status, and the active objective; for example, if fuel is low and the locomotive is damaged, a short retreat may preserve more progress than continuing toward a distant objective. This coordination matters because conflicting decisions can waste scarce resources, strand the train, and turn a survivable Scorched Earth run into an early loss.
Practice Recovery Before Chasing Rewards
A recovery drill takes only a few minutes. Stop the train, identify a damaged side, restore it while one group maintains a perimeter, then return to a planned route. This teaches the crew which materials to keep close and which tasks must happen in parallel.
Do the same after a boss. Assign a repairer, a fuel checker, and a perimeter team before the group leaves the area. This habit is especially important because hazard recovery time can determine whether the train escapes a difficult encounter or becomes trapped in a second wave.
Final Preparation Checklist for the Desert Run
A successful Scorched Earth attempt depends on disciplined decisions rather than a single overpowering weapon. Confirm the locomotive before moving, reserve fuel for emergencies, and repair damaged defenses immediately after every engagement; otherwise, one missed stop can turn a manageable route into a costly overrun. Use the route only once the crew is stable and the engine can support the next detour without stalling the entire group.
| Timing | Final checkpoint | Pass condition |
|---|---|---|
| Before departure | Fuel, repairs, crew roles | Everyone knows their position and duty |
| First stop | Loot efficiency and hazard response | The group returns before exposure spreads |
| Mid-run | Fuel reserve and locomotive condition | Resources remain above the emergency threshold |
| Before a boss | Defenses, healing, escape route | The crew can attack or retreat deliberately |
| After any fight | Repairs and objective check | The engine is ready before the next detour |
| Final approach | Objective item and crew survival | No risky detour delays the clear |
Keep the backup fuel accessible but protected. Store repair materials near the defenders, keep unnecessary loot out of narrow interior passages, and mark the locomotive’s current objective before the crew disperses. These habits make a 16-player group function like a coordinated unit rather than sixteen independent looters.
The best Dead Rails how to beat scorched earth strategy is not about finding one unbeatable weapon or memorizing a perfect route. It is about preserving mobility, making every repair count, and rewarding fuel and combat roles equally. Complete the badge objective, protect the locomotive, and treat the desert as a hostile supply network where every stop has a measurable cost.
Frequently Asked Questions
Can a 16-player crew clear Scorched Earth?
Yes, although coordination becomes harder as more players compete for loot and repair materials. Assign drivers, fuel runners, looters, and defenders, then restrict optional detours when fuel or locomotive condition weakens. A smaller active group at each stop can preserve coordination without leaving the locomotive undefended.
What is the best way to protect fuel in Scorched Earth?
Keep the main reserve aboard, assign one person to track it, and protect the storage area with a layered barrier. Fuel should support movement and essential defenses before optional exploration. If the reserve becomes low, suspend loot detours and use a small retrieval team so most of the crew remains mobile.
Does Dead Rails Bite Sized work well for farming Scorched Earth rewards?
It can, but the modes reward different priorities. Dead Rails Bite Sized is a shortened run with compressed objectives, so players should collect essential rewards and leave quickly. Scorched Earth adds harsher hazards, longer resource demands, and a badge-level clear, making careful fuel control and defensive play more important.
Should a Scorched Earth crew explore dangerous landmarks?
Only when the crew has enough fuel, functioning defenses, and a safe escape route. Landmarks may contain valuable materials or objective items, but a failed fight or an empty tank can erase the run. The safest crew gathers basic rewards first, then attempts a landmark with an explicit retreat condition.
Is Dead Rails Endless better for practicing Scorched Earth?
Endless is useful for testing fuel efficiency, train layouts, and long-term repairs because it removes the 80 km finish line. Scorched Earth is better for practicing a defined badge clear under desert pressure. Use Endless to refine the train, then apply those lessons to the shorter and more hazardous Scorched Earth route.