
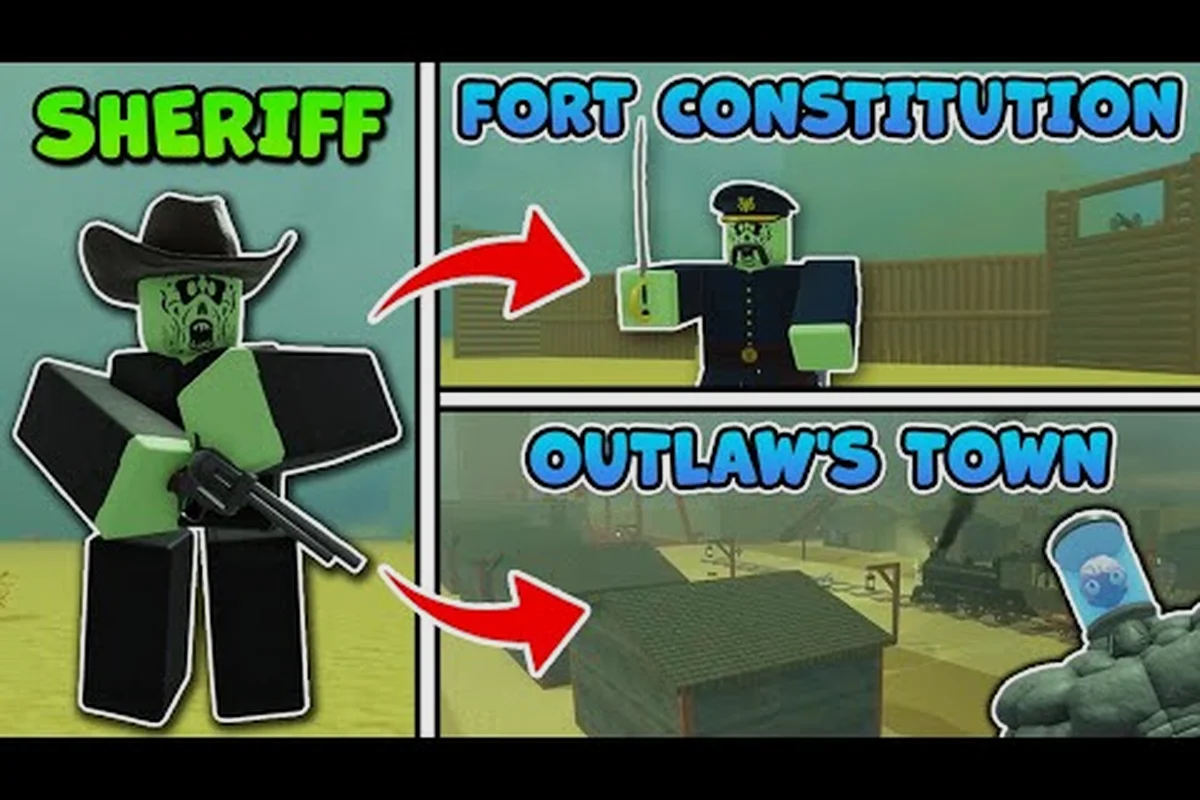
The dead rails sheriff bounty pays for wanted enemies only when you survive the night and bring the body back, making corpse selling the final step rather than the main risk. A clear full moon can lower the pressure from a full night, while a blood moon or stormy night changes the encounter pattern and makes defensive positioning more important. Before accepting a target, compare the route with the current night event, keep enough space to break line of sight, and use the sheriff’s available attacks to create a safer payout.
What the Dead Rails Sheriff Bounty Actually Rewards
The dead rails sheriff bounty is an economy mechanic built around capturing or delivering specific hostile targets, not simply killing every enemy you encounter. The reward structure and exact drop conditions can vary with the current build, so players should treat community reports as practical guidance rather than permanent guarantees. The important part is the sequence: identify the target, bring it down without losing your train or your life, then return to the Sheriff for payment.
That distinction prevents a common mistake. Players sometimes assume an Outlaw has dropped the sheriff bounty the moment it dies, then continue advancing through dangerous territory instead of securing the objective. The bounty is a mission-like target tied to a particular encounter, and the safest approach is to confirm the pickup prompt before leaving the area.
| Objective stage | What to check | Best action |
|---|---|---|
| Locate target | Enemy type, marker, and current threat level | Read the encounter before opening fire |
| Disable target | Health, nearby enemies, and usable cover | Prefer rifles and headshots against Outlaws |
| Secure drop | Inventory prompt or bounty marker | Pick up immediately before looting elsewhere |
| Return to Sheriff | Route, train condition, and time of day | Use a fortified or safe area for the handoff |
| Claim payment | Sheriff interaction and reward message | Confirm the transaction before departing |
Bounties, Outlaws, and side income
Community field notes report that Outlaws carry weapons such as a Mauser, rifle, or sawn-off, while bosses can have much larger bounties. One reported example is Captain Prescott guarding Fort Constitution near the 60-kilometer mark and awarding a Supply Depot Key plus $150. These details are valuable for route planning, but they should be checked against the live game after patches.
A bounty hunt can fund repairs, fuel, and other expedition costs, making it more than optional side content. The Dead Rails enemies overview is useful for recognizing which hostile types deserve priority, while bounty-focused players should keep a reliable rifle and a close-range option available.
When to claim instead of chasing
Do not assume every visible enemy is a bounty target. A small group of zombies may create immediate danger without producing the objective you need, while a distant Outlaw can be worth the pursuit. The best targets combine a clear marker, a manageable fight, and a short route back to the Sheriff.
| Situation | Bounty priority | Reason |
|---|---|---|
| Marked enemy near the train | High | Less travel means less exposure |
| Marked enemy across open desert | Medium | Retreat space is limited |
| Unmarked horde beside a fort | Low | Strong defenses make survival easier |
| Unmarked horde beside the train | Avoid if possible | Standoff fights can derail the route |
| Boss with a large reported payout | High when prepared | Better rewards, but greater danger |
Dead Rails Corpse Selling and Reward Collection
Dead rails corpse selling turns enemy defeats into income, and it can be more dependable than relying on a single large bounty. The value depends on what you carry, whether the body reaches the appropriate selling point, and how safely you can transport it. A corpse that occupies inventory space may also create a tradeoff: sell it promptly or keep carrying it for a better route.
The safest pattern is to separate ordinary loot from bounty-related items. Sort inventory as soon as practical, sell valuable corpses when the route offers a safe stop, and avoid wandering across the desert with a full load of uncollected rewards. This improves the Cash Flow Priority without forcing you to abandon a nearby marked target.
| Cargo type | Best handling | Main risk |
|---|---|---|
| Common enemy corpse | Sell during the next safe stop | Low reward per unit of travel |
| Special enemy corpse | Confirm bounty or sale value first | Incorrect delivery may lose value |
| Boss-related reward | Prioritize the named handoff | Carrying it attracts further danger |
| Valuable ordinary loot | Keep separate from corpse cargo | Inventory congestion |
A practical inventory routine
Before opening a door, crossing a wide stretch of desert, or beginning a boss encounter, open the inventory and identify three things: active bounty items, sellable corpses, and ammunition. Keep ammunition accessible because a failed fight often becomes dangerous simply when the weapon runs dry. Store or sell heavy cargo before accepting another target, especially at night.
The Cargo-to-Combat Ratio should reflect the threat level. At low risk, a full inventory is manageable. During a full-moon event, however, carrying too much valuable material can slow movement and leave you unable to retreat. Community experience suggests that fighting from a fortified carriage or a fort with turrets is safer than confronting enemies in the open, where cover and escape routes disappear.
Confirm the handoff
The Sheriff interaction is the final step, not an automatic result of a successful fight. Approach only after nearby hostiles are under control, look for the required interaction, and verify the cash received. A Dead Rails sheriff bounty gameplay video can help players recognize the general flow, although current-build details should always be confirmed in the game.
Dead Rails Night Enemies and the 11 P.M.–5 A.M. Window
Dead rails night enemies become the main reason to plan bounty runs around a schedule. Community reports place the hostile window at approximately 11 P.M. to 5 A.M., when zombies and other threats begin to pressure the train. Because the exact spawn mix may shift after updates, treat those times as a planning reference and observe the current session for confirmation.
Night hunting can be profitable, but it also changes how you should approach the sheriff bounty. The train becomes a valuable resource because it provides cover, equipment, and a defensible position. Leaving it creates a two-way risk: enemies can attack from behind, while the route back may become blocked by a larger group.
| Night condition | Expected pressure | Recommended approach |
|---|---|---|
| Ordinary night | Regular hostile activity | Use the train, complete nearby bounties, and monitor health |
| Cloudy full moon | Faster Zombies may appear | Prepare extra ammunition and avoid long chases |
| Blood moon | Additional or more aggressive threats | Delay nonessential expeditions |
| Stormy night | Reduced visibility and harder travel | Stay near landmarks and defensive positions |
Daylight does not make the objective optional
Traveling during daylight reduces one major risk, but it does not remove the need for preparation. Special enemies can still appear, and a bounty target may be located in a dangerous region. Daytime is still useful for learning the route, collecting resources, and positioning the train near a fort before the hostile window begins.
The Dead Rails co-op guide can help teams divide responsibilities. One player can watch the train while another handles a short bounty run, or the group can create a firing line from a defended position. Coordination matters because a successful target kill can be wasted if the carriage is overrun while the player is away.
Blood Moons, Full Moons, and Stormy Night Preparation
The dead rails blood moon, clear full moon, and stormy night are related danger signals, but they are not interchangeable. A blood moon calls for the most cautious schedule, a clear full moon can produce recognizable special enemies, and a stormy night mainly complicates visibility and navigation. Treating all three as “stay inside” removes useful opportunities and may leave the train without the resources needed for the next objective.
Community reports say Fast Zombies appear on cloudy full moons. They are described as faster than a walking player but fragile, which means precise shots and short engagements can neutralize them. A stormy night makes those traits harder to exploit because seeing and selecting targets becomes more difficult.
| Event | Signal | Best preparation | Strongest response |
|---|---|---|---|
| Blood moon | Blood-colored night effect | Repair defenses and delay travel | Stay aboard and use controlled fire |
| Clear full moon | Bright moon with a clear sky | Prepare for special spawns | Prioritize rifles and headshots |
| Cloudy full moon | Covered moon | Expect faster enemies | Use distance and avoid chases |
| Stormy night | Reduced visibility and harsh conditions | Mark landmarks and carry supplies | Fight near the train or a fort |
Clearing a full-moon encounter
To clear a full moon safely, create layered objectives instead of demanding a flawless clear of the entire area. First, preserve the train, identify the nearest threats, and kill enemies that can reach the carriage. Next, clear a limited radius around the train so wounded teammates have a safe route. Only then should a group pursue a marked bounty target or collect distant corpses.
The Defensive Priority Order is simple: use the train as a temporary anchor, because a full-moon clear is easier when the group does not split its attention across several threats. For a dead rails sheriff bounty run, keep the marked target inside a controllable area, let the train and nearby cover handle the first wave, and use the limited safe radius to create a recovery path. If enemies close in, abandon the bounty briefly rather than losing the train; securing the dead rails corpse selling opportunity afterward is more valuable than a rushed kill that leaves the carriage surrounded.
-
Keep the train from being surrounded.
-
Eliminate enemies that threaten players already outside.
-
Secure the marked bounty drop.
-
Collect nearby corpses for selling.
-
Pursue distant targets only after the area is stable.
When a storm changes the plan
During a stormy night, broad horizontal searches waste ammunition and time. Players should move between recognizable landmarks, watch for enemies lit by muzzle flashes, and keep the nearest fort or train in mind as a fallback. The important choice is not whether to fight at all; it is whether the current position gives you enough visibility to shoot accurately and enough time to retreat.
A useful comparison with the broader Dead Rails enemy tier list can help identify which threats deserve ammunition priority. Because enemy strength and spawn rules may change, confirm current behavior rather than relying exclusively on an older ranking.
A Reliable Route from Target to Sheriff Payment
A reliable sheriff bounty route protects more value than a slightly faster route. Start with a known safe landmark, approach the target from a direction that keeps the train or fort within retreat distance, and avoid crossing unfamiliar terrain during a hostile event. The route should support both the fight and the return journey.
A strong route uses checkpoints. The train is usually the first checkpoint, a nearby fort is the second, and the Sheriff is the final destination. If a checkpoint becomes compromised, the player can abandon extra loot rather than force a dangerous recovery. This is especially valuable when carrying a special corpse or a boss reward.
| Route choice | Advantages | Drawbacks | Best use |
|---|---|---|---|
| Direct cross-country route | Fast under clear conditions | Few retreat points | Daytime low-risk trips |
| Landmark-to-landmark route | Predictable navigation | Can be longer | Stormy nights and low visibility |
| Train-to-target-and-back loop | Keeps the carriage close | Requires strong defenses | Normal night bounty runs |
| Fort staging route | Turrets and cover | Adds travel time | Blood moons and boss hunts |
The five-step bounty loop
Use the same routine every time so important steps do not get lost in combat. First, confirm the target and bounty. Second, clear the immediate perimeter. Third, defeat the enemy using the appropriate weapon. Fourth, collect the bounty and any sellable body. Fifth, return to the Sheriff and confirm payment.
The Bounty-to-Bank Route improves when each step has a stopping condition. If the target drags the group too far from safety, cancel the hunt. If a corpse cannot be carried without sacrificing ammunition or movement, sell it sooner. These decisions keep the dead rails sheriff bounty as a dependable profit source rather than a reckless expedition.
Advanced Sheriff Bounty Tactics for Groups
Coordinated groups can turn bounty hunting into a controlled operation. Assign a collector, a forward shooter, and a train defender rather than allowing everyone to follow the same target. The collector can watch for the bounty drop and nearby corpses, while the forward shooter prevents the target from being surrounded.
| Role | Primary duty | Secondary duty | Equipment priority |
|---|---|---|---|
| Forward shooter | Disable the marked enemy | Control nearby threats | Rifle with spare ammunition |
| Collector | Pick up bounty and corpses | Track dropped loot | Inventory space and carrying capacity |
| Train defender | Protect the carriage | Cover the return route | Ammunition and repair access |
| Route watcher | Track distant movement | Call threats toward safe lanes | Situational awareness |
Split objectives without splitting survival
The most effective split is not “two groups go in opposite directions.” It is a compact formation with clearly limited tasks. One pair handles a nearby target while the rest maintain a defensive position. Once the drop is secured, everyone reconvenes before moving deeper into the map.
For bosses, community reports describe especially large rewards. Captain Prescott is associated with Fort Constitution around 60 kilometers, a Supply Depot Key, and a reported $150 bounty. Nikola Tesla is a roughly 5,800-health encounter assembled at the Tesla Lab and fought near the 80-kilometer Outlaw Fort, although that health figure is a community estimate that may vary. These encounters reward preparation, not improvisation.
Boss payout versus routine bounty
A boss may offer a better dead rails sheriff bounty, but it also increases travel, damage, and opportunity cost. Compare the reward with the condition of the train, available ammunition, and the distance to the next objective. A smaller bounty completed with full health can be worth more than a major payout that leaves the group stranded.
| Priority | Boss reward | Routine bounty | Survival value |
|---|---|---|---|
| Best case | Large payout and intact train | Standard payout | Both offer strong progress |
| Moderate case | Large payout with repairs needed | Standard payout | Routine target is usually safer |
| Worst case | Team defeated or train lost | Minor loss | Abandon the optional objective |
Frequent Mistakes That Cost Bounty Rewards
The most common failure is not a weak weapon; it is poor sequencing. Players fight a target, overlook the drop, and later discover that the required item is still on the ground. Another common mistake is treating every enemy as a bounty source, which draws the player away from the train and into a prolonged engagement.
A second mistake involves carrying too many corpses. Dead rails corpse selling can generate useful funds, but a crowded inventory limits ammunition access and makes emergency defense awkward. A third mistake is ignoring moon conditions. Entering a blood-moon period halfway through a long collection route may leave the player with valuable cargo but no safe way home.
| Mistake | Why it hurts | Correction |
|---|---|---|
| Leaving without checking the drop | The objective may remain uncollected | Confirm the pickup before advancing |
| Selling at the wrong stop | Time and cargo can be lost | Check the Sheriff route before turning in |
| Fighting without a retreat point | Open terrain increases surround risk | Use the train or a fort as an anchor |
| Carrying every corpse | Ammunition and movement suffer | Sell in controlled batches |
| Ignoring moon status | Special spawns disrupt the route | Delay during blood moons |
| Chasing across the desert | Storms and enemies close escape routes | Follow a checkpoint route |
Check before every departure
Before every departure, use a five-point check on the sheriff bounty objective, inventory, ammunition, train condition, and destination: confirm the contract is secured, group supplies and bounty items into the correct slots, and make sure you carry enough ammunition for the route. Check the locomotive for damage or wear, then verify that the next stop remains reachable under current night conditions, including blood moon threats, stormy night hazards, and other night enemies. This routine prevents avoidable losses and makes the sheriff bounty a dependable part of the run.
The broader Dead Rails challenges can add restrictions that make careful preparation even more valuable. A clean bounty run is about more than earning cash; it demonstrates control over routing, inventory, and threat assessment.
Frequently Asked Questions
How do you claim the dead rails sheriff bounty?
Defeat the marked target, collect the bounty item or required corpse, and return to the Sheriff for the proper interaction. Confirm the pickup before leaving the area, then verify that the payment appears after the handoff. Exact drop prompts can change with patches, so follow the current objective marker rather than assuming every enemy can be turned in.
Is corpse selling better than taking every bounty?
Neither option is always better. Corpse selling creates steady income and can help fund repairs, while bounty targets may provide larger rewards or unique items. The best balance is to carry only what you can protect, keep ammunition accessible, and sell heavy cargo before entering a major fight or special night event.
When should I avoid hunting during a blood moon?
Avoid nonessential hunts when defenses, ammunition, or crew coordination are weak. Blood moons can introduce more dangerous enemies and reduce the time available for a safe return. If the train is fortified, supplies are ready, and the target is nearby, a controlled bounty run can still work, but abandoning a distant target is usually wiser.
How do you clear a full moon without losing the train?
Keep the carriage as the defensive center, clear the closest threats first, and use rifles with headshots against priority targets. Do not chase fleeing enemies far from cover. Once the immediate area is secure, collect the bounty and nearby corpses, then return to the train before pursuing anything distant.
Is a stormy night a good time for corpse selling?
A stormy night can be useful because nearby enemies may provide valuable cargo, but visibility and travel are worse. Sell only when the route to the Sheriff is short and recognizable, keep ammunition accessible, and prioritize a nearby fort or train as a fallback. Valuable corpses are not worth losing the group or stranding the expedition.