
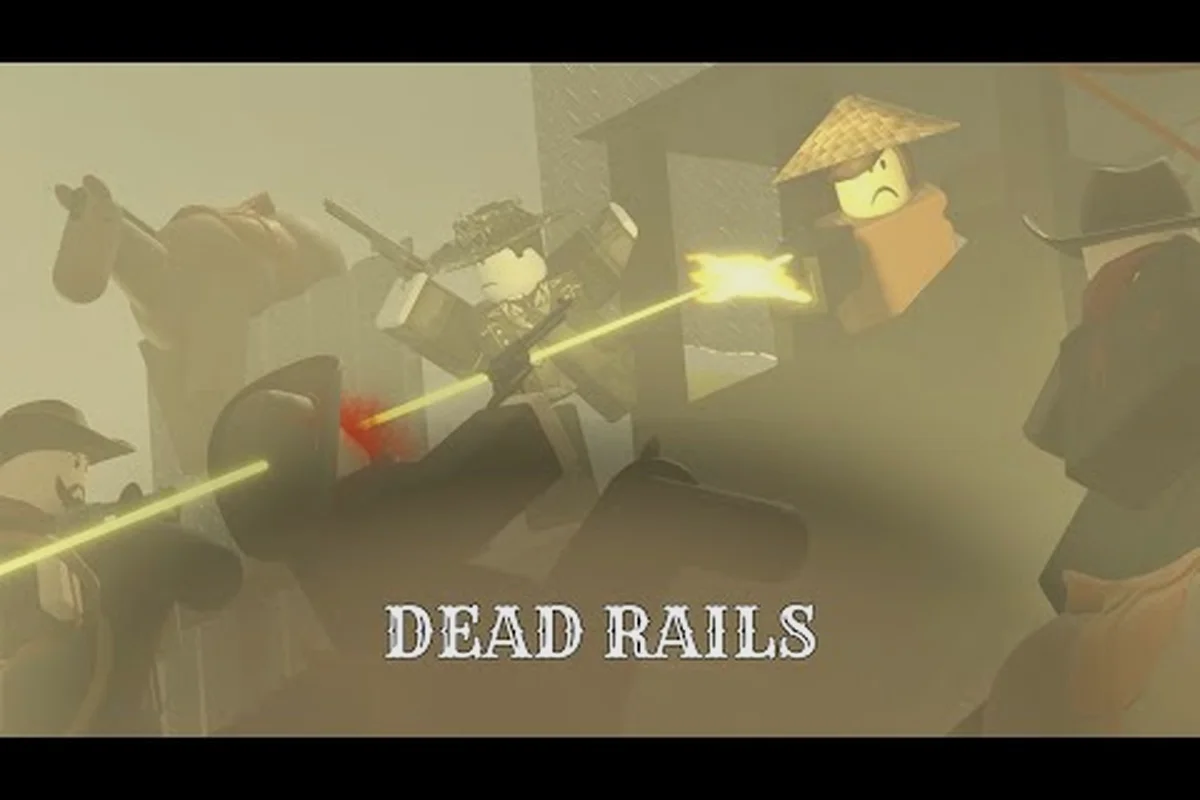
A Dead Rails outlaw can halt a train run with concentrated gunfire, so knowing its health, camp behavior, and weak points matters. Learn where these raiders appear, which weapons work best, and how to survive their nighttime attacks without losing your carriage.
As explained in the Dead Rails outlaw gameplay video, the game’s movement mechanics rely on functioning rails, making dismounted or derailed states especially dangerous.
Outlaw Gunfighter Profile and Spawn Context
The Dead Rails outlaw is a human gunfighter who can appear around hostile camps and along the routes where the train stops for supplies, loot, or mission objectives. Community reports place the enemy at roughly 100 health and note that outlaws may carry a Mauser, rifle, or sawn-off shotgun. Because these figures exchange fire at a distance, closing the gap carelessly can be more dangerous than approaching a slow zombie.
This guide focuses on practical enemy identification and combat decisions rather than an unverified patrol route. The available information describes common outlaw behavior, broad camp locations, and the most reliable counters, while exact spawns and rewards may change with updates. Before relying on a fixed route, observe the landscape around each stop and check whether the area contains wooden fencing, wagons, crates, or other signs of a temporary encampment.
| Dead Rails outlaw trait | Community information | Practical meaning |
|---|---|---|
| Health | About 100 health | A precise headshot can defeat one, but misses leave room for return fire |
| Weapons | Mauser, rifle, or sawn-off | Expect a dangerous shot at medium or long range |
| Bounty | Roughly $35 when turned in | Defeating one can fund ammunition or a later objective |
| Active period | Hostile activity generally begins around 11 PM | Camp and route preparation matter most at night |
| Threat pattern | Uses distance and cover | Move between cover instead of standing in the open |
The bounty makes outlaws worth engaging when the surrounding terrain is favorable. It does not make every fight necessary, though, because the reported cash value can be outweighed by lost health, damaged equipment, or a carriage that becomes harder to defend. Treat the encounter as a calculation rather than a mandatory confrontation.
Identifying the Dead Rails Outlaw and Mounted Raiders
A human silhouette near wagons or a rough camp is not always a stationary outlaw. Some hostile groups include a horseback raider who can close distance while the shooter remains farther back. This creates a layered threat: the mounted enemy pressures you, while the dismounted gunfighter punishes a player who stays in one place.
Watch the horse’s position instead of staring only at the armed rider. A horseman who keeps moving toward your carriage may be preparing a charge or simply repositioning for a better firing angle. The dismounted outlaw is more likely to seek cover and use a firearm, so advancing directly downhill can expose you to both attackers.
| Observation | Likely enemy behavior | Recommended response |
|---|---|---|
| Standing behind crates or a wagon | Seeking cover before firing | Circle toward a flank or use a fort safe zone |
| Riding directly toward the train | Mounted pressure or a charge | Avoid the open center; lead the horse past the carriage |
| Holding a rifle at long range | Long-distance shooter | Use solid cover and return precise fire |
| Moving between two positions | Repositioning for a better angle | Predict the next cover point instead of chasing |
| Group clustered around a camp | Potential camp defenders | Check the area before committing to a wide fight |
This comparison matters because the dead rails horseback outlaw changes the timing of every shot. A standard outlaw may reward patience, since its target is a stationary shooter who can be avoided. A mounted raider forces movement, which can expose the carriage and reveal where your passengers are standing.
The community enemies gameplay reference provides a useful visual baseline for recognizing these classes. Players should still confirm behavior in the current build, because animation, enemy equipment, and encounter density can change after patches. Treat the reference as evidence of patterns rather than a permanent route guide.
Dead Rails Outlaw Camps and Night Encounters
A dead rails outlaw camp is best treated as a sign that armed hostiles may control the nearby stop. Camps commonly form around defensible terrain: beside rock walls, behind wagon clusters, near abandoned structures, or along ridges that provide clear firing lanes. These locations let attackers slow your train while keeping the carriage under fire from more than one direction.
Before entering a suspected camp, stop beyond immediate rifle range and identify its edges. Look for muzzle glints, movement behind cover, horses tied near supplies, and paths that lead around the camp. Community field notes report that hostile activity generally starts around 11 PM and ends around 5 AM, although full moons and blood moons can alter the enemy mix. That makes a nighttime camp a major difference between an ordinary stop and a full combat scenario.
| Camp location clue | Why it favors outlaws | Better approach |
|---|---|---|
| Rocky choke point | Restricts movement and creates firing lanes | Use a fortified position or redirect around the area |
| Cluster of wagons | Provides hard cover for defenders | Circle with a teammate or flank from higher ground |
| Ridge overlooking the track | Lets gunners watch the train arrive | Break line of sight before the train enters range |
| Open field | Offers little protection to either side | Avoid a prolonged exchange and preserve ammunition |
| Fort-like safe zone | Provides controlled defensive space | Gather the group, use turrets, and coordinate fire |
The most reliable way to clear a camp is preparation. Refill ammunition before the stop, identify which teammate can suppress a shooter, and reserve another route for retreat. A fort with turrets can turn a difficult open-world engagement into a manageable defense, but the party still needs supplies, repair materials, and a plan for people caught outside the walls.
That is where fort and location knowledge becomes practical. The Dead Rails bank and fort location guide provides additional context on fortified objectives and defensible locations, which can be valuable when a train route intersects a hostile outpost.
Weapons and Positioning for the Dead Rails Outlaw
Rifles and accurate headshots are the most consistently reported counters for outlaws. A rifle is especially useful because its damage potential lets you remove a shooter before the group can establish overlapping fire. A Mauser can work against a lightly armored target, while a shotgun provides more forgiving damage at close range if you can reach cover without first taking a bullet.
The practical question is not simply which weapon has the highest damage. It is whether you can create a safe firing window. A high-damage weapon is wasted if you fire from a doorway, expose your head, and miss the first shot. Move to a stable position, wait for the target to break cover, and use a crosshair scope if available.
| Weapon or tactic | Best use against outlaws | Limitation |
|---|---|---|
| Rifle | Precise shots at visible enemies | Requires a clear line of sight |
| Mauser | Quick attacks on an isolated outlaw | Very little margin for a miss |
| Sawn-off shotgun | Close-range pressure after a flank | Wasteful across open ground |
| Headshot | Immediate target removal when aligned | Requires precise aim and stable footing |
| Fort turrets | Group defense during a camp assault | Limited positioning and ammunition |
| Carriage cover | Temporary protection while regrouping | Does not stop every angle of fire |
Line-of-sight control is more valuable than raw aggression. Approach from the side, vary your route, and avoid crossing the same open gap twice because enemies often respond to repeated movement. If the train is present, use its solid surfaces as partial cover, but do not assume the carriage protects passengers on both sides.
A practical fight follows four actions: locate the nearest shooter, create a flanking angle, fire until the target retreats, and reposition before the next attacker reacts. If the camp contains a horse, keep the carriage between the rider and the passenger compartment until a teammate can cover the charge lane. This also gives your party time to call for help without scattering into the open.
Outlaws Versus Wolves, Werewolves, and Vampires
Outlaws are dangerous because they use guns, but supernatural enemies punish different mistakes. A werewolf closes distance quickly, making it more vulnerable to close-range burst weapons and dedicated anti-undead tools. A vampire reportedly counters with Holy Water and the Crucifix, while a wolf can become a distraction that pulls defenders away from a rifleman. A dead rails vampire enemy therefore demands a different response from an outlaw encounter, not merely a different weapon name.
| Enemy | Primary danger | Strongest reported counter | Best positioning principle |
|---|---|---|---|
| Dead rails outlaw | Accurate firearm attacks | Rifle and headshots | Break line of sight before returning fire |
| Horseback outlaw | Mobile pressure on a horse | Coordinated ranged fire | Keep the horse away from the carriage |
| Dead rails wolf | Pack movement and harassment | Firepower before it reaches the group | Protect the perimeter |
| Dead rails werewolf | Fast close-range pursuit | Shotgun and Crucifix | Keep a defensive buffer |
| Dead rails alpha werewolf | Greater pressure and durability | Team fire and specialized equipment | Do not split the group |
| Dead rails vampire enemy | Undead threat with special counters | Holy Water and Crucifix | Prepare dedicated tools before night |
Community reports place ordinary werewolf health in a broad estimated range of 300 to 500, and an alpha version is expected to be tougher, although exact values may vary by version. Since those figures come from single-source community testing, they should not be treated as exact balance data. The safe conclusion is qualitative: an alpha werewolf should be handled with concentrated team fire rather than a lone shotgun user.
The same cautious approach applies to a dead rails wolf and nearby supernatural spawns. A wolf can pull attention away from the outlaws shooting from a camp, while a vampire can threaten a group that has spent all of its special ammunition on regular zombies. Carry a mixed kit instead of committing every defensive item to the first target.
For a broader health and threat comparison, the Dead Rails enemy tier list is useful for deciding which enemy deserves immediate attention and which can be left to a teammate.
Defensive Plans for Outlaw Camps
A fortified defense is usually stronger than an open chase. If the party can establish a fort safe zone before the camp is engaged, use turrets and cover to create a firing lane. If the train has stopped near hostile structures, place the carriage so that its strongest side faces the likely shooter and keep a second angle available for the horseman.
Coordination matters because three people firing in different directions may still miss the exposed window. Assign one player to suppress a rifleman, one to watch the horse, and one to protect the carriage. Only the player with the clearest shot should commit to a headshot, which reduces wasted ammunition and discourages the group from rushing into a crossfire.
| Situation | Preferred plan | Fallback plan |
|---|---|---|
| Camp visible before stopping | Circle at distance and identify defenders | Wait for a more defensible position |
| Party has rifles but no fort | Use rocks, wagons, or carriage cover | Retreat after a short burst |
| Fort turrets are available | Hold a narrow approach and focus fire | Send one rider only to redirect enemies |
| Horseman reaches the camp | Prioritize the horse lane | Draw it away while others cover the carriage |
| Ammunition is low | Fight from cover with coordinated shots | Bypass the camp and preserve supplies |
The objective is not to force a complete camp clear with every group. A successful run can involve removing the nearest shooter, looting what is safe to reach, and leaving before reinforcements arrive. The reported $35 bounty is useful, but it is not worth spending every round or damaging the train for one payout.
Watch the time of day as well. Hostile activity beginning around 11 PM means late-night stops are inherently riskier. A camp encountered before that window may still contain bandits, but the encounter can grow as night falls. If resources are limited, clear early, secure useful supplies, and move the train onward before the strongest enemy groups arrive.
Advanced Outlaw Tactics for Solo and Group Runs
A solo player should avoid trying to recreate a coordinated defense. The better approach is to use speed, terrain, and the horse to control the engagement. Circle until the outlaw shows its position, land one accurate shot, and move before nearby allies can return fire. If the enemy retreats behind a wagon, do not follow into a narrow space where multiple shooters can cover the entrance.
Groups can create more options, but even four players can waste their advantage by pursuing separately. Mark a shooter, watch for a horse, and keep one person responsible for the carriage. This simple division of attention is often more effective than everyone chasing the nearest target.
| Player role | Primary assignment | Equipment preference |
|---|---|---|
| Scout | Find the camp and identify firing lanes | Binoculars or a long-range rifle |
| Sharpshooter | Remove exposed gunmen | Rifle with a scope |
| Close defender | Cover the horse and carriage flank | Shotgun or rapid-fire weapon |
| Support player | Watch the rear and manage supplies | Sidearm and utility items |
The best advanced tactic is to use the environment twice. First, use it to block the outlaws’ shots while you find a firing angle. Second, use the same cover to break contact after the kill. A direct approach may work once, but it exposes ammunition, reveals the party’s formation, and makes the camp fight more expensive.
Horseback players can improve their odds by using the mount as a moving firing platform rather than charging blindly. The Dead Rails horse mastery guide covers useful riding fundamentals that can make circling and rapid repositioning more practical. Even without a mounted build, a horse offers another route for gaining distance from a rifle shot.
Frequently Asked Questions
How much health does the Dead Rails outlaw have?
Community reports place the Dead Rails outlaw at about 100 health, although balance changes may alter that figure. Its firearm is the greater danger, so a precise rifle headshot or a well-placed burst can remove the threat before it exploits the group’s open position.
Where do Dead Rails outlaw camps usually appear?
Outlaw camps tend to occupy defensible terrain near track stops, including rocky chokepoints, wagon clusters, abandoned structures, and ridges with clear firing lanes. Search for cover, tied horses, and movement around supplies before entering the area, and avoid approaching through the same exposed direction.
What is the best way to defeat a horseback outlaw?
Keep the horse away from the carriage, use cover to limit its charge lane, and let one teammate focus on the rider while another watches the ground. Rifles are effective against mounted enemies, but coordinated fire and a protected position are more reliable than pursuing a horseman across open desert.
Should the party fight every Dead Rails outlaw camp?
No. Fight when the camp threatens a required stop, blocks essential supplies, or can be handled from a fort or defensible position. Bypassing a camp can preserve health and ammunition, so consider the reported outlaw bounty alongside the risk of a longer nighttime engagement.
Do wolves and werewolves counter outlaws?
They can distract the party while an outlaw fires from cover, but each enemy requires a different response. Rifles and headshots suit gunmen, while shotguns and the Crucifix are more useful against werewolves. Holy Water and the Crucifix provide reported counters against the Dead Rails vampire enemy.